This is the third of five snowed-in posts, illustrating the pathways I sometimes pursue due to my avid curiosity. This Tangent began with a video remix of an old song by Duran Duran, which had inserts from a French New Wave film from 1961, which had echoes of a failed star of the silent screen who grew up just 40 miles from our home in Bartlesville.
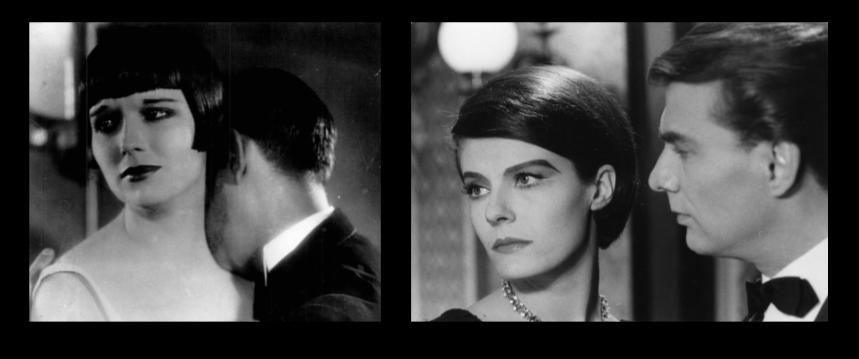
In Last Year at Marienbad, director Alain Resnais wanted Delphine Seyrig’s appearance to resemble that of Louise Brooks in 1929’s Pandora’s Box. Alas, Delphine showed up for filming with a haircut that would not allow for the recreation of Brooks’ Lulu bob. A wedge cut was utilized instead, and that became a phenomenon as well.
Louise Brooks with her Lulu bob in Pandora’s Box of 1929 and Delphine Seyrig with her wedge cut in Last Year at Marienbad of 1961
Louise Brooks
Louise Brooks in Pandora’s Box
I’ve never seen Brooks’ films, but her look is iconic, and she eventually became a powerful essayist on Old Hollywood. She memorably shared, “If I ever bore you, it’ll be with a knife.”
Louise was born in 1906 in Cherryvale, Kansas, just 40 miles from my home in Bartlesville. Her father was a lawyer and her mother was cultured, participating in Chautauquas and playing Debussy and Ravel on the piano for her children.
However, Louise was sexually abused by a neighbor when she was nine years old. She shared, “We were Midwesterners born in the Bible Belt of Anglo-Saxon farmers, who prayed in the parlor and practiced incest in the barn.”
The family moved to Independence when she was 13, and then on to Wichita. She regularly performed as a dancer across southeastern Kansas and left for New York, and at age 18 she was signed to a five-year film contract with Paramount. Although she only appeared in a couple dozen movies between 1925 and 1938, starring in only three of them, her bobbed black helmet of hair was a style icon, and I already knew of her sharp wit.
If I ever bore you, it’ll be with a knife.
Louise Brooks
Brooks led a wild existence with plenty of drinking and sex. After two highly regarded German films, she returned to Hollywood in 1930, where her independent spirit, rebellious nature, and outspokenness clashed with studio executives. Her career faded, and she eventually returned to Kansas, where “the citizens of Wichita either resented me having been a success or despised me for being a failure”. She then fled to New York to star as a radio actor in soap operas and failed. She became a gossip columnist and was fired. She became a salesgirl at Saks, and finally fell into prostitution from 1948 to 1953.
She began an autobiography, Naked on My Goat. The title was from a young witch’s lines in Goethe’s Faust, who displays her youthful beauty and confidence while another witch warns that eventually she is bound to rot. However, after working on it for three years, she threw the manuscript into an incinerator. Her drinking increased and she considered suicide. Brooks would later share that despite two marriages and numerous affairs, she had never loved anyone.
The French saved Louise. Henri Langlois and others rediscovered her films and, at age 51, she was the subject of a film festival. The curator of film at the George Eastman House in Rochester learned how the former film star was living as a recluse in NYC and persuaded her to move into a tiny apartment nearby. She agreed to watch films, including some of her own which she had never seen, and launched a new career writing essays for film magazines.
The talented yet tragic Louise Brooks
Once derided as a brainy showgirl, Brooks proved to be an articulate and acerbic writer. Her revived notoriety helped inspire director Resnais to model his 1961 film’s star after her classic appearance, all the more since the movie was influenced by a 1940 novella whose author had Brooks in mind for its main female character.
Sight and Sound shared, “If Brooks has an Achilles heel, it is her own intelligence: she tends to attribute to others as much self-awareness and analytical power as she has herself.”
Film Comment‘s take on her work was, “It is also an exhilarating display of the sort of diamond-hard prose whose beauty is inseparable from its precision.”
All that led me to order her only book, Lulu in Hollywood, with eight of her essays. It wasn’t available electronically, so I ordered a splendid print version that the University of Minnesota Press published in 2000 which included a famous profile of her by Kenneth Tynan.
In one of her last essays, Brooks explained why she had not written her full memoir: “I am unwilling to write the sexual truth that would make my life worth reading. I cannot unbuckle the Bible Belt.”
Louise died at age 78 in Rochester, having always thought of herself as a failure. Late in her life, she wrote to her brother: “I have been taking stock of my 50 years since I left Wichita in 1922 at the age of 15 to become a dancer with Ruth St. Denis and Ted Shawn. How I have existed fills me with horror. For I have failed in everything — spelling, arithmetic, riding, swimming, tennis, golf, dancing, singing, acting, wife, mistress, whore, friend. Even cooking. And I do not excuse myself with the usual escape of ‘not trying.’ I tried with all my heart.”
Last Year at Marienbad birthed multiple Tangents, including the ancient game of Nim, which I shall explore in Tangent A4.
This is the second of five snowed-in posts, illustrating the pathways I sometimes pursue due to my avid curiosity. This Tangent began with a video remix of an old song by Duran Duran, which had inserts from a French New Wave film from 1961.
Here’s the video that instigated this Tangent:
French New Wave
One of the original posters highlights the disturbing
In my younger days, I would occasionally skim issues of the French film magazine Cahiers du Cinéma at public libraries, although my French was limited to a few weeks in fifth grade and its descent from Latin, which I studied for a few years in high school and college. Thus I thought of the magazine’s title as Cashiers rather than Cahiers since I was unfamiliar with the French word for notebooks. I enjoyed seeing retrospectives on the work of auteurs like Truffaut, Godard, and Demy, and I have seen Truffaut’s Fahrenheit 451 of 1966, Godard’s Alphaville of 1965, and I have a Blu-Ray of Demy’s The Umbrellas of Cherbourg of 1964 that I’m saving as a post-retirement treat. The sumptuous yet strange visuals in the music video reminded me of that era when French directors rejected traditional filmmaking conventions.
Cahiers promoted the work of “Right Bank” filmmakers, who were primarily film critics with cinephile backgrounds. However, there were also slightly older “Left Bank” filmmakers who often came from literary, documentary, or other arts backgrounds. While Godard and Truffaut might focus on formal experimentation like jump cuts, the Left Bank integrated other art forms and had more overtly political, literary, and intellectual themes. The latter were associated with the intellectual and bohemian “Rive Gauche” or “Left Bank” of Paris.
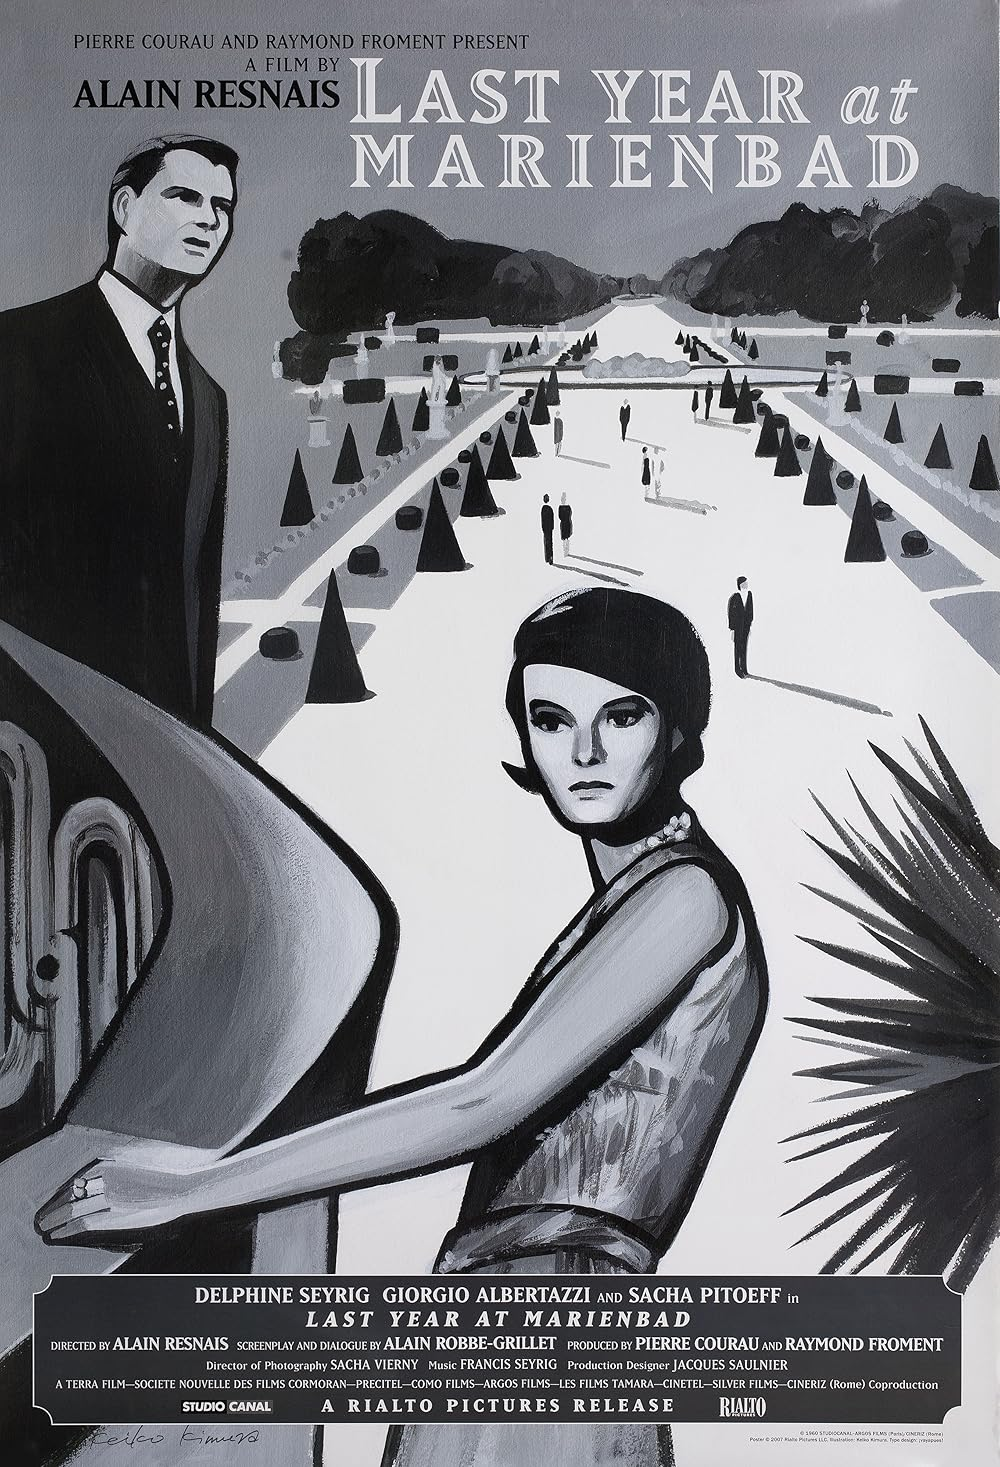
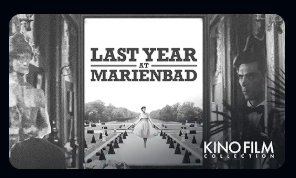
Last Year at Marienbad
A Google Lens search identified the female protagonist as actress Delphine Seyrig in director Alain Resnais’ 1961 film L’Année dernière à Marienbad or Last Year at Marienbad. So the video was remixing with a Left Bank film. I was familiar with that group’s La Jetée by Chris Marker, which inspired one of my favorite films, 12 Monkeys, but I’d never heard of Marienbad.
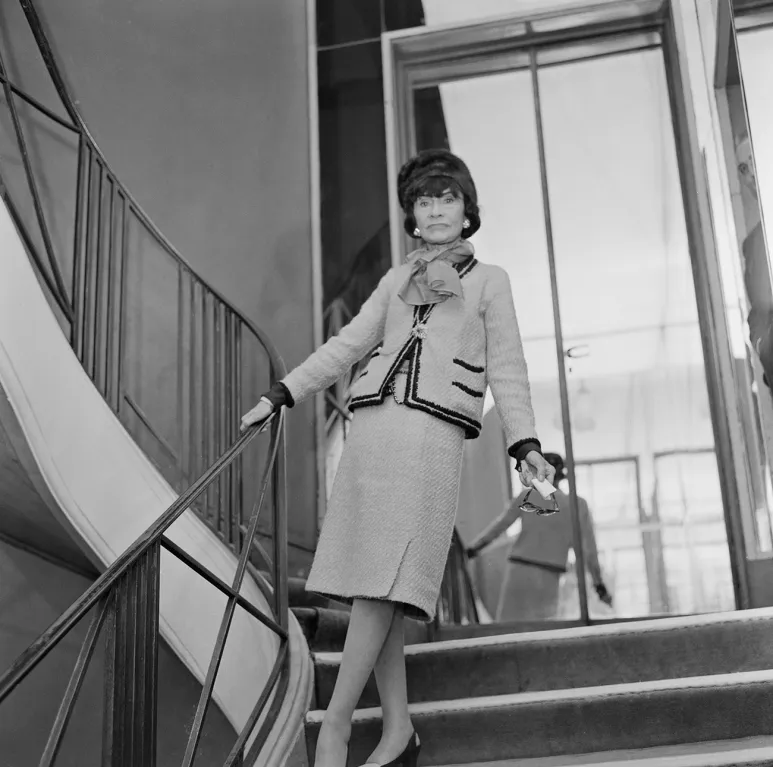
Coco Chanel
Coco Chanel in 1963
The beautiful gowns that Seyrig wore in the film were immediately arresting. I presumed they were by a French designer, but I was surprised to learn that Coco Chanel was responsible, albeit uncredited in the film. You see, Chanel had met Hollywood mogul Samuel Goldwyn at Monte Carlo way back in 1931, and he had paid her a million dollars to come to Hollywood a couple of times per year to design costumes for his films. Chanel came to dislike the culture of the film world and only worked on a few films there, declaring, “Hollywood is the capital of bad taste … and it is vulgar.”
Hence I didn’t expect to see her designing costumes for a Left Bank film decades later. However, Director Alain Resnais admired Chanel’s timeless style and asked her to do the film’s costumes when she was 77 years old. Resnais and screenwriter Alain Robbe-Grillet wanted 1920s glamour blended with 1960s modernity, and Chanel’s clean lines, little black dresses, and use of chiffon and tulle were well-suited to the film’s black-and-white cinematography.
“I should have shown you set among white feathers…a sea of white feathers about your body.”
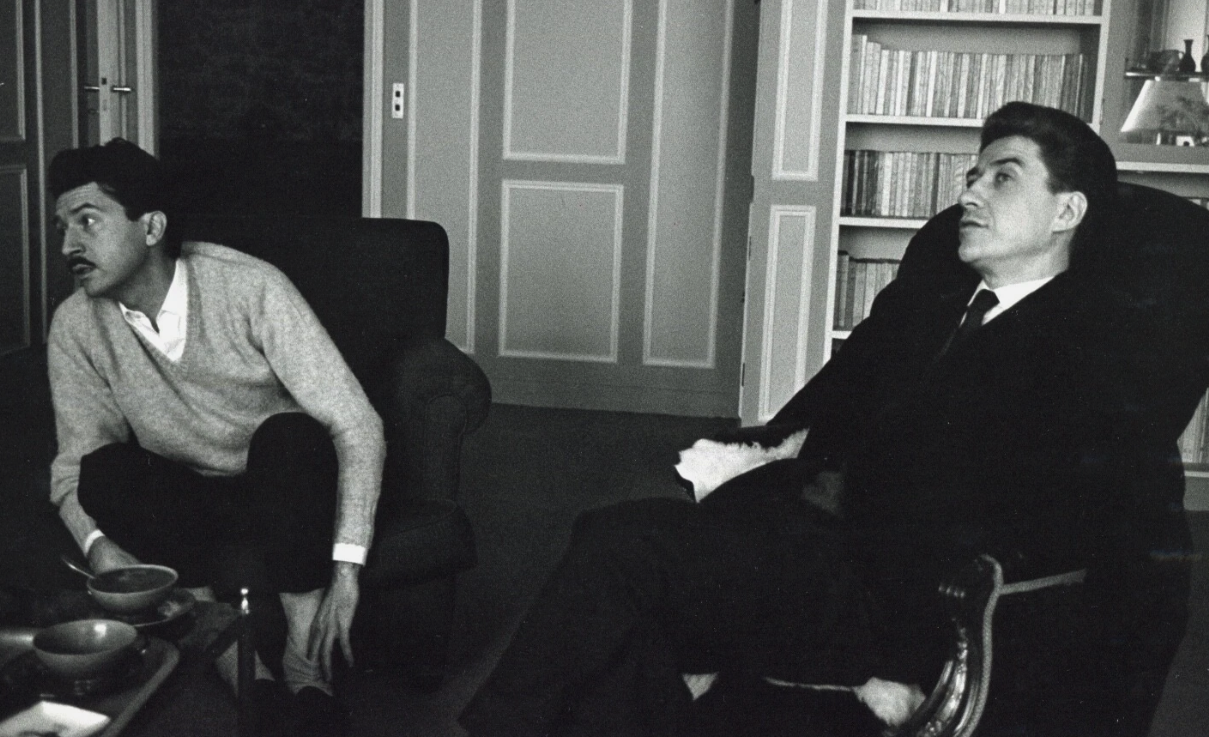
Writer Alain Robbe-Grillet and director Alain Resnais collaborated on the film, with Robbe-Grillet writing a detailed screenplay that went beyond dialogue, gestures, and décor to include the placement and movement of the camera and the sequencing of shots.
Robbe-Grillet’s preface to the story shared: “The whole film is in fact the story of a persuasion, what is involved is a reality that the hero creates by his own vision, through his own words. [. . .] It all takes place in a luxury hotel, a sort of international palace.[. . .] An unnamed man goes from room to room [. . .], walks down interminable corridors. [. . .] His glance moves from one nameless face to another nameless face. But it always comes back to one face, that of a certain young woman. [. . .] To her, then, he offers [. . .] a past, a future, freedom. He tells her that they have already met, a year ago, that they became lovers, that he has returned now to this rendezvous which she herself had made, and that he will take her away with him.”
“She does not wish to leave the other man [. . .] who watches over her and who is perhaps her husband. But the story told by the stranger becomes more and more real; irresistibly, it becomes more and more true. The present and the past have, besides, finally become fused, while the growing tension among the three protagonists creates in the mind of the heroine tragic phantasms: rape, murder, suicide. . . .”
Resnais filmed that script with great fidelity, although there are inevitable differences. The most notable of those is that Resnais was not interested in filming the rape, instead emphasizing the hero’s rejection of that scenario, agitatedly reformulating it into a willing and welcome embrace. However, in the repeated overexposed tracking shots moving toward the smiling woman of that reformulation, her strange smile and the tilting of her head are simultaneously comical and disturbing — deliberate off-putting choices.
The conclusion is a sudden linear narrative of the woman accepting the hero’s narrative, finally being willing to “go away with him, toward something […], love, poetry, freedom … or, perhaps, death.”
The Critics
I resisted watching Last Year at Marienbad for some time, even though it was clearly gorgeous, because I fully expected it to be difficult, obscurantist, and pretentious given its Left Bank origin. I dislike and often disagree with New Yorker film critic Pauline Kael, but her caustic take on the film no doubt has elements of truth:
Here we are, back at the no-fun party with non-people, in what is described to us as an “enormous, luxurious, baroque, lugubrious hotel — where corridors succeed endless corridors.” I can scarcely quote even that much of the thick malted prose without wanting to interject — “Oh, come off it.” The mood is set by climaxes of organ music and this distended narration; it’s all solemn and expectant — like High Mass. But then you hear the heroine’s thin little voice, and the reiterated questions and answers, and you feel you shouldn’t giggle at High Mass, even if it’s turning into a game of Idiot’s Delight.
However, my tastes often aligned with Roger Ebert, and he recalled standing in the rain in college to see the film, and remembered it more fondly.
Yes, it’s easy to smile at Alain Resnais’ 1961 film, which inspired so much satire and yet made such a lasting impression. Incredible to think that students actually did stand in the rain to be baffled by it, and then to argue for hours about its meaning–even though the director claimed it had none.
…
Viewing the film again, I expected to have a cerebral experience, to see a film more fun to talk about than to watch. What I was not prepared for was the voluptuous quality of “Marienbad,” its command of tone and mood, its hypnotic way of drawing us into its puzzle, its austere visual beauty. Yes, it involves a story that remains a mystery, even to the characters themselves. But one would not want to know the answer to this mystery. Storybooks with happy endings are for children. Adults know that stories keep on unfolding, repeating, turning back on themselves, on and on until that end that no story can evade.
Ebert recalled sitting over coffee in the student union with Gunther Marx, a professor of German, after seeing the film for the first time. Marx told him, “It is a working out of the anthropological archetypes of Claude Levi-Strauss. You have the lover, the loved one, and the authority figure. The movie proposes that the lovers had an affair, that they didn’t, that they met before, that they didn’t, that the authority figure knew it, that he didn’t, that he killed her, that he didn’t. Any questions?”
I could hug Roger for his addition: “I sipped my coffee and nodded thoughtfully. This was deep. I never subsequently read a single word by Levi-Strauss, but you see I have not forgotten the name. I have no idea if Marx was right. The idea, I think, is that life is like this movie: No matter how many theories you apply to it, life presses on indifferently toward its own inscrutable ends. The fun is in asking questions. Answers are a form of defeat.”
You are so difficult!
Difficult films are hit-and-miss for me. I like much of David Lynch’s work, including the nonlinear Lost Highwayand the puzzle box of Mulholland Drive, but I couldn’t make it through Inland Empire. I tried to watch Terence Malick’s Tree of Life, but it desperately needed pruning.
The Amazon Prime Kino Film thumbnail that caught my eye
So, given my reluctance, how did I come to watch Last Year at Marienbad? Well, several months ago I purchased a new 4K HDR release of Danger: Diabolik from Kino Lorber, which had been the subject of an episode of the Perf Damage podcast with Charlotte Barker, Paramount’s Director of Film Restoration, and her husband, Adam. I might guess that influenced the algorithms crafting my online experiences to promote Kino Lorber’s products on Amazon Prime. Thus, when I opened the Prime Video app on my iPad to seek entertainment, it offered up the Kino Film Collection. A bit of idle side-scrolling then brought the thumbnail of the film into view. I could watch it for free, so long as I remembered to cancel a 7-day free trial of the sub-service. Hmmm…why not?
So I watched this difficult and beautiful film in bed on a little 10.9″ screen at about 2K resolution while wearing a bone conduction headset with mediocre sound quality. How fitting for these times, and thank goodness for subtitles.
The film was indeed exasperating, fascinating, foolish, disturbing. There was obviously intercutting in the editing between multiple scenes, without clear signals of past versus present except occasional revealing dialogue. Deliberate mismatches of dialogue and visual descriptions accompanied shifting, inconsistent realities that reminded me of several of David Lynch’s later films. I didn’t find the film profound, as it seemed mostly only surviving surfaces of a plot that had been eviscerated, but it tickled my curiosity in multiple ways.
Firstly, what was so familiar about Delphine Seyrig’s appearance? The film’s obvious choices to have many characters arranged in motionless and stilted tableaus, the dated play-within-the-film, and the cinematography all seemed to pay homage to silent films. Sure enough, director Resnais had unsuccessfully tried to get Kodak to supply old-fashioned film stock that would bloom and halo like in the old silents, and he wanted Seyrig’s appearance and manner to resemble that of Louise Brooks in 1929’s Pandora’s Box. Thus we turn to follow Tangent A3.
We’re likely to be snowed in for several days, so in hopes of entertaining some other snowbound folks, this is the first of five daily releases on some tangents I followed when I stumbled onto something with rich connections. Tangent A1 will be followed by A2 through A5.
Give people facts and you feed their minds for an hour. Awaken curiosity and they feed their own minds for a lifetime.
Back in 1985, I discovered James Burke, the British science historian, author, and television producer, through his series The Day the Universe Changed that came to Public Broadcasting. Burke had long rejected the conventional linear view of historical progress, contending that our world is the product of a web of interconnected and isolated events, driven by personal motivations, occurring with no conception of the modern results. The series struck a nerve with me, and I incorporated episodes of it into my physics teaching, continuing to show my students at least part of the fifth episode, Infinitely Reasonable, for decades. Burke’s earlier series, Connections, was less linear and led to five additional follow-ups, the most recent being Connections with James Burke in 2023 via CuriosityStream.
I enjoy adapting Burke’s ping-pong methodology to my own entertainment and edification. I call these posts Tangents because they needn’t feature any through-line, simply reflecting connections that captured my interest. My personality profile ranks me at the 93rd percentile in Openness, so I’m as curious as a cat and happily careen from one topic to another.
This first series will detail (of course! relentlessly) how a mere music video triggered my insatiable curiosity, leading me to watch a French New Wave film, pursue essays by a failed star of silent films, explore combinatorial mathematics, and read an 85-year-old Argentine science fiction novella.
The Instigating Video
It all began months ago when the YouTube algorithm coughed up The Blue Ball Music‘s video of Greek DJ and producer Dim Zach‘s remix of Duran Duran’s 1993 song Come Undone.
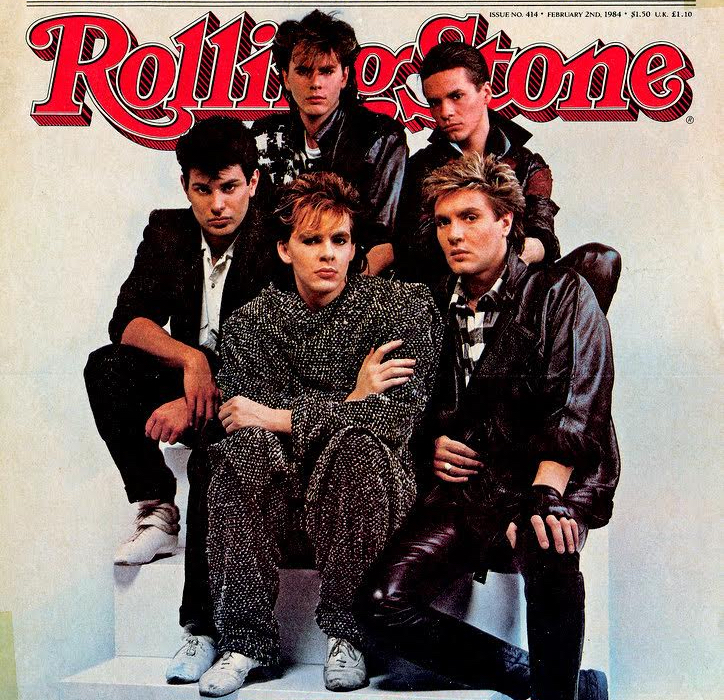
Duran Duran in 1984
I first encountered Duran Duran, an English pop rock band, on MTV in the 1980s. In that bygone era, if I wanted to listen to my favorite songs in my car, I had to create a mix cassette tape from vinyl record long-playing albums or 45-rpm singles.
In 1982 I saved a bit of money by purchasing The Beat, a K-Tel compilation vinyl album. That got me 14 songs at one fell swoop. Among them was Duran Duran’s Girls on Film, but I didn’t care for it, much preferring We Got the Beat by the Go-Go’s, I Ran (So Far Away)by A Flock of Seagulls, and I Want Candy by Bow Wow Wow.
Ah, youth. I don’t listen to any of those songs anymore, although I do still love the Go-Go’s Our Lips Are Sealed.
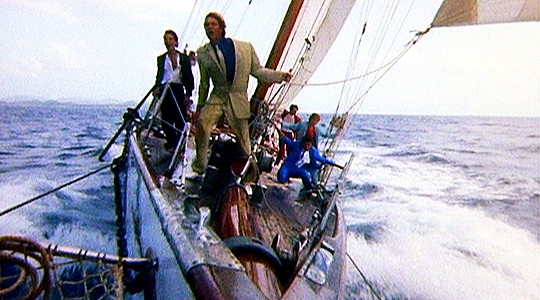
Duran Duran aboard the 1936 Fife yacht Eilean
I kept seeing Duran Duran’s Hungry Like the Wolf on MTV, but I thought most of their videos were cheesy. Their best video to me was Rio by Russell Mulcahy with the band in Antony Price silk suits aboard a yacht sailing near Antigua.
Roger Moore was far past his prime by A View to a Kill; I couldn’t imagine him listening to Duran Duran
The group was misnamed after the villain Dr. Durand Durand of the rather baked movie Barbarella, which was based on a French science fiction comic book. One of the band’s founding members saw the 1968 film when it was broadcast on the BBC on October 20, 1978, and sold the others on using the name, although it is unclear if they realized it was misspelled. There already was a famed night club and music venue in Birmingham named Barbarella’s, so that may have been a factor, although the band didn’t perform there until June 1, 1979.
The comic book led to Jane Fonda as Barbarella being tortured by Milo O’Shea’s Dr. Durand Durand
Music videos were instrumental in the band’s eventual success, but I had stopped watching those long before 1993 when their original video for Come Undone was released, featuring colorful footage in the London Aquarium. However, I did manage to hear and enjoy the song back in the day, although as with many songs, I can only reproduce bits and snatches of the lyrics, and I had no grasp of its meaning; many vocals blend into the wall of sound for me. Vocalist Simon Le Bon wrote the lyrics as a birthday gift to his wife Yasmin, which is why it includes the line, “‘Happy Birthday to you’ was created for ya”. The song was the band’s last top-40 hit on the Billboard Hot 100 chart.
When I saw this video remix, it was drastically different from what I would have expected from the group, with black-and-white footage that seemed to come from some vintage film, which I deduced was likely French New Wave.
And thus I took off on Tangent A2…to the Left Bank in Paris.
Back in June 2024 I wrote about Oklahoma Teacher Retirement. Now, in early 2026, my preparations have begun for my mid-year retirement, which will occur about a month before I reach 60 years of age. I have filed my application with the teacher retirement system, agreed to new segmented accounts for the monies I’ve accumulated in various retirement funds, and arranged my post-retirement/pre-Medicare health insurance.
Retirement Funding
I selected the pension option where if I die before her, my wife will receive my monthly pension for the remainder of her life. I also opted for a Partial Lump Sum distribution which will be combined with the traditional IRA I contributed to from 1989 to 2014, the Roth IRA I have contributed to since 2015, and the 403(b) plan I have contributed to since 1992. All of those funds will flow into various accounts per an Advanced Time Segmentation plan.
Advanced Time Segmentation
I opted for a Partial Lump Sum, which reduced my pension by 17%, in order to boost my total investments pool as a hedge against inflation. That is important to me since the Oklahoma Teacher Retirement System (OTRS) stopped providing annual cost-of-living adjustments (COLAs) long ago. The legislature only rarely provides tiny adjustments, the last being a 2-4% increase in 2020 after a dozen years without one, while the Consumer Price Index increased by almost 50% between 2008 and 2025.
I plan to start drawing my Social Security retirement benefit in a couple of years when I turn 62. Three factors motivated my decision to take it as soon as possible:
Social Security benefits, unlike OTRS, do have annual COLAs, based on the percentage increase in the Consumer Price Index for Urban Wage Earners and Clerical Workers. That will help offset health insurance/Medicare cost increases.
The dysfunctional federal government has done nothing to stave off the exhaustion of the Retirement & Survivors Fund in 2033, meaning there could be benefit cuts of up to 23% in the coming years. Best to get whatever I can, as soon as possible, since Congress and the President might eventually allow benefits to drop significantly, decrease or suspend the annual COLAs, etc.
Even if Congress somehow protects my Social Security benefit, waiting to collect it until age 67 would not increase my lifetime payout until I am over 75 years old, if I even survive to that age. I’d rather enjoy those benefits for over a dozen years when I’m younger and healthier.
An example of breakeven ages if I delayed taking Social Security, based on my latest Social Security statement and this calculator
Bear in mind that calculation does not factor in COLAs or the unknown changes in Social Security that must occur within the next seven years. My stance on Social Security might be different if I lacked my teacher pension and had not spent decades building up my retirement savings.
Health Insurance
My health insurance has evolved over time. When I began teaching in Bartlesville in 1989, the district had a self-funded plan. As of 1991, the monthly premium was $118, or $277.29 in 2025 dollars adjusted for inflation according to the Consumer Price Index. Now the monthly premium is $707.00, with the inflation rate for health insurance premiums being much higher than for the overall economy.
Oklahoma teachers’ premiums for HealthChoice High insurance have been fully paid by the state since 2004. At the time, the monthly premium was $292.54 or $498.15 in 2025 dollars. The chart below tracks my monthly health insurance premiums, in inflation-adjusted 2025 dollars, and compares that to the average among firms in the South employing 200-1000 workers.
It is no surprise that the health insurance costs have increased far above the overall rate of inflation. Over the course of my career, the real cost of health insurance increased by a factor of 2.5, although it has stabilized over the past decade. However, I have been insulated from those increases for over 20 years because Oklahoma began paying for public school educators’ single health insurance premiums in 2004.
For the five years until I qualify for Medicare, I’ve opted to stay with the state’s HealthChoice High insurance plan. The retirement system will pay $102/month towards my premium, which will start out at $707/month plus $48.58/month for HealthChoice Dental insurance. I’m also keeping an American Fidelity cancer and intensive care unit insurance policy I obtained in 2009 which costs me $32.45/month.
So for five years I’ll be paying out-of-pocket at least $686 per month or $8,232.36 per year for health, dental, and cancer insurance until I qualify for Medicare. Given the structural defects in our health care system, I won’t be surprised if the cost of my health insurance rises above the overall rate of inflation.
Oklahoma ranked 49th in health care among the states and the District of Columbia, with only Texas and Mississippi below us. Our state is 48th in health care access and affordability and is among the bottom-five in a slew of categories: uninsured adults, Medicare spending, adult cancer screenings, dental visits, COVID-19 vaccinations, children without mental health care, avoidable emergency department visits for the elderly, premature deaths from treatable and preventable causes, suicide rate, colorectal cancer deaths, smoking, adults lacking care due to cost, children’s medical and dental visits, and hospital admissions. None of that helps my insurance costs.
Transitional Period
A decade ago, when I agreed to occupy a new district administrative position over technology and communications, the school board president of the time, the superintendent, and I acknowledged that the position was an unusual one unlikely to survive my tenure. I had a specific role to play in modernizing those aspects of the district, and now that mission has concluded. In the summer of 2026, the district will have a new superintendent, and she has begun the process of establishing a new administrative structure.
My roles will be spread among multiple administrative positions, and I have crafted a multi-year roadmap and instructions that could be used to sustain the district’s technology and communications programs while they evolve into new forms. New central office administrative positions have been posted and should be filled in a few weeks.
My office from 2017 to 2026
I’ll then begin a transition process with the new administrative designees, and at some point I will vacate my office at the Education Service Center. My retirement reception is set for May 19, 2026 and I’ll officially retire on June 30, a day before Wendy and I celebrate our tenth wedding anniversary.
Wendy is nine years younger, so after I retire she will continue to lead the Student Technology Support Team at Bartlesville High School, working with students to maintain the thousands of Chromebooks used across the school district.
The time of transition has arrived. As Fred Rogers wrote, “Transitions are almost always signs of growth, but they can bring feelings of loss. To get somewhere new, we may have to leave somewhere else behind.”
Light reading is important to me, with trusted authors and series offering safe harbors when I’ve had enough of the sometimes stormy sail of reading literature, once I’m tired of nonfiction, or whenever I’m stressed.
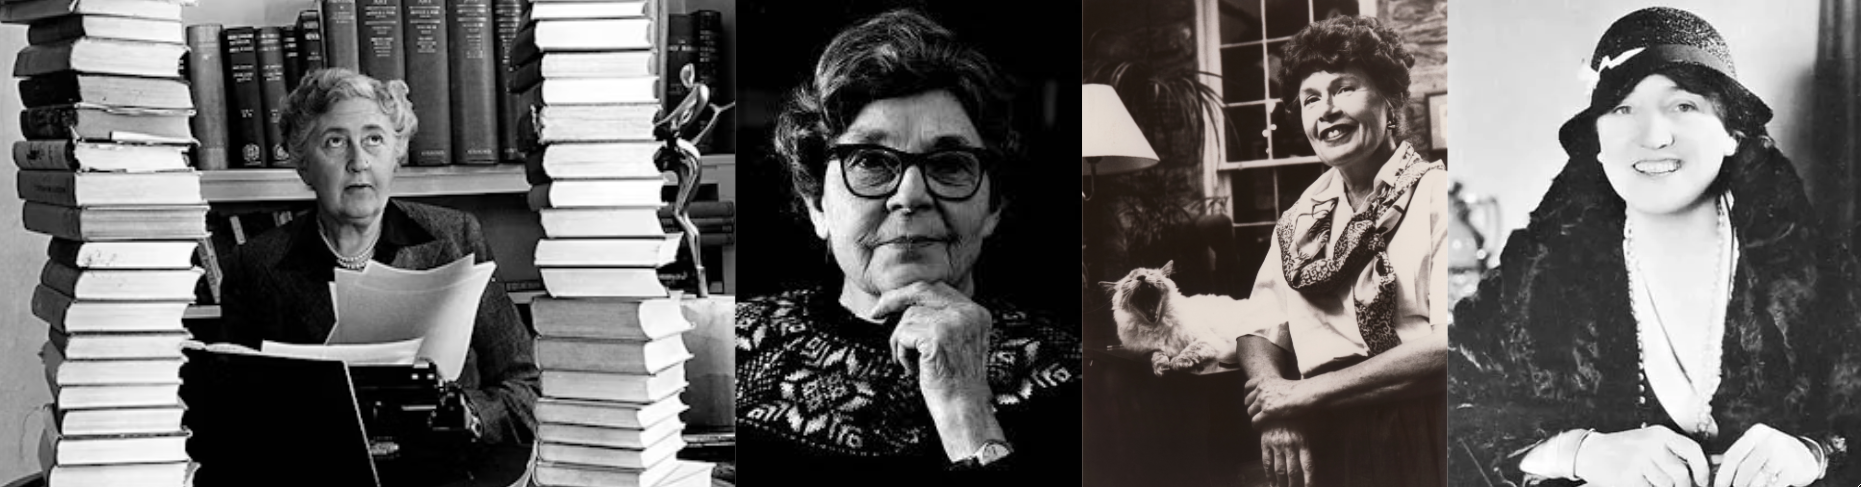
In the early 2010s, I was driving out to day hike on most weekends, and I listened to every Agatha Christie audiobook there was, at first on cassette tapes checked out from the Tulsa libraries and later via purchases on Audible. She remains my favorite for audiobooks, but I exhausted her numerous mysteries long ago.
It was many moons ago that Carrie, my friend who is a librarian, put me onto Ellis Peters’ Brother Cadfael Chronicles, which were actually authored by Edith Pargeter. I read or listened to all of those, then all of her Inspector Felse mysteries, and having exhausted the supply of audiobooks, now I’m working my way through her standalones on my Kindles. She is not as cunning a plotter as Christie, nor as skilled with dialogue, but Pargeter brings a wonderful sense of realistic morals, atmosphere, and empathy to her stories that made her my favorite after Christie.
My favorite mystery series authors of the past include Christie, Pargeter, Mertz, and Rinehart
Whilst seeking more Ellis Peters audiobooks, I stumbled into Elizabeth Peters stories, actually authored by Barbara Mertz. While I loved her Vicky Bliss and Jacqueline Kirby series, especially when Grace Conlin voices Herr Professor Anton Z. Schmidt in the audiobooks, I don’t care for the characters of her Amelia Peabody novels and found the books Mertz penned as Barbara Michaels too predictable and angry. So I’m done with her works.
Anxious to find more offerings, I tried Mary Roberts Rinehart, who was called the Agatha Christie of America, although her work is often far more dated. Audible is also my preferred format for Rinehart stories, and I am happy to find that Audible has been adding more titles. For awhile, several of her audiobooks had a terrible unprofessional narrator, but that appears to have been rectified. The age and variability of her novels leads me to place more trust and confidence in what remains of Pargeter and now Mary Stewart.
Mary Stewart
I’d read the first of Mary Stewart’s five Arthurian novels, but I didn’t continue with them, as that genre just isn’t for me. Happily I recently discovered her romance suspense novels, enjoying one from 1962 before zipping back to her first from 1955. As Elsie of the Tea and Ink Society has documented, Stewart authored 15 non-Arthurian romance suspense novels, so I am lucky to still have a baker’s dozen to savor.
I plan to parcel those out over time, as I do with Edith Pargeter’s works. I usually avoid binging on videos or books available in series, finding that can decrease my appreciation and enjoyment. That’s why I wait months before listening to another of Richard Osman’s audiobooks. I’m so invested in his Thursday Murder Club characters, and his works include such pathos, that they are special treats for me rather than light reading.
I haven’t always succeeded in my attempts to find new series. I read the first Flavia de Luce mystery by Alan Bradley, a series that my late acquaintance George Parks enjoyed, but it wasn’t my thing. I also read the first of Dorothy Sayers’ Lord Peter Wimsey series, but I found that character insufferable.
I asked Google’s AI for authors similar to Mary Stewart, and for classic authors it offered up Daphne du Maurier, Phyllis A. Whitney, M.M. Kaye, and Rinehart. I read du Maurier’s short story “The Birds”, which Hitchcock adapted into his famous film, years ago. While I liked it, I couldn’t get into Rebecca, her most famous novel and Hitchcock’s first American film. I have a feeling her blend of atmosphere and action is weighted too much toward the former for my taste. However, I did enjoy the Mexican Gothic novel The Hacienda by Isabel Cañas, which was clearly influenced by du Maurier. The “modern” mystery authors that Google suggested were Ruth Ware, Susanna Kearsley, and Michaels.
Louise Penny
Over the years, I’d seen mentions of Louise Penny’s Three Pines mysteries featuring Chief Inspector Gamache. I’m no Francophile, so the setting of rural Quebec, where French is the sole official language, was more repulsive than attractive from a distance. However, when I saw her work again recommended by friends on Facebook, I finally sampled the first novel, Still Life. It was published back in 2006, and the series is clearly successful since it had grown to 19 books by 2024.
The Three Pines mysteries are my new series
I was immediately drawn to Penny’s emphasis on characterization and the sharper edges of modernism amidst her cozy tale. I enjoyed her emphasis on community and belonging and appreciated that she never let the French become intrusive. I was also impressed by the resources on her website. Reportedly four out of every five people hear an “inner voice” when reading silently, and they should appreciate the pronunciation guide she provides, although I lack any sort of interior monologue, so that is less important for me.
P.G. Wodehouse
Besides most mysteries, humor is another genre that I consider light reading. However, I’m quite selective. Back in 2021-2022, I listened to a dozen P.G. Wodehouse novels, mostly in the Blandings Castle series. I was binging on them as an escape from the stresses of the Covid-19 pandemic, but they became formulaic. So I took a nine-month break before listening to another, and it has now been 19 months since I listened to one.
I will continue to avoid the three remaining Blandings Castle books for some time, as I’m quite tired of pigs. I instead plan to eventually listen to Sam the Sudden, the last novel that includes Lord Tilbury, who has been my favorite Wodehouse character. I don’t think Jeeves & Wooster would be to my taste, so after that it might be standalones as far as Wodehouse.
I liked Douglas Adams‘ Hitchhiker’s Guide series, in any media format, although its frenetic pace meant that reading them in succession gave me a headache. I’ve had an audiobook of Dirk Gently’s Holistic Detective Agency downloaded into iTunes for well over a decade, but I have yet to engage with it.
I am delighted to have novels by Penny, Stewart, and Pargeter in hand, and audiobooks by Osman and others in ear, to ease my transition in mid-2026 from 40 years of employment into an unknowable number of years of retirement.