Our second full day in Victoria was devoted to visual and botanical art. We headed out in the afternoon to the Art Gallery of Greater Victoria. It occupies and extends the 1889 Spencer Mansion, which was designed by William Ridgeway Wilson and built by George Mesher as Gyppeswyk, the Old-English name for the Suffolk town of Ipswich, for original owner Alexander Green, a banker who made his fortune in the Australian and American gold rushes. David Spencer was the last owner, having made his money in dry goods, and his family occupied the mansion from 1903 to 1951. His daughter Sara gave it to the city as an art gallery. The only intact feature of the mansion is the beautiful foyer, featuring gorgeous paneling.
A brief shower had us ducking under some plants for shelter near the Butchart house at one point, opting again to forego another Japanese Garden overrun with visitors. We viewed, but did not ride, the Rose Carousel.
By the time we ended our visit by shopping at the large gift store, it was dark for the drive back to Victoria.
We had one more day to spend in Victoria, and then two days of travel to return home. I’ll cover that in the next and final post about our honeymoon.
Victoria, the “Garden City”, is the capital of British Columbia and is situated on the southeastern tip of Vancouver Island, only twenty miles north of Washington State. It has a temperate, sub-Mediterranean climate with mild and rainy winters and relatively dry summers, and is one of the sunniest places in Canada. We Okies think of the Pacific Northwest as gloomy and rainy, but Victoria sits in the rain shadow of the nearby Olympic Mountains. It is the driest location on the British Columbia coast, averaging 24 inches of precipitation per year, with about 10 inches of snowfall.
That contrasts with Bartlesville’s humid sub-tropical climate. We get about 40 inches of precipitation annually, including 9 inches of snowfall. More significantly for our honeymoon, Bartlesville’s average temperature in July is 93 degrees, while Victoria’s is 68 degrees. But my use of Fahrenheit reflects my American upbringing; a Canadian would say Victoria reaches about 20 degrees Celsius in July while Bartlesville shoots up to 34 degrees!
Wendy and I spent four nights and three full days enjoying the mild and sunny weather in Victoria before heading back to the states. Our first day featured a walk of a couple of miles to and from Beacon Hill Park.
I discovered that 200 acre park on my first visit to Victoria in 1998. One day I ventured southeast from the Inner Harbour and spent a lovely afternoon strolling through the park. I stumbled onto a fun afternoon jazz concert by Chris Millington and his band, which I would later hear again in Butchart Gardens a decade later when his group was playing dance tunes.
For this visit, I knew Wendy would love to see some roses, and a small rose bed was promised in the middle of the park’s 3/4-mile long western edge. So that became our target after we enjoyed breakfast at the Magnolia Hotel’s Catalano Restaurant, paid for by the hotel credit our neighbors had arranged.
We walked south on Douglas Street past the totem poles outside the Royal British Columbia Museum. In 1941 six vacant lots were transformed into Thunderbird Park, and the museum displayed its collection of totem poles. The ones now on display are replicas of the originals, which have been moved inside to be preserved. Mungo Martin, a Kwakwaka‘wakw master carver, Henry Hunt, and Hunt’s sons Tony and Richard created most of the replicas. The chief carver is now Nuu-chah-nulth artist Tim Paul.
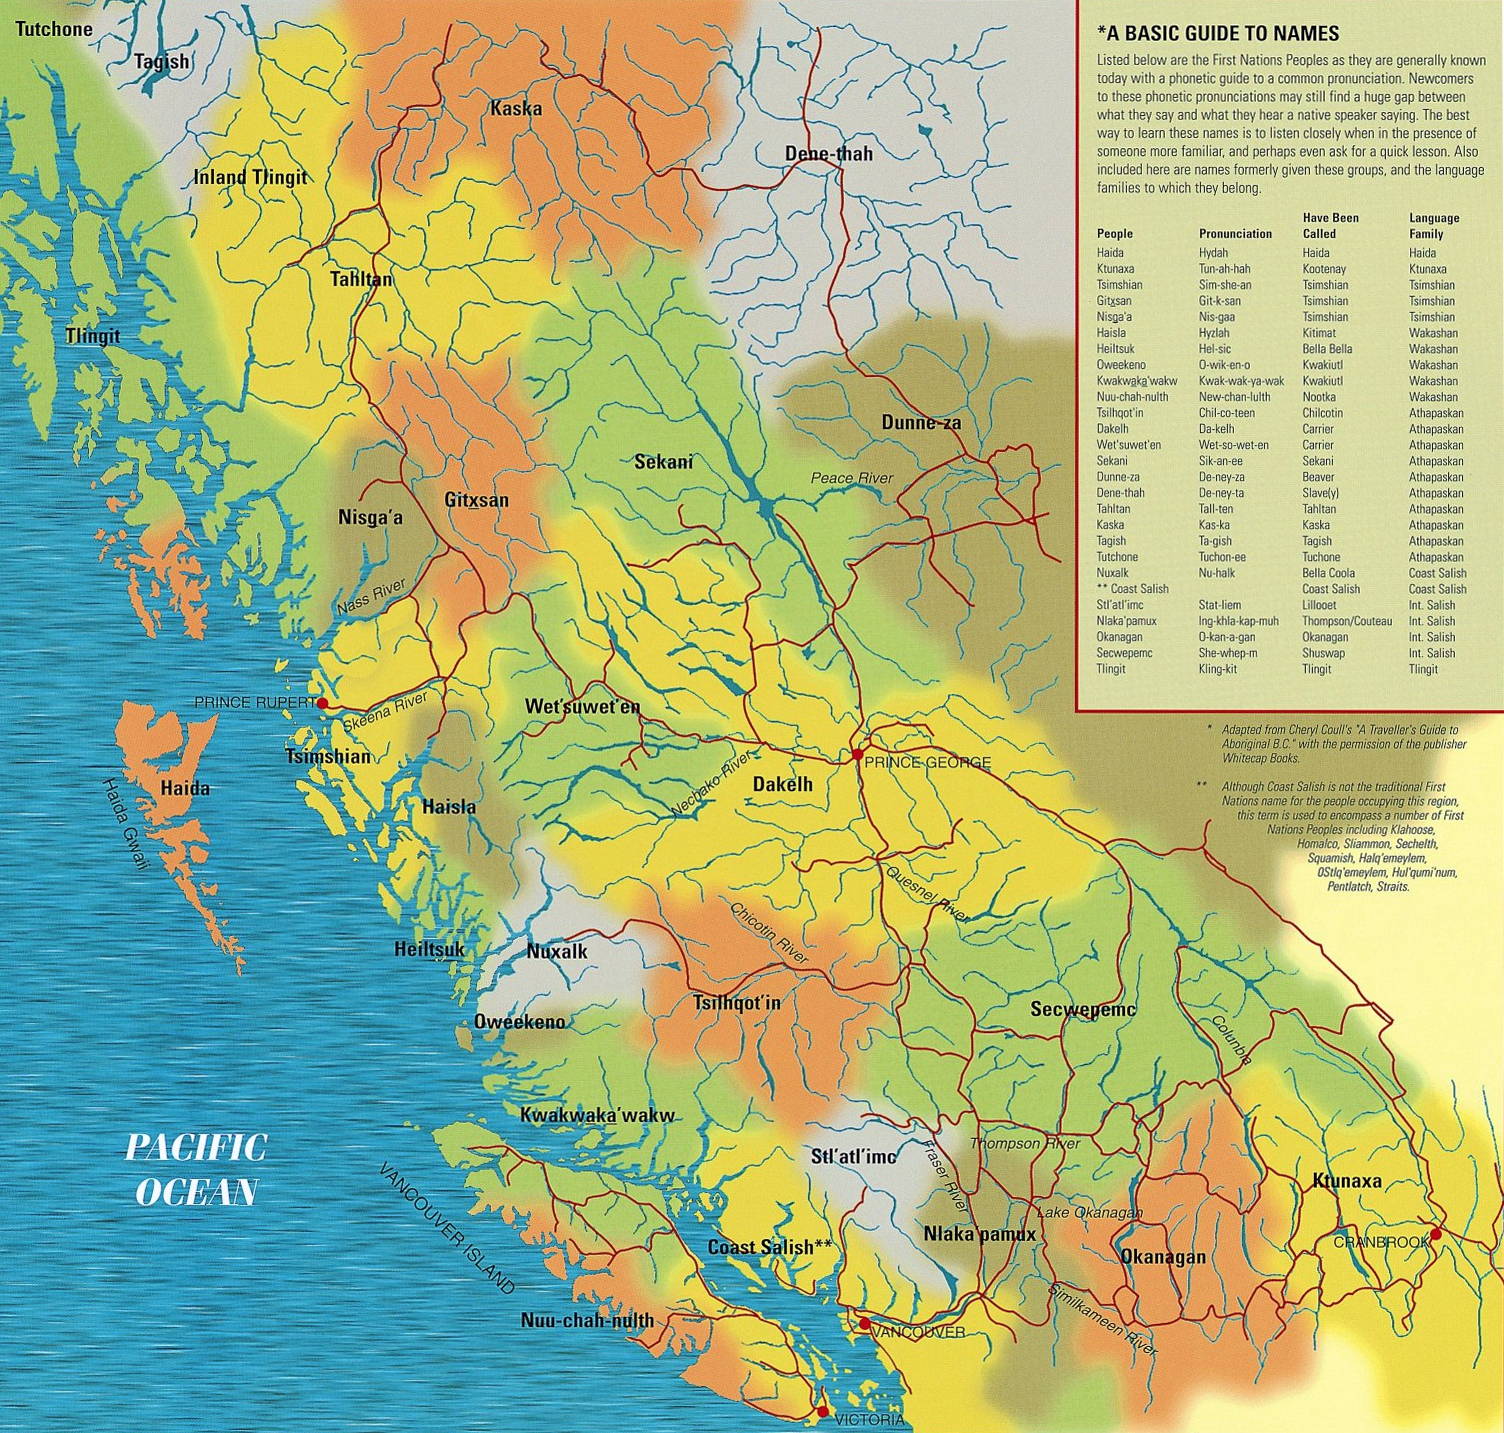
Wendy got a kick out of the totem pole figures. I found a map online to help me figure out where the originating First Nations were located who carved the poles.
Two Haida mortuary poles are on the south end of the park. They were erected at t’anuu ‘llnagaay (eelgrass town). One was built for a high-ranking woman who was shot while traveling through the San Juan islands. Her cremated remains were placed in the cavity behind the frontal board. The other was in front of the House That Makes a Noise, a large six-beamed house owned by Gwiskunas, a member of the Qadasgo Creek lineage of the Raven clan of the Haida.
A Kwakwaka‘wakw Heraldic Honouring Pole was built to recognize the Hunt and Whonnock families of the carvers. It was carved by Sean Whonnock and Johnathan Henderson in 1999 from a log that was 553 years old.
Nearby is a Gitxsan Pole, raised by chiefs Tu’pesu and Wawralaw in the second half of the nineteenth century at Gitsegukla (Skeena Crossing). Its name translates to Great Protruding (Being) from the Lake and includes a section of figures representing a legend of a woman crossing the lake who saw the faces of children in the water, leading to a song about that vision becoming a crest for her family.
Another Gitxsan Pole named Skim-sim and Will-a-daugh belonged to Chief Wiha (Wee-kha, Ernest Smith) of the Wolf (Gilt-Winth) clan. Topped by a giant woodpecker, it has a prominent beak of the mountain eagle Skim-sim, who kidnapped and mated with a young woman and devoured their offspring. At the base is Will-a-daugh, a chief’s niece at Ke-an (Prince Rupert), who carries with her a child she conceived from a wood grub. Seems like a rather gruesome pole from my perspective, but we’re just getting started.
The Wawadit’la House was built by Mungo Martin as an authentic Kwakiutl house with the hereditary crests of his family on the house-posts. The Kwakwaka‘wakw Heraldic Pole out front features crests from the various nations of the tribe. At the base is Dzunukwa, the Wild Woman of the Woods. The story goes that a man chased her for stealing dried fish and eventually married her, and her half-human son became the founder of the Namgis family at ‘Yalis (Alert Bay).
Wendy particularly liked the Huxwhikw, or Cannibal Bird, that graced the top of a Kwakwaka‘wakw House Post. The story is that this servant of Baxwbakwalanuksiwé, the Cannibal-at-the-North-end-of-the-World, uses its long snapping beak to crack open the skulls of men to eat their brains or pluck out their eyeballs. Ewww!
I’m glad that the bird now has a disc in its beak to change the reference to the Raven stealing the sun, a story of how the Raven was once a snow-white bird who fell in love with the daughter of Gray Eagle, the guardian of the sun, moon and stars, and fresh water. Gray Eagle hated people and kept these treasures hidden. Raven stole the sun, moon and stars, and water hanging on the side of Gray Eagle’s lodge, along with a brand of fire. Raven flew with them up through the lodge’s smoke hole. He then hung the sun up in the sky along with the moon and stars, and dropped the water on the land. The fire brand’s smoke turned the Raven black and eventually burned his bill, so he dropped it into rocks, which is why if you strike two stones together sparks of fire fly out. I’m not sure of the physics in that tale, but I sure like it better than skull-cracking cannibal birds!
Beacon Hill Park
We eventually reached the tiny plot of roses at Beacon Hill Park. They paled in comparison to the roses at the Empress, but the park did feature many beautiful plants, including Tibouchinas, pink stunners, and a fascinating Red Tiger flowering maple. It isn’t actually a maple, but this Abutilon’s leaves resemble that of a maple. It has yellow flowers with deep red veining that remind me of Chinese lanterns, complete with pull cord.
Walking back towards our hotel, we passed through the park’s open grassy hilltop, lovely ponds, and majestic trees. It is truly a wonderful urban park.
We were hungry by the time we returned to the hotel area, so we had a tasty lunch at The Old Spaghetti Factory.
Later that afternoon, Wendy relaxed at the hotel while I walked over to the Old Victoria Custom House. This striking three-story building was completed in 1875. I like its bright red brick walls with stone corner quoins. One of the houses on our cul-de-sac acquired some weird fake stone corner quoins a few years back, and let’s just say that the Custom House pulls off the look much better.
I didn’t just walk over there to see the Custom House, however. I walked out on a nearby float to view the seaplanes, boats, and kayakers. I watched with some amusement as tourists made their way across the harbour, some struggling to dock their kayak at a rental shop.
Back in July 1998 my friend Wendy Robinson, who at that time taught science at Bartlesville High and was known as Miss R., treated me to a birthday ride on an old de Havilland seaplane out of Victoria’s Inner Harbour. It was great fun to take off and land on the water. I’d always wanted to fly in a seaplane since reading The Viking Symbol Mysteryas a young boy. In that tale the Hardy Boys visited the Canadian Northwest Territories and learned to fly a seaplane. I’m not sure if it was a DHC-2 Beaver or a DHC-3 Otter that Miss R. and I rode in, but I do know one thing: it sure was noisy! I don’t plan to ever fly in one again, but it was a worthwhile experience.
My bride and I had a fun first day in Victoria, to be followed the next day with a trip to the Victoria Art Gallery and Butchart Gardens.
It was time for us to leave the country. In 1998 I first visited Victoria, the capital of British Columbia, Canada. I enjoyed it so much that I revisited Victoria in both 2005 and 2008. It was time to share that beautiful city with my bride, who had never before ventured outside of the United States of America.
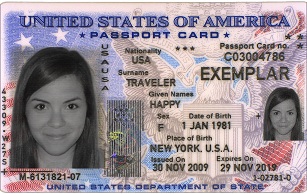
Passport Cards are MUCH cheaper than full-fledged Passport Books
Visiting Canada used to only require a driver’s license, but now requires a full-fledged Passport Book or the cheaper Passport Card. I’ve previously had Passport Books, but haven’t had a valid passport since 2008. One of those books now costs $110. Yikes! Happily, it is only $30 for a Passport Card which works for sea and land travel to and from Canada and Mexico.
We would be returning home at the end of our Canadian visit, so I researched the cost of flying home from the airport in Victoria, BC, which would require Passport Books, versus taking the car ferry back to the U.S. and flying home from the big Sea-Tac airport. Even with the added cost of a ferry ride, gasoline, and a night in a Sea-Tac hotel room, it was still cheaper to go the ferry route with Passport Cards than to fly out of Victoria using a Passport Book.
So, several months before our wedding, Wendy and I dutifully appeared at the post office in Bartlesville with our Passport Card applications, birth certificates, and other documents. We sat for photos, and the helpful clerk verified everything was in order and took our money. We were thrilled when our cards arrived in the mail a few weeks later. Wendy’s card is in her maiden name and worked fine for the honeymoon; she can get an updated card with her married name on it for free if she applies within a year of the issuance of the card, sending in one of our certified copies of our marriage license. One thing Wendy will tell you is that it is a “major pain in the rear” to change your name with the many and varied services we use in the modern world.
Forks
We had breakfast at the Kalaloch Lodge and checked out, heading north up US 101 past Ruby Beach for the two-hour ninety-mile drive around the peninsula to Port Angeles, where we had booked passage on the car ferry M.V. Coho for a late afternoon passage to Victoria.
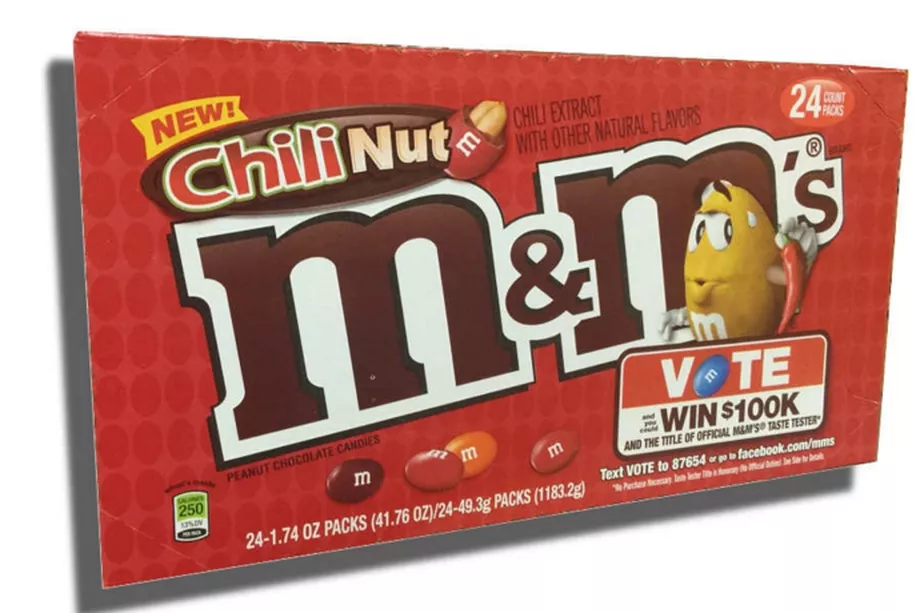
Wendy loved Chili Nut M&Ms
We made a pit stop at Forks, and Wendy was thrilled to find some Chili Nut M&Ms at the service station. She’d been looking for them in vain in Oklahoma after Mars Candies asked consumers to try out and vote on Honey Nut, Coffee Nut, and Chili Nut flavors between March and June 2016. Wendy loved Chili Nut, but in the end Coffee Nut won a spot on retail shelves over its competitors. After the honeymoon, she found at a Walgreens an intact display with 40 bags of the Chili Nut M&Ms, and she bought them all! Wendy keeps them hermetically sealed in a jar in our pantry, rationing them out for special occasions.
La Poel
Another happy find along our journey to Port Angeles came after we drove eastward along the Sol Duc river valley (Sol Duc means “sparkling waters” in Quileute). Highway 101 left the Sol Duc behind to run along the southern shore of Lake Crescent, which was formed by glaciers in the last Ice Age and a landslide 8,000 years ago which dammed Indian Creek. The lake has brilliant blue waters with very little nitrogen.
The road twisted and rippled along the lake shore. A delivery truck was riding our tail on the curves of the narrow highway, so I decided to escape from that rude driver by taking a turn-off. Our rental Camry stumbled into the La Poel day use area, which turned out to be a delightful and much-needed respite. We followed a narrow drive past picnic tables through towering trees and pulled into a spot with a view of the lake to take a break.
The area was simply lovely, with trees shrouded in moss. Ferns and mushrooms grew in the shade. Wendy looked for rocks and photographed tiny flowers. She made a neat find: a rock with a large golden fleck. This short time spent in the woods by the lake on an overcast day is one of those little moments from our honeymoon that has stuck with me. I go back there in my mind and remember how peaceful and calming that pull-off was after a long drive on the two-lane highway around the peninsula. Some day I want to return to stay and hike at Crescent Lake.
Port Angeles
First Street Haven
In 1791 the Spanish explorer Francisco de Eliza came across a natural harbor on the south shore of the Strait of Juan de Fuca. He named the harbor Puerto de Nuestra Señora de los Ángeles (Port of Our Lady of the Angels). It was protected by a three-mile-long sand spit, now called Ediz Hook, from the ocean swells coming down the strait. That harbor is now home to the M.V. Coho ferry run by the Black Ball Ferry Line. It can carry up to 1,000 passengers and 115 vehicles. I had booked us round-trip tickets to and from Victoria for $162.
Reaching Port Angeles, I drove us down to the ferry dock to scout out how best to access it a few hours later. Then we drove a couple of blocks inland to park downtown near the First Street Haven Restaurant. TripAdvisor had once again come through, this time with a little shop that is renowned for its cinnamon rolls, which of course were sold out by the time we arrived for a late lunch. Wendy had a great turkey sandwich with yummy cranberry cream cheese.
We walked over to the spraying water of the Conrad Dyer Memorial Fountain, which was surrounded by flowerbeds and walls with a painted mural. I couldn’t find anything online to figure out who Conrad Dyer was, but I did find out that the Olympic Visions mural of Olympic National Park was originally painted on wood by Tim Quinn, a cartoonist for the Sequim Gazette. That mural was completed in 1999, but volunteers applied improper sealant and it deteriorated. In 2010 Quinn had repainted half of the mural directly onto the concrete walls around the fountain when he passed away, so the renewal was completed by Jackson Smart, a friend of Quinn, with help from Dani LaBlond. Like Quinn, Smart put names of people he met while working on the mural into the painting. Wendy had fun spotting various animals in the mural: a raccoon, mountain lion, wolf, elk, and more. I noticed Teddy Roosevelt, the Conservation President, blended into one of the clouds.
We both admired the classic look of the Clallam County Courthouse, built in 1914-15. It interested me to learn that the enormous clock was not originally meant for that building. The clock was manufactured in Boston in 1880 and shipped around Cape Horn to Seattle, where it languished for almost 30 years before the Clallam County Courthouse architect incorporated it into the new building.
Finally it was time for our ferry ride. We got in line, presented our documentation, and I drove our Camry onto the cramped vehicle deck. We squeezed out to climb the stairs to the passenger decks.
Wendy had been dreading the ferry ride. She took some Dramamine beforehand, but still found the initial crossing made her uncomfortable as the huge ferry tilted back and forth. We had opted to sit in the middle of the boat to minimize the rocking, but from there we could not see the waters of the strait through the windows.
Wendy later read that seeing the horizon would make the trip more comfortable, so on the return trip she doubled up on the Dramamine and we sat in the solarium up top where she could see the water. That trip turned out to be much longer, with the boat diverting to dodge rough water, and the ferry rocked and rolled much more than it had on the first trip. Thankfully the strategy of using more Dramamine and sitting where she could see the water, looking out from the side of the boat perpendicular to its forward motion, worked like a charm. Wendy had no trouble on the rougher and longer return trip.
The Magnolia
We docked in Victoria and drove a few blocks to a parking garage that was less than 1/5 mile from our hotel, unloaded our luggage and hoofed it over to The Magnolia Hotel & Spa.
Where to stay in Victoria had been the most important lodging decision for the honeymoon. I knew we’d be staying there for four nights, it would be the last big stay on our honeymoon, and ideally should be within walking distance of the Inner Harbour and all of its attractions. None of the hotels I’d stayed in previously would be appropriate, so I spent a lot of time researching possibilities. I knew to stay away from the Fairmont Empress Hotel, which is the largest and most prestigious hotel of the Inner Harbour; the premium on its rooms was outrageous, and parts of that venerable edifice actually look rather worn. I also hoped to avoid the expense and bother of valet parking.
The room was everything I’d hoped for. It was the one of nicest hotel rooms Wendy and I have ever stayed in. We were surprised to find waiting for us a bottle of champagne chilling in an ice bucket, along with chocolates and a card. A group of our neighbors back in Bartlesville had teamed up and arranged that for us along with a very generous hotel credit. It literally pays to be a good neighbor. Or perhaps I mean neighbour, since we were then in British Columbia.
We pulled back the curtains to see the Empress Hotel and the copper dome on the Parliament building bathed in the light of the Golden Hour. Wendy, in awe, stared out at the Canadian flag flying from the roof of the Union Club next door, which drove home that we were in a foreign land.
The next day we’d begin exploring that beautiful country, visiting the Inner Harbour Causeway and Beacon Hill Park.
We spent two nights at the Kalaloch Lodge on the shore of the Pacific Ocean in Olympic National Park. I’d been out on the Olympic Peninsula of Washington State before, but only to visit Hurricane Ridge and take the ferry across the Strait of Juan de Fuca from Port Angeles to Victoria, British Columbia. This time I opted for us to drive over to the Pacific shore because our friend and colleague Gary Layman had recommended that we visit Ruby Beach.
Kalaloch Lodge
In planning the honeymoon trip, I had been looking for fancy accommodations and hit upon Kalaloch Lodge. I booked its largest room, the Kalaloch Room, which was originally a bar and is now a very spacious room with a panoramic view of Kalaloch Creek winding its way to join with the Pacific.
One thing we learned when we reached the lodge was how to pronounce the name: CLAY-lock. The Quinault native Americans named the area, which translates to “good place to land” as it was a safe place to land between the Quinault and Hoh Rivers.
Another thing we learned is that the fanciest rooms can have their shortcomings. The room was indeed very large with a great view. I loved gazing out at three windblown cedars near the Pacific. The room had its own wrap-around balcony and dedicated interior and exterior stairs. But the bathroom was another matter.
An elevated area that was once a stage now had a whirlpool tub, shower, sink, and cramped toilet room. The toilet room was the problem…it stank! The longer you were in there with the door shut, the more your nose itched with the unwelcome smell of old urine. Our attempts to clean the area did not help. I should have raised more of a stink about it, haha, but we just held our noses. First the smelly carpet in Astoria and now this. Thankfully that was the last issue we encountered with our honeymoon accommodations, and things would improve a lot when we arrived in Canada a couple of days later.
Coffee Time
One thing Wendy is adamant about is having coffee to start and end her day. Travel complicates that, and here is her take on the struggle for a good cup of coffee moving from one hotel to another.
Wendy on Hotel Coffee
The types of coffee machines varied as we hopped from hotel to hotel on this trip. Many hotels like Best Western have the one or two cup drip machines. You get a tea-bag-like packet with coffee in it and pop it into the tray, add water, and let it drip. That’s the norm. At home I use a drip coffee maker, so that is fine by me.
Best Western coffee maker
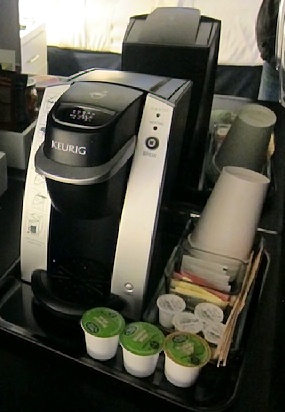
At some of the hotels, they have those Keurig coffee makers. They make good coffee, a little strong, but still good. Instead of a filter or tea-bag-like packet, you get a plastic cup full of ground coffee with foil covering the top. Pop it into the Keurig (which punctures the plastic cup), and add water. Then wait. Forever.
Keurig Coffee Maker
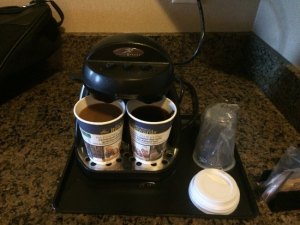
At Kalaloch Lodge, we had a regular drip coffee maker. Relieved, I got out my filters and little sandwich bags full of the “good stuff” (½ Walmart decaf and ½ Dunkin Donuts regular). When I opened up the coffee maker to put in a filter, the filter basket was CAKED in brown coffee gunk. It appeared it had never been cleaned. So I worked with my Q-Tips to clean out every single crevice. When that was all clean, I pondered what kind of microorganisms might be growing in the water reservoir, which I could not readily get to. Completely disgusted, I decided not to use the coffee maker.
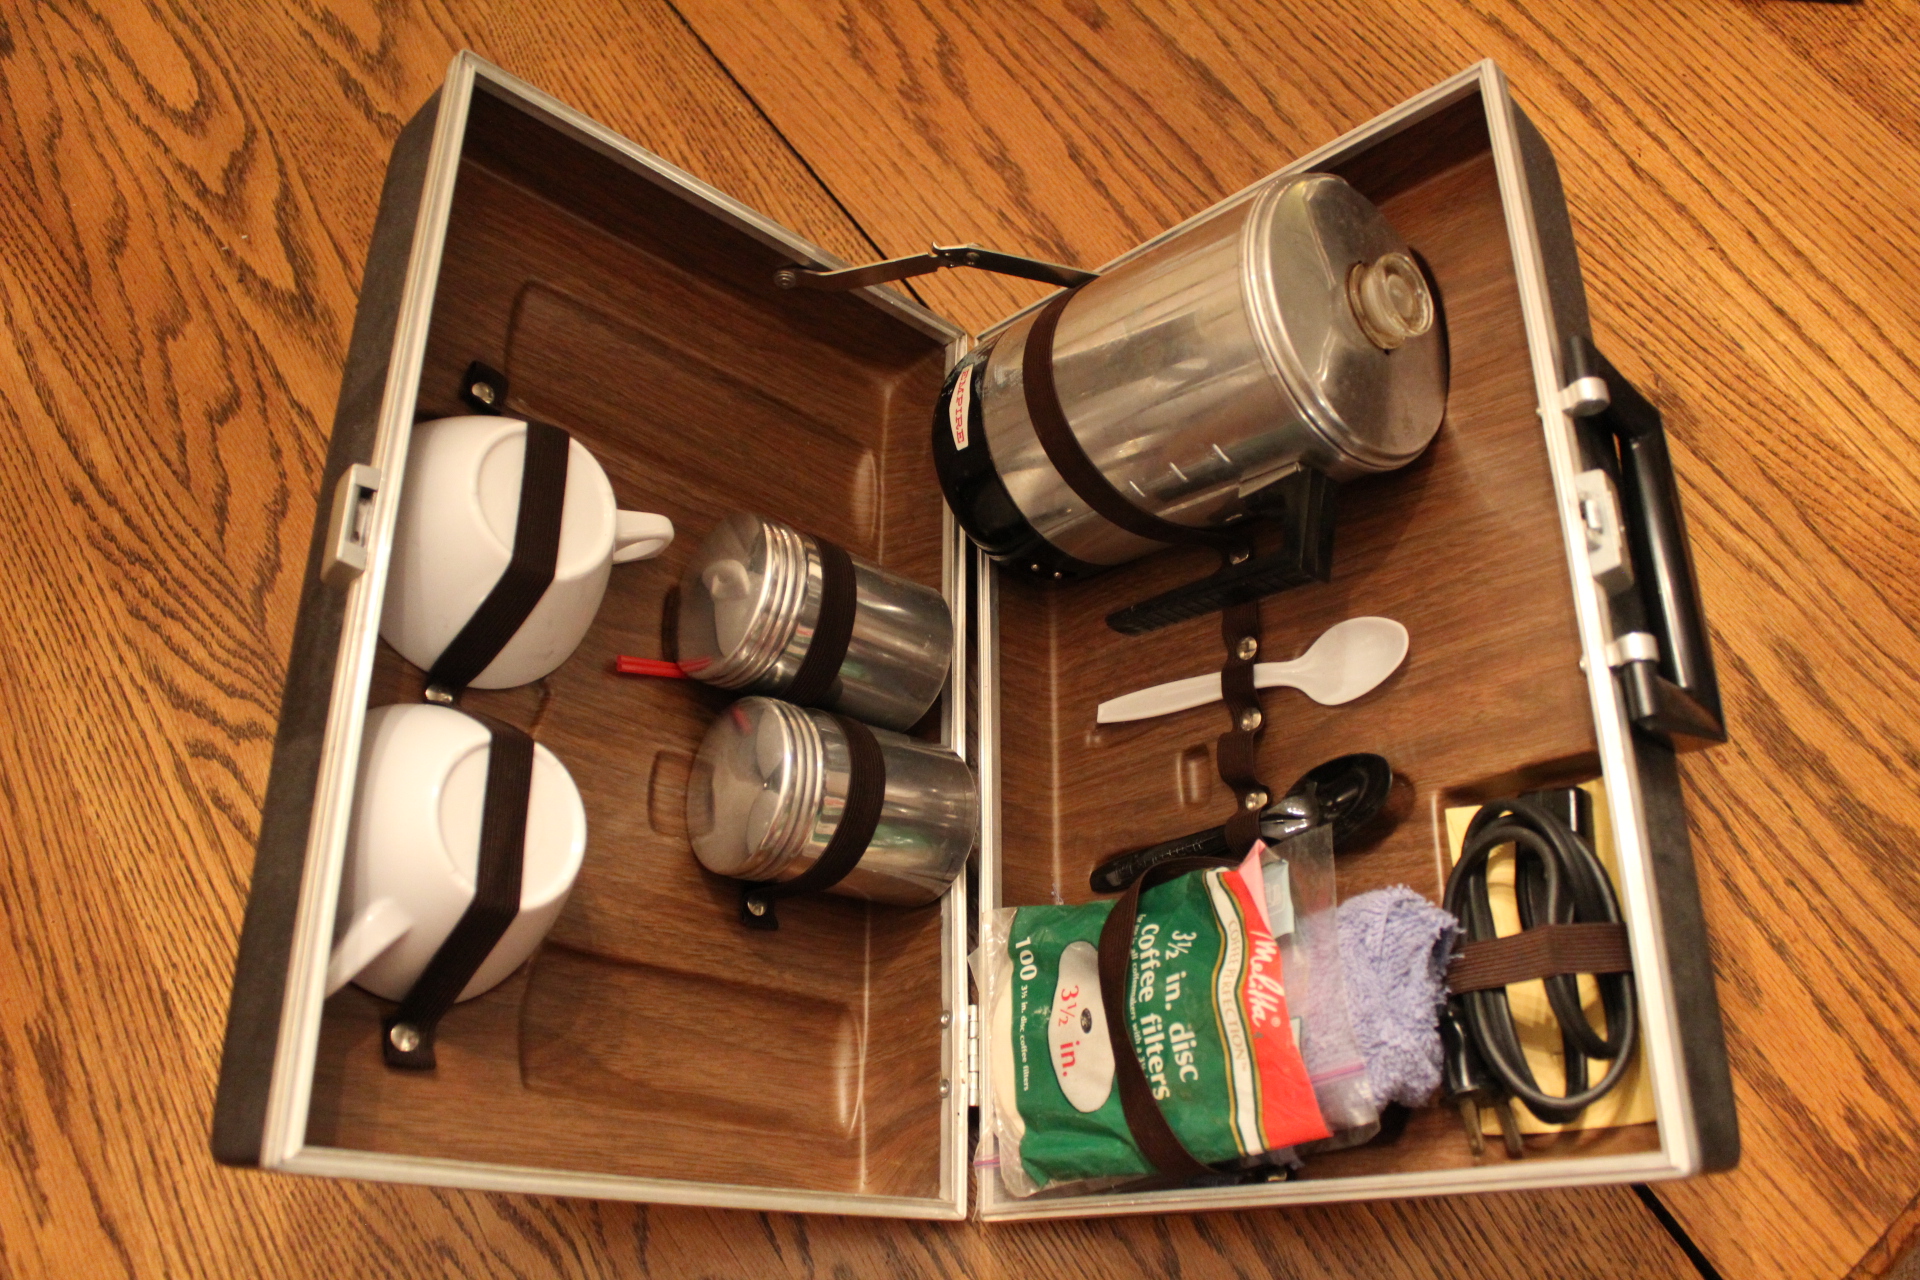
Usually I am prepared for a situation like that. Granger’s father gave me a portable coffee kit with an electric percolator and all of the accoutrements. That kit is usually my backup on every trip. Unfortunately, due to airplane weight restrictions, I wasn’t able to bring it on the honeymoon. But I couldn’t just go without my coffee!
The Backup Coffee Kit
Since I was raised to “rig” things up when they don’t work, I came up with a solution. I took a filter, filled it with coffee, and then tied it up tea-bag fashion with the tie from a trash bag. I boiled a cup of water in the microwave and then dipped the bag into the boiling water. Voilà! Coffee time!
Later, once we got to Canada, I would discover yet another coffee making device – Nespresso. It’s pretty fancy and high-tech. Coffee delivery systems are evolving, but just give me a drip coffee maker any day. Keep it simple.
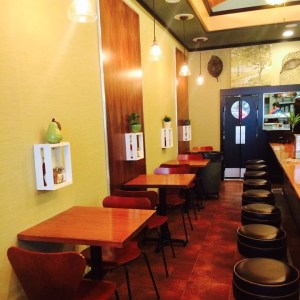
The room certainly had its shortcomings on cleanliness, but the lodge’s Creekside Restaurant was splendid. We ate there for all of our meals. It had an attractive seating area indoors (we avoided the patio, although it looked pleasant), and the food was great. All of our servers were interesting, helpful, and friendly.
Ruby Beach
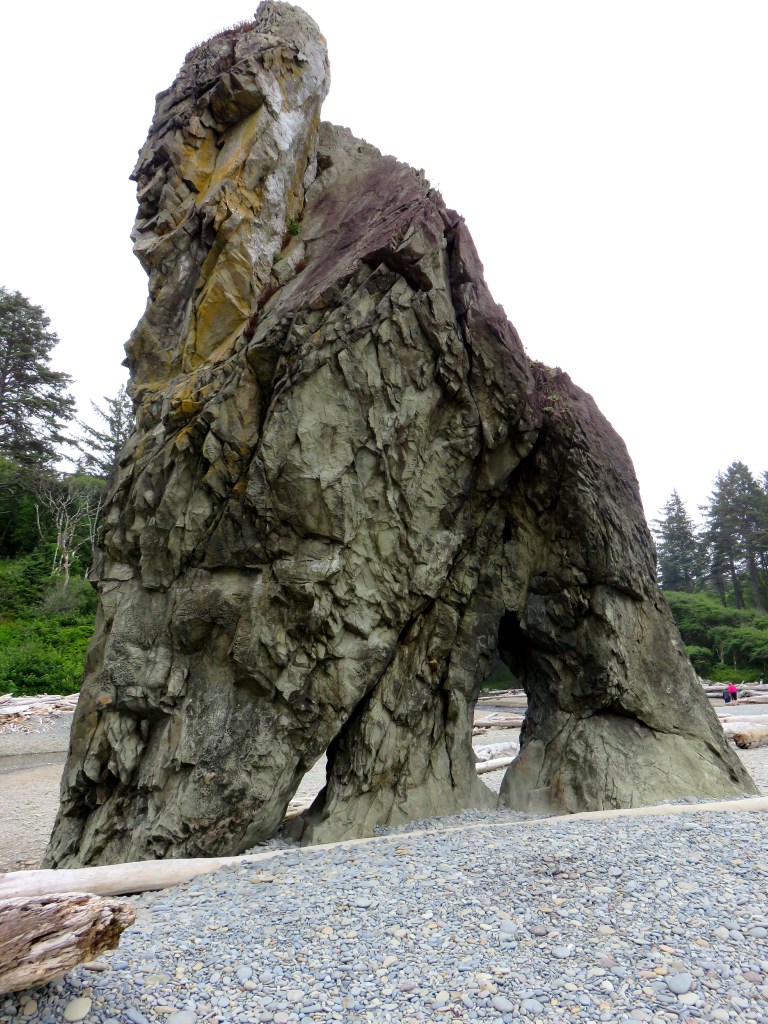
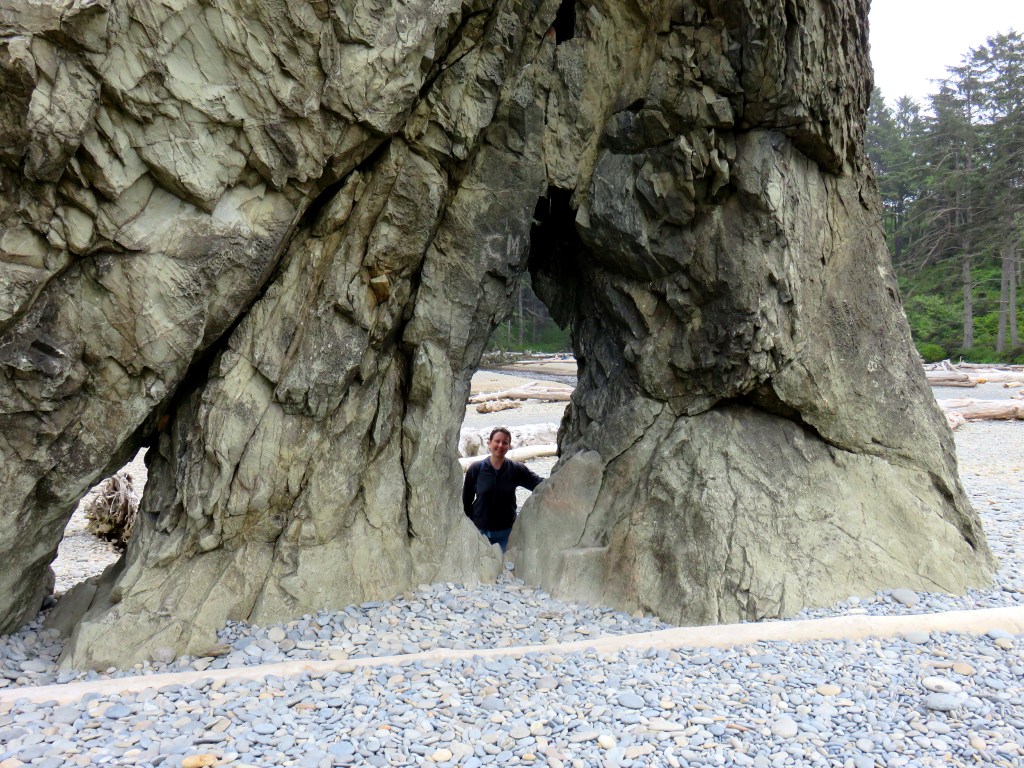
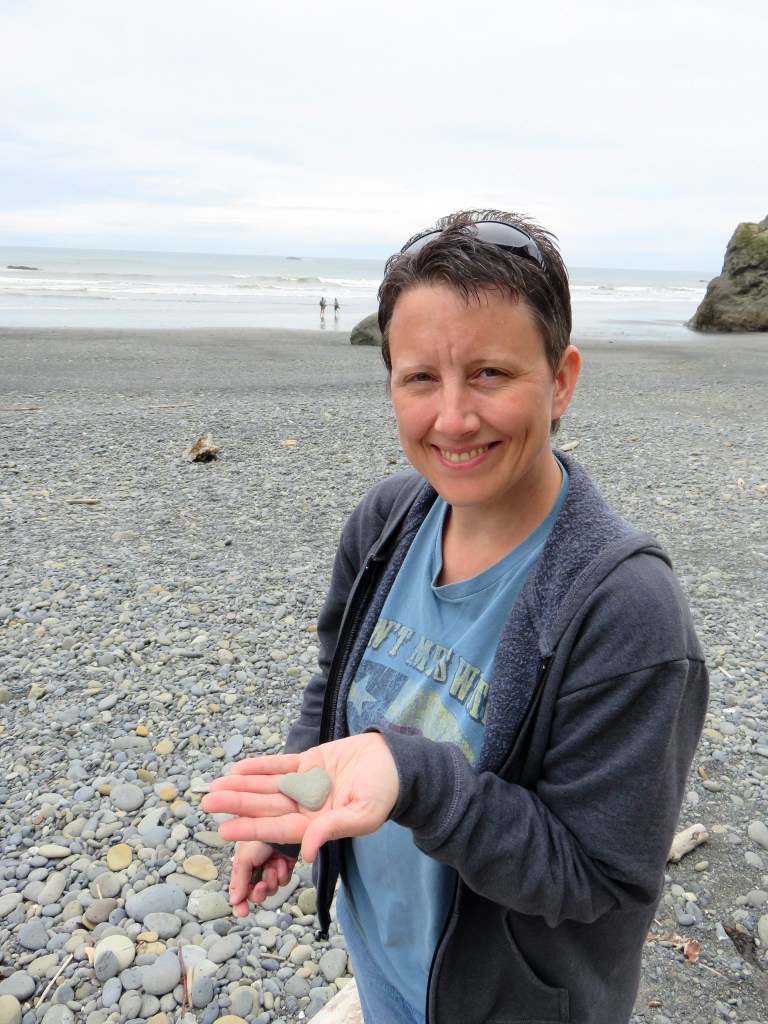
The whole point of our stay at Kalaloch, however, was to visit Ruby Beach. Named after the ruby-like crystals in its sand, the beach was a 7.5 mile drive north on 101 to a lot filled with cars and a trail winding its way down to the ocean. A panoramic view through the last stand of trees revealed an initial beach area covered in driftwood, with a group of sea stacks.
A closer look revealed people roaming amidst sea stacks three or four times their height, with Abbey Island looming in the background with its steep rocky cliffs. We would eventually roam over to it during our exploration of the beach.
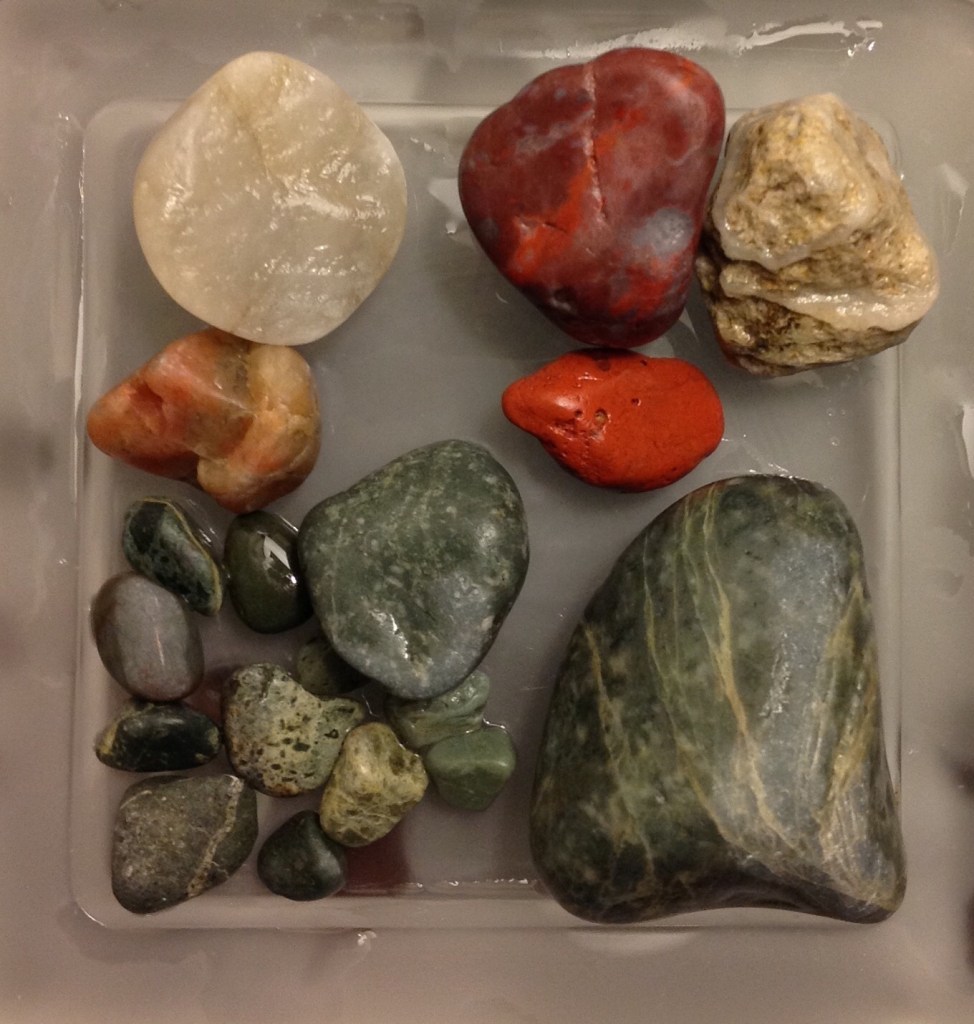
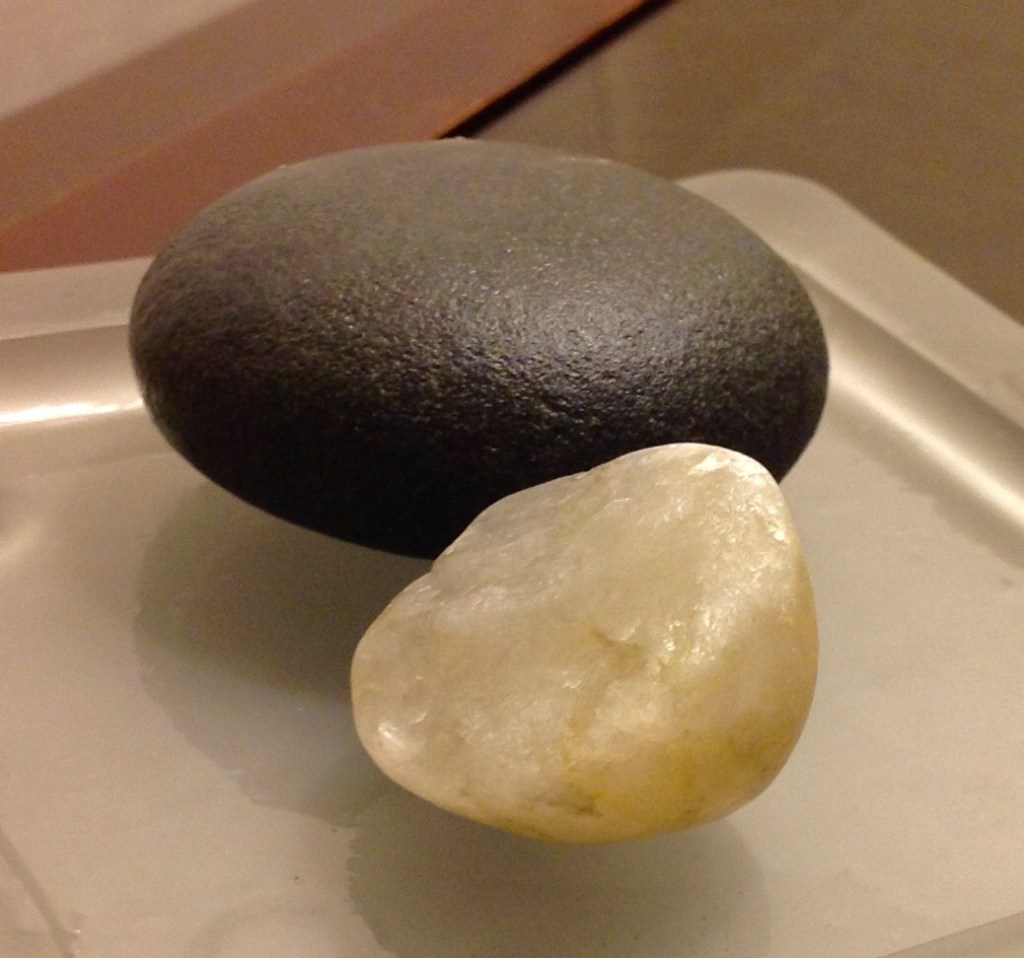
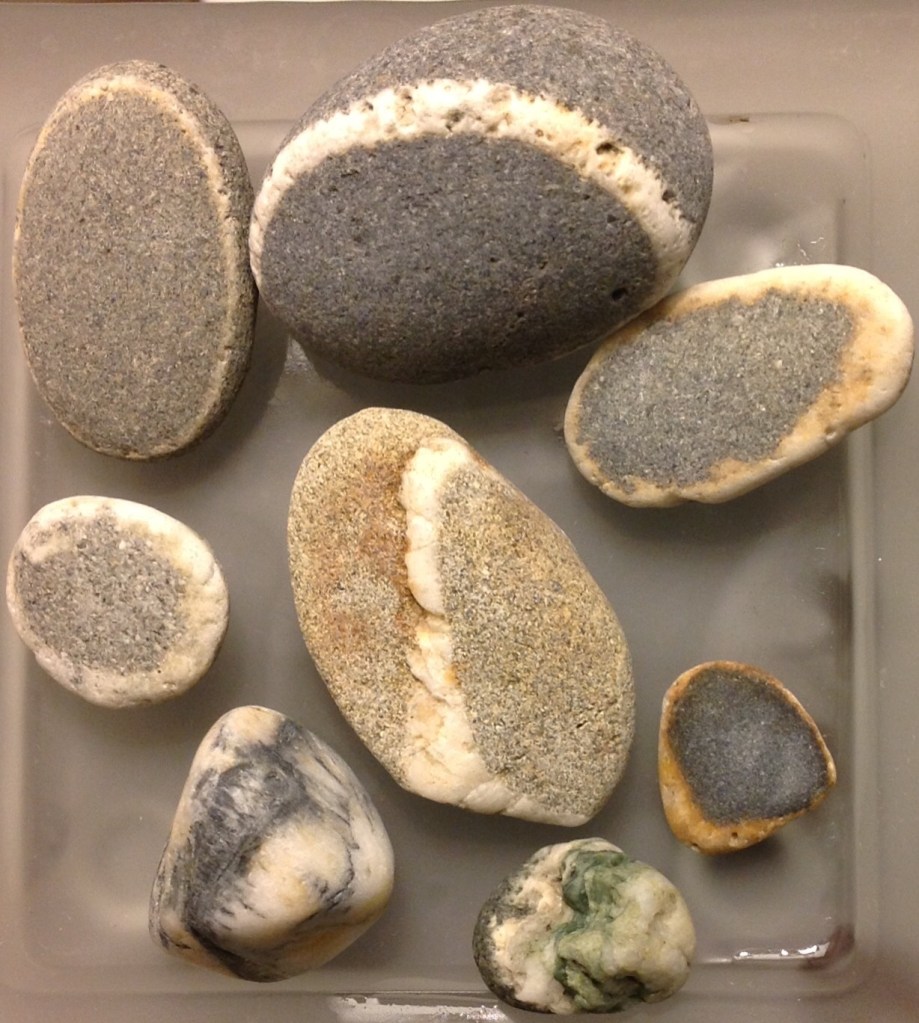
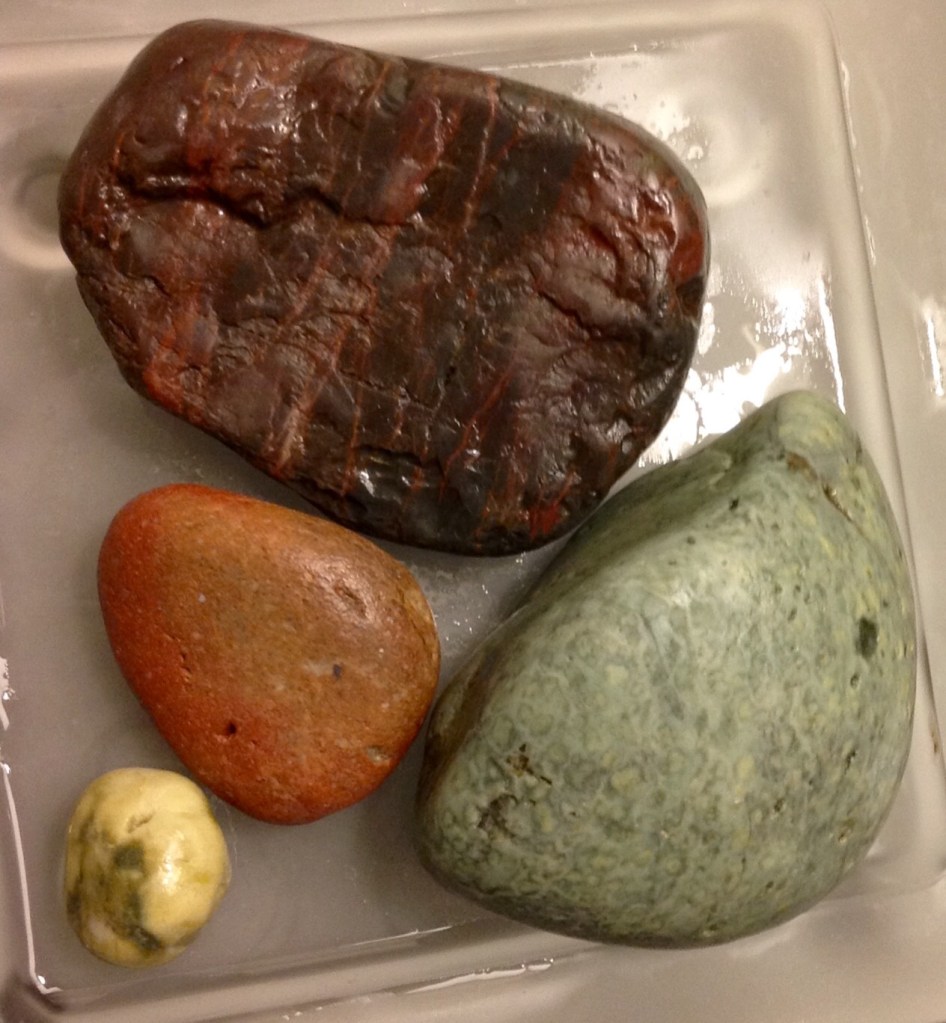
One of my green stones made it into the collection of rocks Wendy later photographed, delighting in the many different and beautiful ones she collected at the beach. The first stone she collected at the beach was a large red one which resembled an actual human heart.
Abbey Island
We left the sea stacks behind and made our way over to Abbey Island. Early settlers to the area thought that the imposing block of an island resembled a cathedral. Tidewater pools around its base had sea anemones, both submerged and rising up out of the tide.
Some enterprising visitors had built differentdriftwoodstructures on the rocky beach. Destruction Island was visible four miles southwest of Ruby Beach, with its lighthouse made clearer by the superzoom camera. You might expect the name refers to shipwrecks, but I had read about how a group of Spanish sailors was massacred there in 1775 by the local Quinault Indians, lending it the name Isla de Dolores (Island of Sorrows), and twelve years later an English fur trading ship had a party leaving this island meet a similar fate on the Hoh River, leading its captain to name it the Destruction River and for that name to then attach itself to the island. The lighthouse was completed there in 1891 and automated in 1968, but is no longer in operation, and its light is now in the Westport Maritime Museum.
Last Night in the States
We drove back south to Kalaloch Lodge. On a walk around the property, I admired a large bush of blue and purple hydrangeas. During dinner in the lodge restaurant the sun was sparkling off the ocean outside. This would be our last night in the United States for five days. The next day we would make our way to the north shore of the Olympic Peninsula to catch a ferry to Victoria Island in British Columbia, Canada.
When planning our honeymoon, I’d hoped to take Wendy up onto Mount Rainier for some hiking in the snow in July. Hence we stayed in Packwood, Washington to the south of the volcano, hoping to swing around southeast of Rainier National Park and visit its prime locations on our way to our next hotel, the Kalaloch Lodge on the Olympic Peninsula.
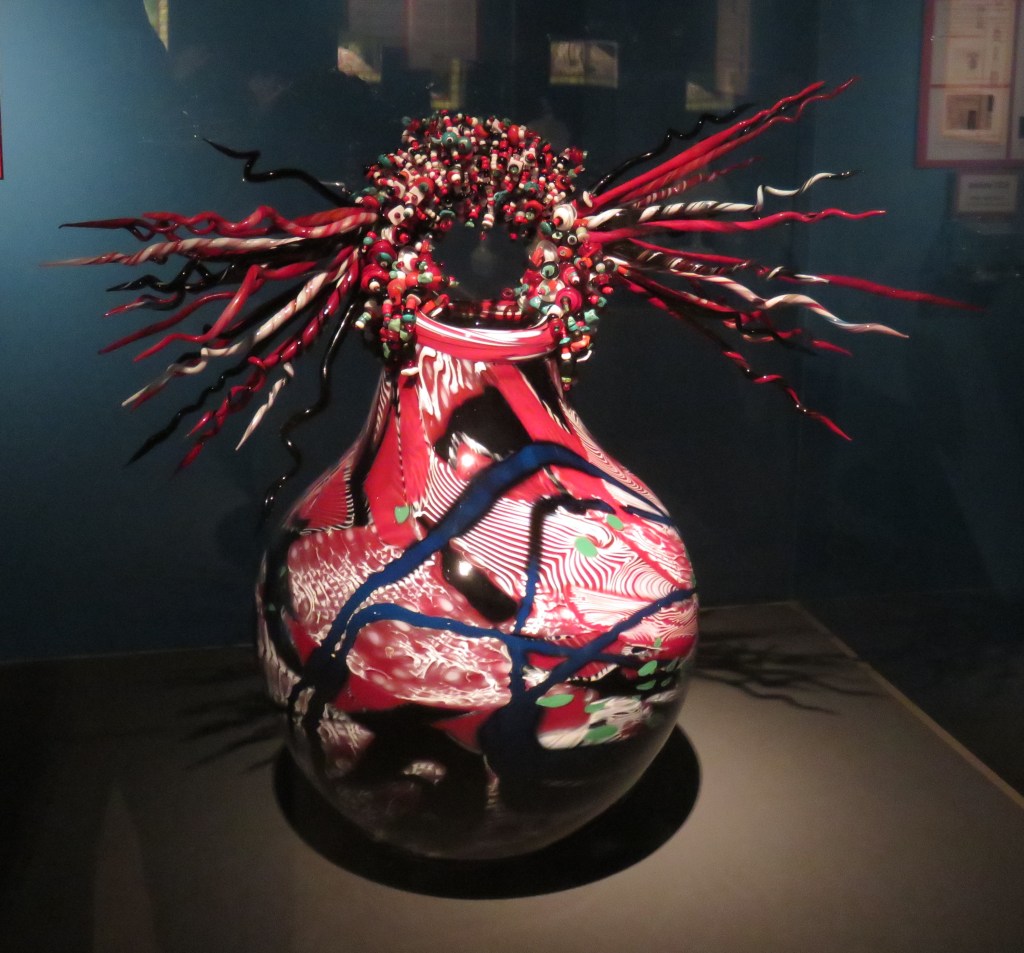
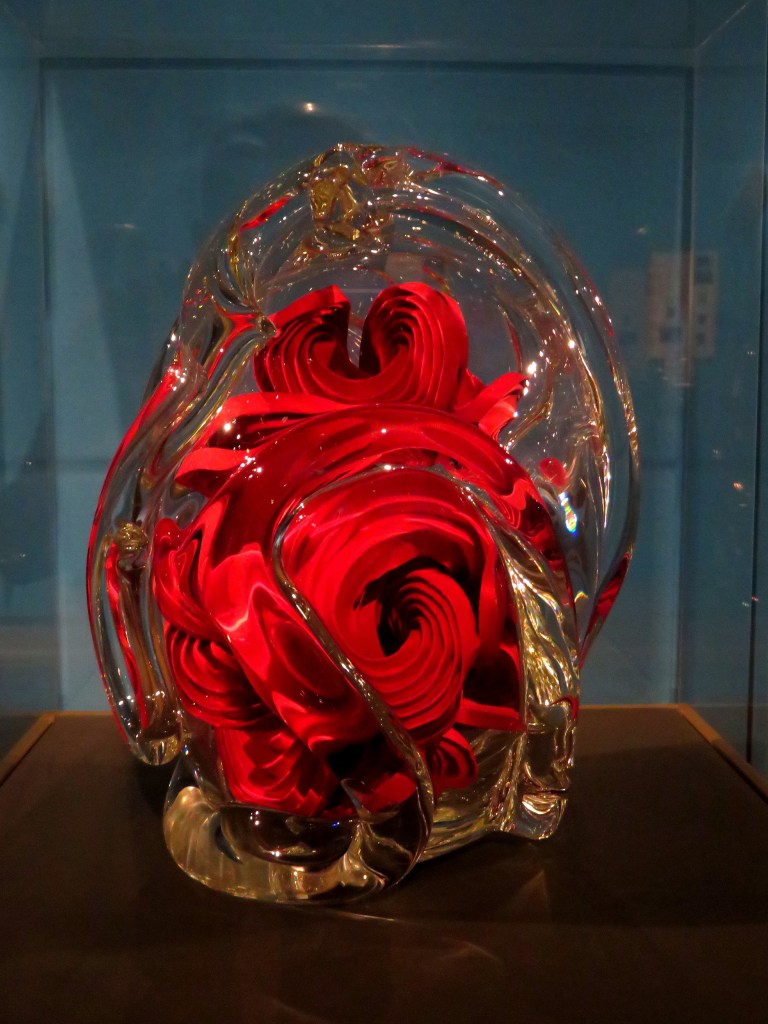
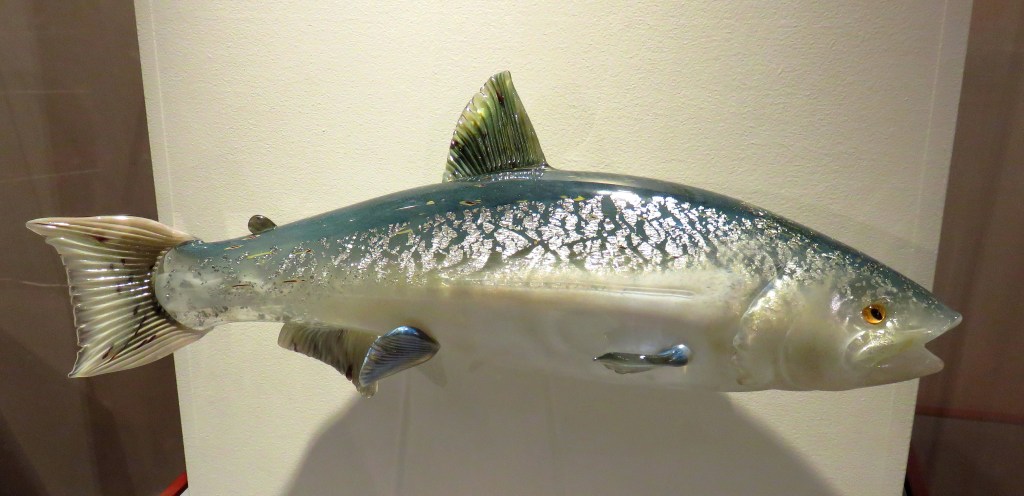
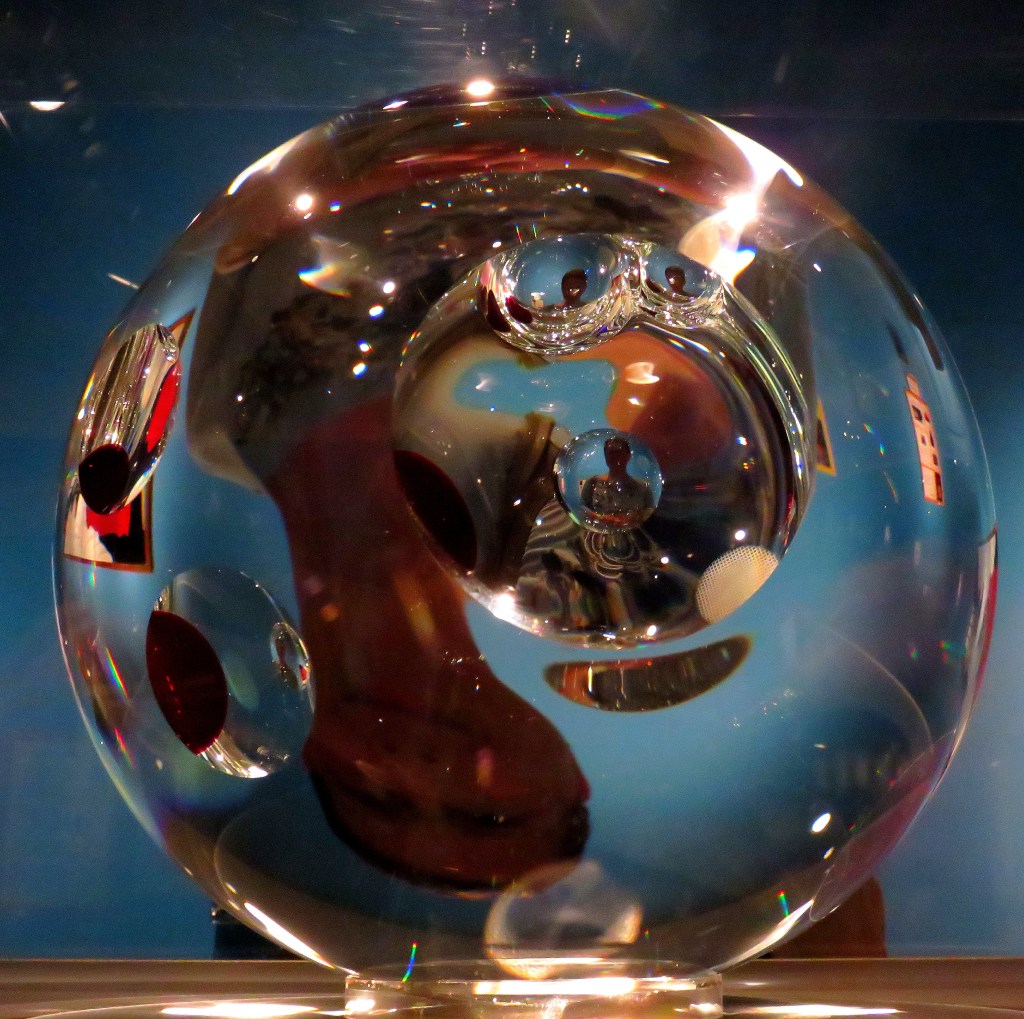
But the Paradise area of Rainier I like to visit averages 126 inches of rain each year, compared to Bartlesville’s average of 43 inches. So I knew that our itinerary, with only one open day to visit Rainier, was at risk of being rained out. Sure enough, it was cool and rainy when we awoke, and the Paradise area was forecast for rain all day. So it was time for Plan B: we’d visit Tacoma’s Museum of Glass to break up a 4.5 hour 240 mile drive to our next lodge, which was situated along the middle of the western shore of the Olympic Peninsula.
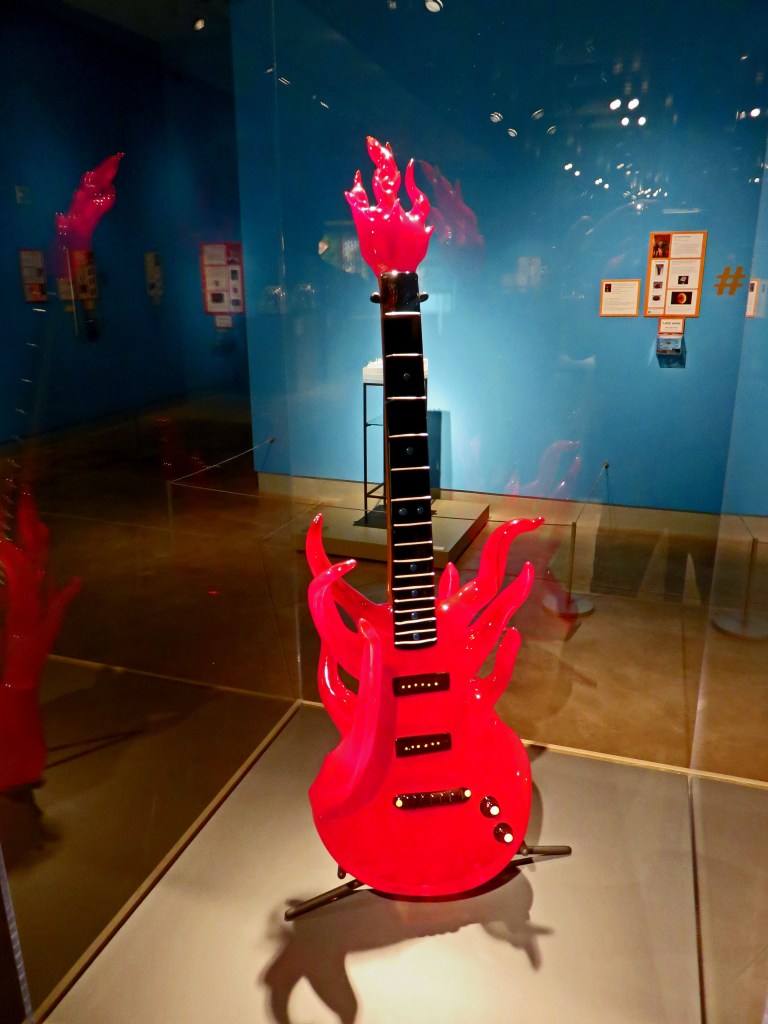
Small low clouds hugged the treetops as we drove west from Packwood to Morton and then north to Tacoma. We had to circle the Museum of Glass to search out a parking spot, landing on Pacific Avenue near the University of Washington, Tacoma. From there we used the marvelous Chihuly Bridge of Glass to walk across to the museum. That 500-foot-long pedestrian bridge has a 50-by-20-foot glass ceiling topped by 2,364 pieces from Dale Chihuly’s Seaform and Persian series.
Below us a flag display included a rainbow flag, reminding us that we were in the liberal coastal area of the Pacific Northwest. We entered the museum by climbing the steps around the metal cone which exhausts heat from the hot shop, where artists create new glass pieces.
We exited the museum around 4:30 p.m. and drove an hour west to the state capital of Olympia, where we found a delicious dinner downtown at Ramblin’ Jacks, one of the best meals on our honeymoon. Wendy’s chicken fried chicken was fluffy, crunchy, and juicy, with mashed potatoes as good as a mother could make. My French Dip was also juicy and delicious.
After a pit stop at a Fred Meyer in Tumwater, we headed west on highway 8 to Montesano, where we headed northwest on the scenic Wynoochee Valley, Wishkah, Hoquaim Roads to intersect coastal highway 101 for the drive north to Kalaloch Lodge. We made another pit stop at the tiny grocery in Humptulips, and I just had to know the etymology of that peculiar name. Humptulips is a word from the Salish native Americans and means “hard to pole” (no, I’m not kidding) because of the difficulty in poling canoes along the nearby eponymous river.
We were grateful to arrive at Kalaloch Lodge that night, although even its largest and nicest room had some shortcomings. More on that in the next post, but thankfully a visit the next day to Ruby Beach would more than compensate.


