Mr. Fix-It Helps Make a Portable Dishwasher Permanent

February 2, 2014

I’ve written before of my attempts at home and car improvement, and in January I had two opportunities for such projects. I did one for the most part by myself, but the other was mostly done by John Henderson, the husband of Betty Henderson, who has been a teaching colleague of mine for the past 25 years. Betty and John are both generous folks, and when they purchased a new home with its own permanent dishwasher, they no longer needed their portable unit. Betty offered the unit to me, knowing that the old HotPoint unit in the galley kitchen at Meador Manor still worked but had odor problems. I am truly thankful she also offered John’s services in installing the new unit; this Mr. Fix-It needed the help.

That Stinking Dishwasher

I did a very minor repair to the old HotPoint dishwasher when I bought my home twenty years ago; the racks were bulging with rust and I was able to purchase new ones. Some years ago I began having odor problems with the kitchen sink and slowly realized it was not just the garbage disposal but water caught in the drain line from the dishwasher. That line had been strung up into an inverted U where it connected to the garbage disposal, but it had been hung from flexible wire which had finally given way. I strung the hose back up by tying it to a water line. This made the odor less horrible, but I still had to run the dishwasher half empty sometimes because it just stunk up the place.

So I was hopeful the new unit would have better drainage, but also trepidatious about what it might take to get a portable unit to install under my kitchen counter. That concern was justified; the installation took many hours as we puzzled through it, and wasn’t finalized until I received a few parts some days later.

Removing the Old Unit

Removing the old dishwasher (click image for slideshow)

I used a YouTube video to guide me in removing the old HotPoint unit. It was right on point, reminding me to unplug the unit from the electrical outlet under the sink. Then I disconnected the drain line from the garbage disposal, removed the low panel below the dishwasher door, and disconnected the copper hot water line and the rubber drain line underneath the dishwasher.

Next I removed the hangers connecting the dishwasher to the underside of the kitchen counter, and lowered the leveling legs on the front of the dishwasher to provide clearance. I put a big piece of cardboard down on the floor and pulled the old unit out from the cabinetry. Once I could reach them, I lowered the leveling legs on the back of the unit, and pulled it all of the way out. I drug it out into the garage to await a spring clean-up day when the city will hopefully haul off old appliances.

It was fun to make a couple of discoveries in the slot where the dishwasher had been. The installer had left a screwdriver under it years ago, and there was also some of the old original sheet vinyl kitchen flooring under there. Wow – my house was built in 1981 and that original floor had a definite 1970s vibe.  It had been replaced with newer sheet vinyl by 1994, and a few years ago I pulled that out and put in self-stick tiles. They gap a bit these days, but they still look a lot better than the sheet vinyl did.

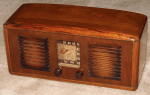
Stripping the Portable Unit of its Cover and Base Frame

The new portable dishwasher, stripped of its coverings

John and Betty arrived and we unloaded the new portable unit, made by Whirlpool. I helped John remove the wood top and outer cabinet, and he cut the drain and feeder hoses off the connector which fitted them to a sink for portable use.  He said his father had installed a portable dishwasher into a house before, so he knew it could be done.

I was glad to see a nice tall inverted U for the dishwasher drain hose, built right into the side of the unit, which would keep water from backflowing. A permanent dishwasher does not use a base frame and counterweight, instead resting on leveling legs and using hangers to secure it to the countertop.

We took the unit off the base frame, but found there were only leveling legs on the front of the portable unit; the back end had slots where some sort of legs or supports might attach, but they were absent. When shoved under the counter, there was now a big gap between the top of the unit and the countertop.

John called his father to see what he had done with the other portable dishwasher back in the day, and he said he had left it in its case with the counterweight. So we reattached the base frame and counterweight. I pulled off the casters and John snipped large holes in the metal cover to allow the drain and feeder hoses to pass through the right side so they could go through into the kitchen sink cabinet on the right side.

But, alas, the portable dishwasher on its frame and in its cabinet would not fit under the counter anymore, even with the top removed.  We were truly chagrined when we found that even when sitting on its base frame without the cover, it was still too tall to fit into the slot beneath the counter.  Now what?

Looking for Help

Whirlpool’s attachment for the top front of their dishwashers

I tried finding information on the Whirlpool website about converting a portable dishwasher for permanent installation, but only found an expensive conversion kit which I was uncertain would work on our unit.  So we decamped to Lowe’s to see if they could help. Their Whirlpool catalog showed an undercounter mounting kit, but again we couldn’t tell if it would truly work with our unit.

Then we went to Teco appliances, where the Hendersons bought the unit a few years ago. They couldn’t help regarding the lack of back legs, but I noticed their regular Whirlpool dishwashers on display, of similar design to the portable unit, had some front hangers that looked like they would work with our unit. It had no hangers, but did have two slots in the metal where hangers might fit.

So Teco ordered two of the hangers, apologizing that because the part was not a commonly needed item, they could only order it for $7 each as part of an assembly, which is of course a huge markup. I did not care about that, wanting to get the unit bolted to the countertop without devising a hanger of my own making.

Building A New Base

Homemade base for the dishwasher

So we now would have a way to connect the dishwasher to the countertop, but needed to lift it without using its own frame. John measured the cabinet and the dishwasher and decided we could buy a piece of plywood of appropriate thickness, cut it to fit, and screw the dishwasher and counterweight to that wood so the unit would slide into the slot and be at the right height.

So we returned to Lowe’s, had the wood cut, and bought screws. We also bought some new connectors to allow us to extend the dishwasher drain hose to reach the garbage disposal and also connect its water line to the copper line in the cabinet. Back at the Manor, John drilled holes in the metal and plastic edges of the dishwasher’s bottom edge so we could screw it into the wood, struggling because I only had very old drill bits at home and some were too dull to cut through the metal. But he found a decent bit and John was able to connect the dishwasher and the counterweight to the new plywood base.

We got the unit inserted and it was just about right, with the top resting close to the bottom of the countertop. The counterweight meant the unit would not start walking when used, so we hooked up the hoses and set it running. Success!

Final Touches

Hooking the drain line to the garbage disposal

John and Betty were finally able to leave, having invested much more time in getting rid of that portable dishwasher than they had to. I was still concerned about the drain line, given the long history of odors. Even though there was a tall inverted U for it in the side of the dishwasher, we had not elevated the drain hose above the inlet into the garbage disposal.

I figured disposal waste could backflow into the drain hose and get to stinking, so I bought some more hose and connectors and a pipe bracket and put a tall inverted U in the drain hose as it exited the garbage disposal, using the pipe bracket to hold it up high against the cabinet wall just under the sink. The double traps should keep the stink to a minimum.

A few days later the front hangers arrived at Teco. I picked them up and pulled out my dishwasher, inserted the hangers in the slots and bent a metal tab to hold them in place. Then I shoved the dishwasher back in as far as possible and used spare unused floor tiles to shim up the front of the unit until it was flush against the bottom of the counter. I screwed the hangers into the underside of the counter and then used a reciprocating saw to remove the part of the hangers sticking out beyond the edge of the counter.

Putting It to the Test

I’ve been steadily filling the unit with dirty dishes, but it has taken me awhile to fill it since the racks are so much better designed than the old HotPoint unit. They hold far more glasses up top and plates and bowls down below than the old unit did. They save room by putting the silverware in a door rack, which you can remove to empty it, although I find that harder to empty than the old unit’s silverware bucket.

When I finally had a full load, I popped in some detergent, and set it to work. The new unit says it reduces typical energy consumption by 40% but in doing so extends the time for a cycle to several hours. They recommend using the Rinse Aid to help compensate for less energy use in drying the dishes, although I ran the unit without it and it did fine. So far there has been zero odor from the unit or the sink, so this project was a definite win.

Completed project

Click here for a slideshow from this project

Posted in home repair | 1 Comment

A New Power Supply for Vector

February 1, 2014

I keep my desktop computers for extended periods, typically four to eight years.  So I buy high-end models that will last for a long time. But that means I must deal with typical fatigue failures. That is what I dealt with this week, when the power supply in my 2009 Velocity Micro Z35, which I call Vector, crapped out.

My low teacher salary means I keep cars for even longer periods – Princess the Toyota Camry is over 12 years old with over 225,000 miles on her.  I know water pumps wear out and timing belts must not be allowed to break, so I have them periodically replaced.  For a computer, the spinning hard drives have a limited lifespan, so I use a mirrored second hard drive in a RAID 1 setup so that I can recover quickly from a drive crash. But the next most common problem with an older computer is a burned-out power supply. That is too infrequent to keep a spare on hand, so when my desktop computer showed absolutely no sign of life last weekend, I knew it would stay out of commission for a few days.

My Velocity Micro system has lots of fans, both in the case and on internal components. That helps it stay cool, but also introduces a lot of dust into the unit, as does it placement on the floor next to my computer desk. My system had overheated and shut itself off a few times, which I temporarily fixed by cleaning it out and keeping an air gap on all sides. But I don’t have a regular cleaning schedule for the unit, and when the power supply went down and I opened up the unit, I discovered the fans and internals were covered in dust. That probably shortened the life of the supply.

The dead power supply taken out of Vector

I blew out all of the dust and began examining the many power cords from the 550 watt supply. It is a real monster to allow one to outfit the computer with lots of drives and powerful graphic cards, etc. My system didn’t use half of the supply cords, which were tucked away, and had some separate power line splices to hook multiple fans and drives up to a single power supply cord. But that still left several connections to pull apart:

  • 20-pin motherboard connector
  • 8-pin +12V workstation connector
  • 4-pin Molex connector for DVD/CD drive and fans
  • SATA connector for hard drives

Power supply connectors

I pulled all of those out and removed the old supply. I could buy a nice Antec supply of the same power with the various connectors on Amazon for $65 with 2nd-day Prime shipping, but my girlfriend, Wendy, knows how to save a dime and urged me to get a cheaper supply from TigerDirect. I opted for the Ultra LSP550 supply, which cost $35 with a $10 2nd-day-air shipping charge.

The new power supply

I ordered the supply over the weekend and the new unit arrived on Wednesday. There was actually a nice user’s manual with step-by-step illustrated directions for making the various connections. I plugged everything in, put the system back together, and thankfully it booted up like a champ.

I have no immediate plans to retire my system. The Intel i7-920 microprocessor with four 2.66 GHz cores running Windows 7 still meets my needs, although the slow hard drives are a real bottleneck when comparing performance to my old MacBook Air, which is speedy thanks to its solid state drive. I hate Windows 8, so I’ll probably wait for Windows 9 and cheaper large-scale solid state drives before I buy a new desktop system. Hopefully the new power supply will keep Vector running until then.

Vector back up and running

Posted in home repair, technology | 4 Comments

A New Year on the Trails

January 22, 2014

Declining Mileage

In 2013 my hiking mileage of 111.4 miles had plummeted 58% from what it had been 2012, and was down 65% from my peak mileage of 326.3 miles in 2011. I have almost exhausted the supply of new trails within a reasonable range without an overnight stay, and 2013 was when Wendy became a big part of my life. While she likes to hike, we enjoy many other sorts of outings as well.

I started 2014 with a bad cold, but as soon as it let up, Wendy got me back out on the trails, helped along by some warm weather days. Limiting our travel time, we stuck with the closest trails to home.

Osage Hills

A series of close hikes (click image for slideshow)

On January 11 we drove west 20 miles to hike three miles on the blue bike trail at Osage Hills, where I confirmed that the Osage Trail from Camp McClintock has indeed been rerouted onto a parallel track in one spot, swapping designations with the old bike trail route. After I confirm the precise change, I’ll update my online map of the trails of Osage Hills State Park.

Elk City Lake

On January 12 we drove north 45 miles to hike 1.5 miles north and then back again for a three mile walk, starting from the south end of the Table Mound Trail at Elk City Lake. The weather was warm, but the wind was really up, whipping west across the plates of ice on the lake and blasting at us up on the bluff at one of the westward lookouts. A large flock of birds out on the ice were hollering continuously, and I enjoyed taking close-ups of the ice forms out on the lake.

Thankfully the trees sheltered us from the wind, and when we turned east to walk along the north side of a peninsula, the mound itself provided shelter. Looking north toward the dam, we spotted a couple of places where the ice had buckled upward. Along the shore, wave interference had created a series of snow mounds.

Oologah Lake

On January 19 we drove 37 miles southeast to hike the Skull Hollow Nature Trail at the Hawthorn Bluff Campground on Oologah Lake. I knew the part of the campground with the trailhead would be closed, but we were able to pay a day use fee at the box and park near the gate to that portion of the campground and walk a quarter mile to the trailhead. We followed the main trail’s outer loop, ignoring the two smaller inner loops, and then extended our walk to 2.1 miles with a trail to a park gazebo.

After pausing at the lake overlook, where a cold south wind blew right into our faces, we crossed a footbridge to begin walking the perimeter of the hillside, walking through the trees near but above the lake shore. Wendy hears better than I do, and knew a Cardinal was around. I finally spotted him and he posed for a photo shoot.

Cardinal Photo Shoot

Heeling Over

I kept pausing along our route to snap sailboats on the water, watching them heeling over and tacking. Wendy and I both posed for shots, her along the trail and me as I struggled to squeeze into a hollow tree in a vain attempt to prove I could fit into it. My shoulders were too broad and my dignity suffered.

Back at the trailhead, I noticed that the cow skull carving on the sign is rotting away. Across the road was a “Gazebo Trail” which I tried to take years ago, but couldn’t penetrate because of the huge number of spiderwebs. This winter it was a clear and pleasant walk over to the other campground area’s gazebo amphitheater.

I’m glad Wendy got me out hiking, providing much-needed breaks from multiple meetings each day of the work week, most of them concentrated on the design process for the big expansions coming soon to the high school where we both work. If only grading papers were as relaxing…

I just can’t fit…

Click here for a slideshow from these day hikes

Posted in day hike, photos, travel | Leave a comment

Winter Break Trip 2013 Links

Here is the collection of posts for the trip to Texas which Wendy and I made at the end of 2013:

Mosaic

Click mosaic for the photo collection from this trip

Posted in travel | Leave a comment

Winter Break 2013 Trip, Day 6: Fort Worth on New Year’s Eve

December 31, 2013

Our final true vacation day in Texas was spent visiting art museums and attending a New Year’s Eve concert in in downtown Fort Worth. (Originally we’d hoped to visit some of Wendy’s friends and relatives in the Arlington area on New Year’s Day, but weather intervened again with a winter storm headed for Bartlesville. So we had to pack up early on New Year’s Day to make it home before the storm hit.)

Fort Worth Stops (click image for slideshow)

Gloria’s at Montgomery Plaza

We left San Antonio early on the day of New Year’s Eve as well, successfully beating the traffic from the Alamo Bowl, driving 270 miles north that morning to Fort Worth. We had lunch at Gloria’s Latin restaurant at Montgomery Plaza. I enjoyed my fajitas and Wendy enjoyed sampling a chicken tamale, pupusa, Yuca, fried plantain and gallo pinto on the Super Special plate. The restaurant is in a huge multi-story building (here’s a photo by Dave Hensley) which was built in 1928 and was the largest building in Texas at the time, a Montgomery Ward store and catalog center. It is a Mission Revival building with 12-inch solid concrete walls and is now condominiums, restaurants, and retail.

Kimbell Art Museum

Standing Dignitary

After lunch we drove over to the Kimbell Art Museum, which was having a large exhibition of 100 works from the Art Institute of Chicago. We didn’t realize the scope of the exhibit and were frankly shocked to walk in and be standing a few feet from Picasso’s Old Guitarist, one of the most significant works of modern art. We’ve seen reproductions of it over the years, including slides in the art appreciation course I took in college, but I never thought I’d see it in person without visiting Chicago. Wendy was excited to see original works by Matisse, and she discovered Mondrian at this show. We overlap in our appreciation of the latter’s works, with me having a few old Mondrian prints I purchased back in college now tucked away in a bedroom closet. After the many fine “modern art” paintings from the early twentieth century which we saw at the McNay and the Kimbell on this trip, we are both spoiled.

Neither of us wanted to plod through the exhibit with the audioguides, opting to just dash through, weaving around the viewers transfixed for long periods in front of each work by the narration they held up to their ears.

We couldn’t snap photos of the visiting show, but the permanent collection was fair game. I liked Jacques-Louis David’s Anger of Achilles, although Achilles’ expression doesn’t register as anger for me. The Kimbell has a fairly extensive webpage on the work. I snapped Piet Mondrian’s Composition as well; here’s the Kimbell’s take on it.

Wendy liked the Mixtec Rain God Vessel, which was created more than 600 years ago, along with the much older Standing Dignitary figurine from Peru with its inlays of mother-of-pearl, purple and orange spondylus shell, mussel shell, turquoise, pyrite, greenstone, lapis lazuli, and silver. Kudos to the Kimbell for their great website descriptions of their collection.

Part of the permanent collection is in the recently opened pavilion designed by Renzo Piano. The main building is a famous design by Louis Kahn and the addition also uses concrete walls and innovative use of natural overhead light. I’m not a fan of Kahn’s monolithic style and am put off by so much bare concrete, although his skylights at the Kimbell are quite nice. For me, the best part of the new pavilion is the use of wood in the beams and flooring, warming the space, and the soft, natural, overhead lighting in some of the galleries.

Modern Art Museum of Fort Worth

I’ve enjoyed past visits to the neighboring modern art museum, but this visit was a disappointment. None of the visiting works impressed me, with most of them striking me as shrill, angry, obvious, and reflecting little technical skill. I was sad to see that the nifty Ladder for Booker T. Washington was no longer on display, but in its place was an interesting three-dimensional piece of stones and bits of glass suspended mid-air on uniformly arranged strings. Outside I could still enjoy Roxy Paine’s Conjoined.

The most memorable part of our visit at this museum was when a patron ahead of us at the admission booth balked at the lack of an audioguide. The ensuing conflict between him and his wife about this was an amusing interlude for us, but not for them.

Water Gardens

The Active Pool

Our next stop was the Water Gardens designed by Philip Johnson in the 1970s. I hadn’t visited this spot in years and it was Wendy’s first time to see the area. We were annoyed by the dearth of adjacent parking; we finally found a meter south on Lancaster, but had to scale the large walls to enter from that way. Clearly the design was intended more for the adjacent convention center than other visitors, unlike the more accessible and child-friendly Keller Fountain Park I’ve visited in Portland, Oregon.

We saw the dramatic Active Pool first, which was featured in the old Logan’s Run movie. I enjoyed taking the open steps down 38 feet to the bottom with the dramatic cascades about me, pouring 10,500 gallons per minute into the central pool. Wendy, who is always more safety-conscious than this testoterone-addled guy, found it a treacherous spot, especially for children. There’s a reason this sort of architecture is called brutalist!

The Aerating Pool was less interesting with its array of sprinklers; it would be much more popular, especially in summer, if it were designed for kids to roam about in.


Wendy’s favorite spot was the Quiet Pool with its tranquil rows of cypress trees and serene stillness. The “knees” growing about the cypress trees and the pool wall were fascinating.

The Quiet Pool

Blackstone Hotel

Blackstone Hotel

Blackstone Hotel

When planning this trip I wanted our first New Year’s Eve together to be something special, and I found a suitable event in downtown Fort Worth. I never want to drive on the night of New Year’s Eve, so I booked us a pricey room at the Courtyard by Marriott Blackstone. This 1929 skyrise hotel eventually fell on hard times, sitting vacant for decades, but was gutted and rebuilt for a reopening in 1999. It is less than a block from Bass Hall where the evening’s festivities would occur, so it was perfect for our needs.

Due to its location, the hotel depends on valet parking in area garages. Being used to carrying a pack on long day hikes, I despise paying for valet parking; I’d rather just haul my luggage in myself and spare the expense and delays. Thankfully Wendy is just as willing to lug it with our rolling suitcases, so we scouted around and finally found an available public garage a few blocks away. We rolled into the lobby, which has few traces of the original design, and found our 15th floor room to be quite modern and comfortable.

New Year’s Eve with Steve Lippia

We had dinner at the Flying Saucer bar off Sundance Square, grabbing a table before the 6 p.m. reservations kicked in. I enjoyed my French Dip and Wendy had Honey Dipped Chicken. Then we went to the beautiful Bass Hall, with those impressive 48-foot-tall angels sculpted by Marton Varo adorning the front.

Bass Hall Angels

I’ve been to Bass Hall twice before to see Pink Martini perform, but tonight it would be Steve Lippia doing Sinatra songs. From our seats in the hall we spotted festive balloons up against the 80-foot-diameter dome, which was beautifully painted by Scott and Stuart Gentling.

Steve Lippia gave a terrific professional performance, with many fun anecdotes and comments on the songs and their arrangements, and we were delighted when he performed our songI’ve Got You Under My Skin. The Chairman of the Board came back to life to serenade us!

A Room with a View

We were too road-weary to participate in the later festivities at Sundance Square, but enjoyed them from on high when the fireworks rose into view from our hotel room, appearing from behind the beautifully lit Sinclair Building with its eagle finials. It was a perfect ending to a wonderful winter break in Texas.

Click here for a slideshow from this day

Day 5: Natural Bridge Caverns

Posted in art, photos, travel, video | Leave a comment