August 17, 2014
Tubes gave way to solid state
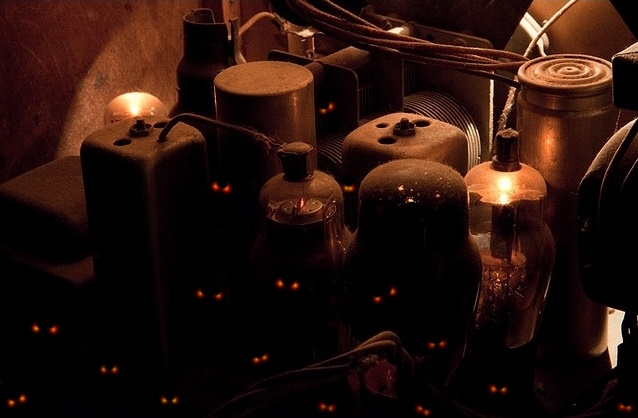
When I was a small child, I would climb up onto the top of the RCA Victor black-and-white television in our living room. It was warm up there, and I would peer through the vents down into the television. Its innards were lit by the dim glow of vacuum tubes. I figured out those tubes were part of the reason why there was a long delay between turning on the set and getting a picture or sound; until they began to glow red hot, Mr. Magoo would not appear. Eventually I would clamber down and sprawl on the floor to watch the flickering gray images. I also remember being bewildered by that stupid lying NBC peacock, which would spread its feathers and proclaim the next show would be in living color…it never was.
My parents finally bought a Zenith color television around 1973, an emblem on its front proclaiming it as SOLID STATE. I wasn’t sure what that meant, except that the warm glow of the tubes was gone and the picture and sound came on very quickly. The peacock was proud and colorful.
Solid state circuits with transistors revolutionized electronics, and now solid state drives are changing local storage on our computers.
Hard disks vs. solid state drives
For decades we’ve relied upon the incredible hard disk drive first introduced by IBM in the 1950s. For years every decent personal computer had one or more of these spinning drives, with their steadily increasing capacity and decreasing cost, as I outlined in my previous post. But in 2010 I bought a laptop computer with no hard drive, a second-generation MacBook Air. I knew its 128 GB solid state drive meant it would boot up very quickly and perform admirably despite its somewhat dated microprocessor, but I was still startled by the performance increase it gained by dispensing with an electromechanical hard disk.
Solid state drives are now commonplace in our smartphones, tablets, and some laptop computers. But it has taken much longer for them to creep into our desktop systems because the old hard disks have so much more capacity and are far cheaper. I finally took the plunge this month of buying a one-terabyte solid state drive for my five-year-old desktop computer, and this post is about my experience of installing and using it.
Cleaning up my system
I debated doing a fresh installation of Windows 7 on the new solid state drive and then re-installing, one-by-one, the various applications I use on my desktop machine. That would clear a lot of cruft from the computer and its registry, but it would mean a lengthy process of locating, re-downloading, and re-installing software packages. Back when everything came on an optical disc, re-installations were fairly straightforward, but now many of my applications are downloaded from the web and I’d have to find download links and locate emails with their registration keys to get them back up and running.
That was too big a hassle for me, but I also wanted to make the image of my existing disk as clean as possible before cloning it onto the new drive. So I used Control Panel > Programs and Features to list the dozens of applications on my system and began working my way through them, uninstalling anything I thought I would not use. Over its five years of use, I have installed on my desktop machine many different video and photo editing applications and accumulated various utilities I needed once or twice and then never again. In the end, I wound up uninstalling over 40 different programs. After a reboot to ensure clean-up from the uninstalled programs, I was ready to install my new solid state drive.
My Crucial M550
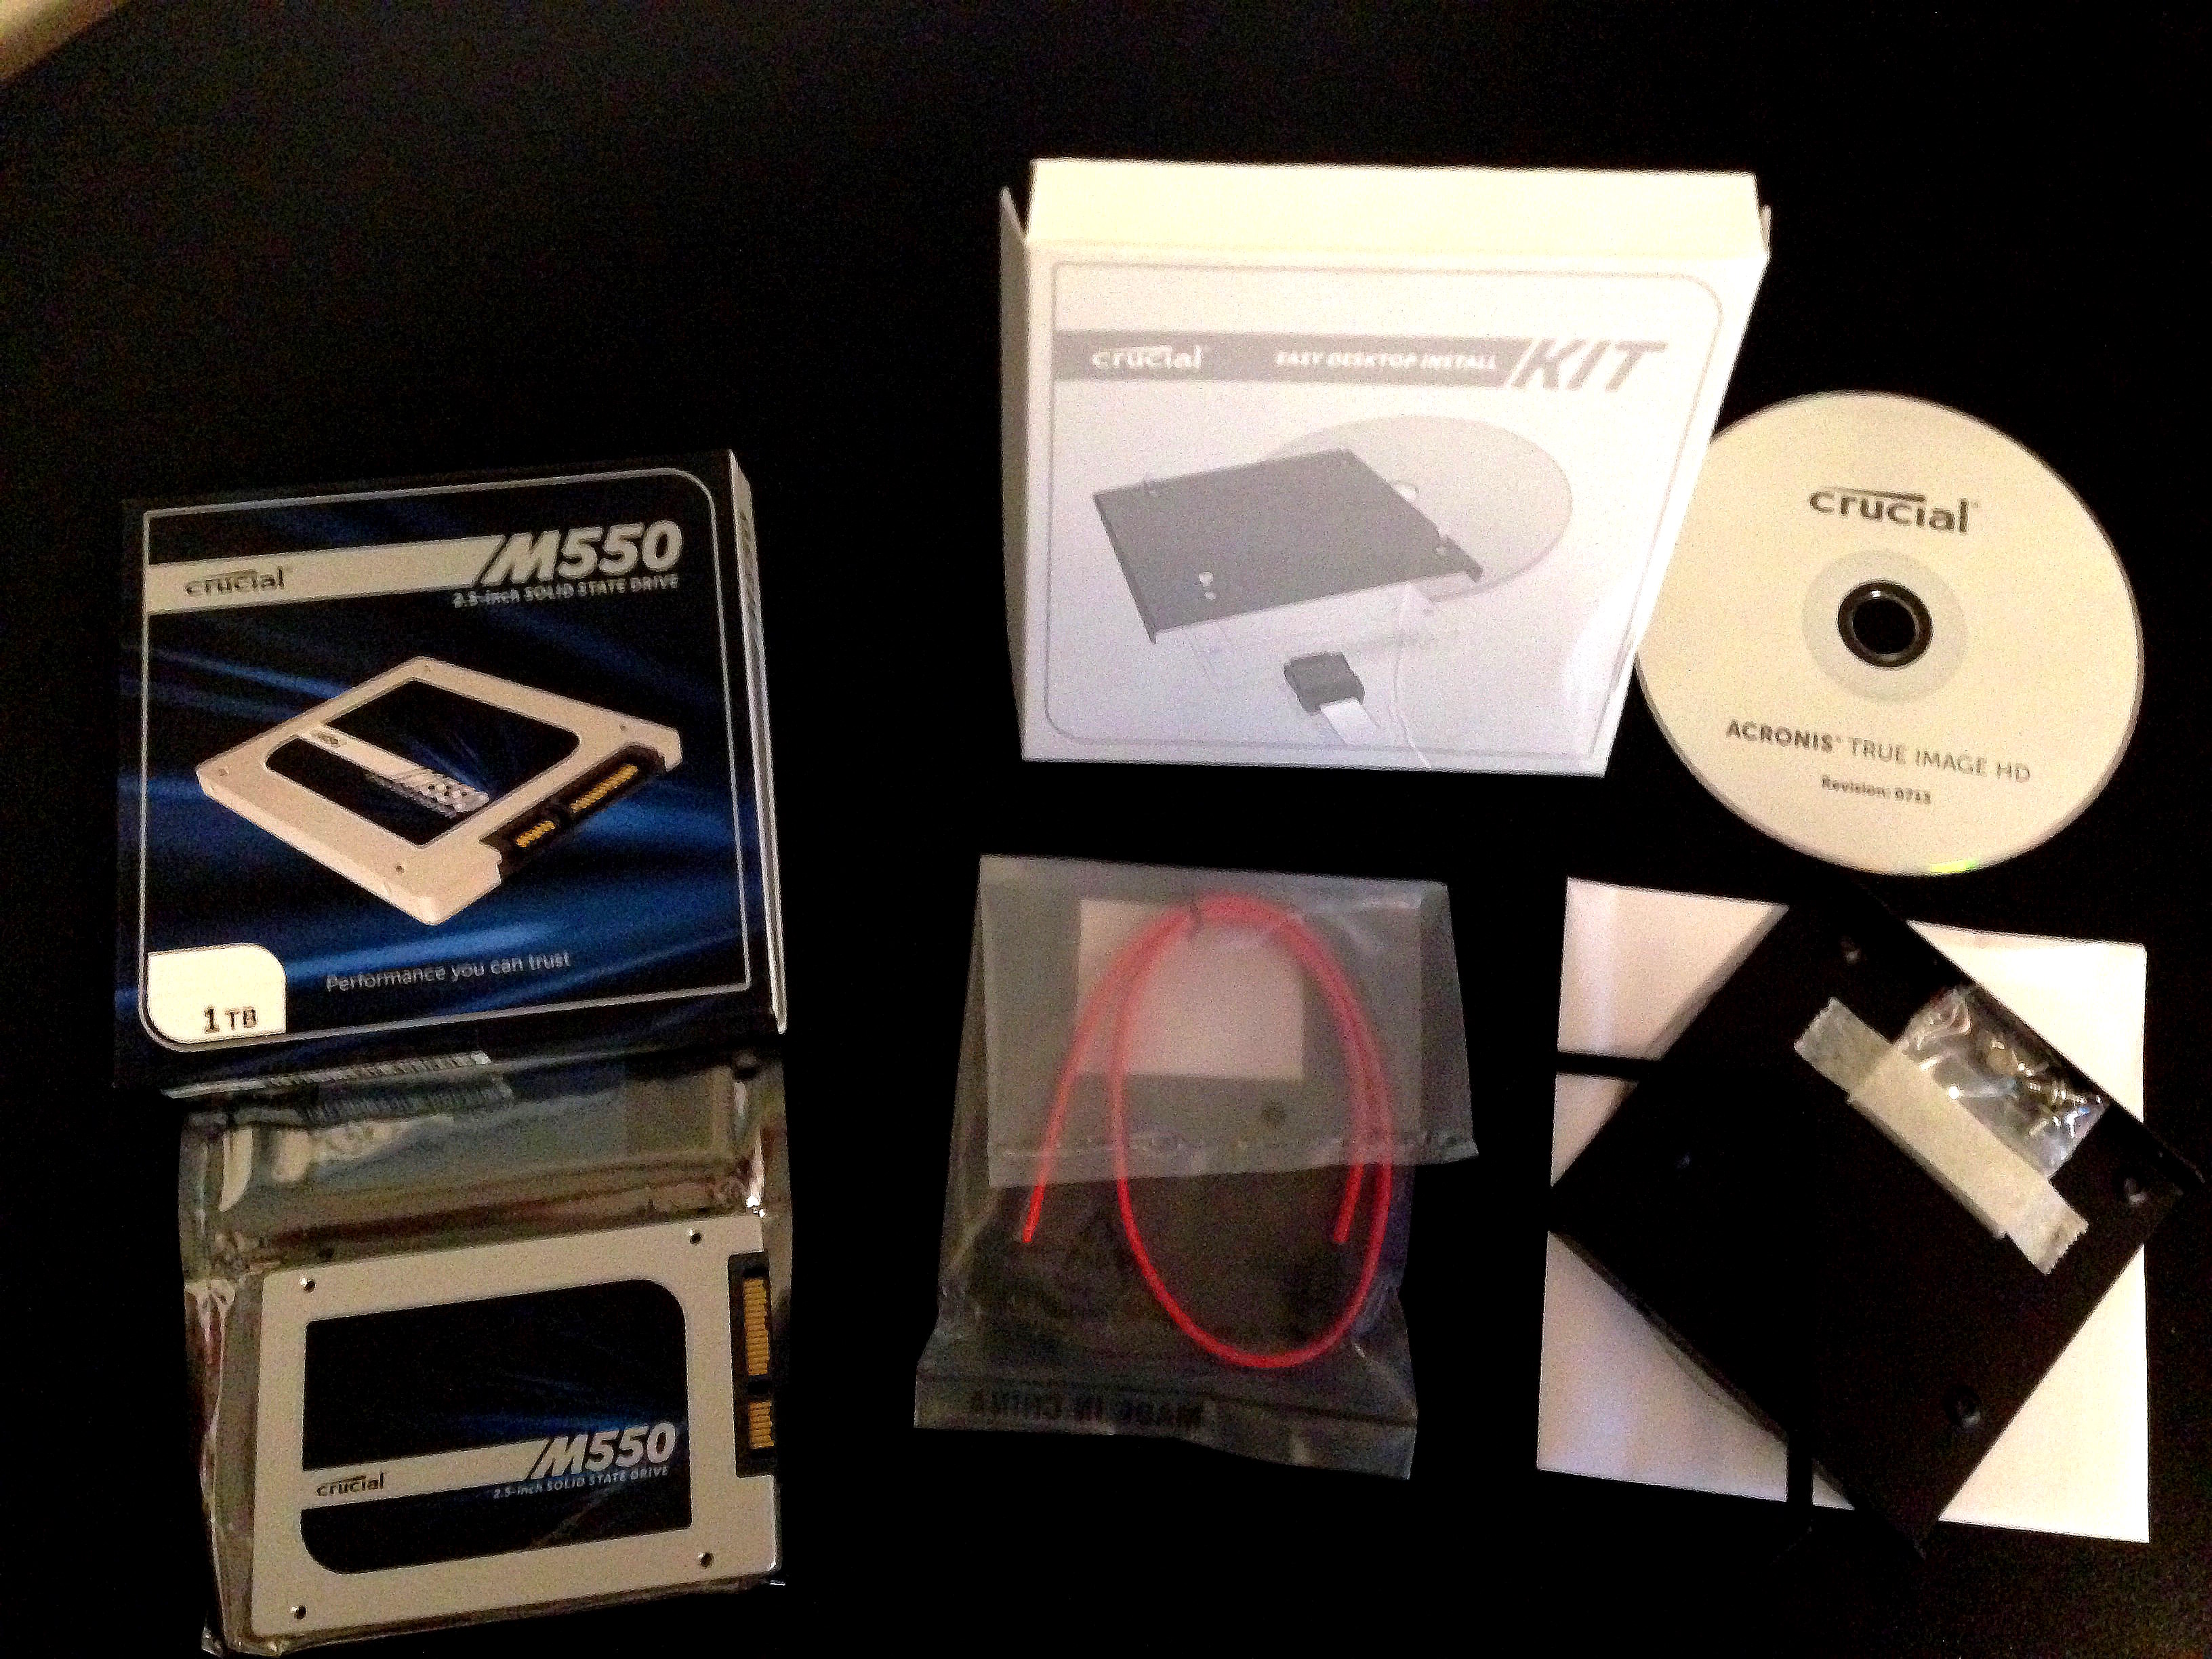
My new solid state drive and installation kit
I had ordered a Crucial M550 one-terabyte drive with a SATA interface from Amazon for $432. I also purchased a $24 desktop installation kit which provided a SATA cable to connect the drive to the computer’s motherboard, an adapter bracket to fit the laptop-sized 2.5″ wide drive into a desktop’s 3.5″ bay, and Acronis TrueImage HD software to help me migrate my system from my one-terabyte hard disk to the solid state drive.
Thankfully Windows 7 is new enough to know how to handle a solid state drive; if a new drive had meant moving to Windows 8, I would have refused. I hated Windows 8 when I previewed it back in the spring of 2012 and the few times I’ve used it since have convinced me to stick with Windows 7. I won’t get a new desktop computer until after the successor to Windows 8 is released; I often skip versions of Windows and have never regretted it.
Installing the new drive
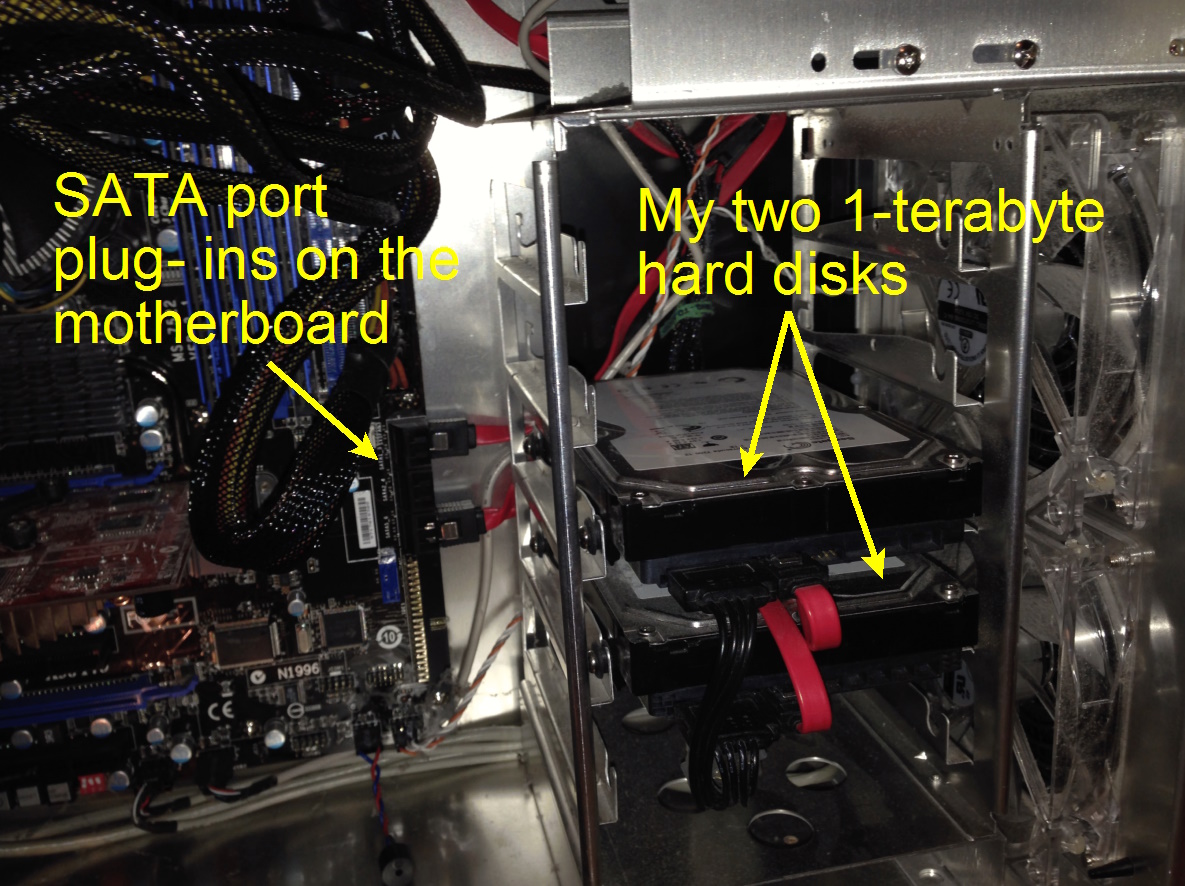
My hard disks before the new drive was installed
I unplugged the power and all peripherals from my CPU and opened it up. I had two one-terabyte hard disks; one was the primary drive and the other for backup. Both were connected to SATA ports on the motherboard and to power cables from the power supply.
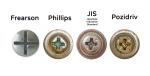
Four screws that came with my installation kit secured the tiny solid state drive into the wider adapter bracket. The drive is only 7 millimeters thick, which makes sense for a laptop computer, but looks comically thin compared to my system’s hard disks. The bracket then was supposed to be secured in a drive bay by four more screws that came with the kit. But my bay is not easily accessed on one side, so I was only able to easily screw in three of the four screws. It seemed sturdy enough, and solid state drives are much less susceptible than a hard disk to vibration damage.
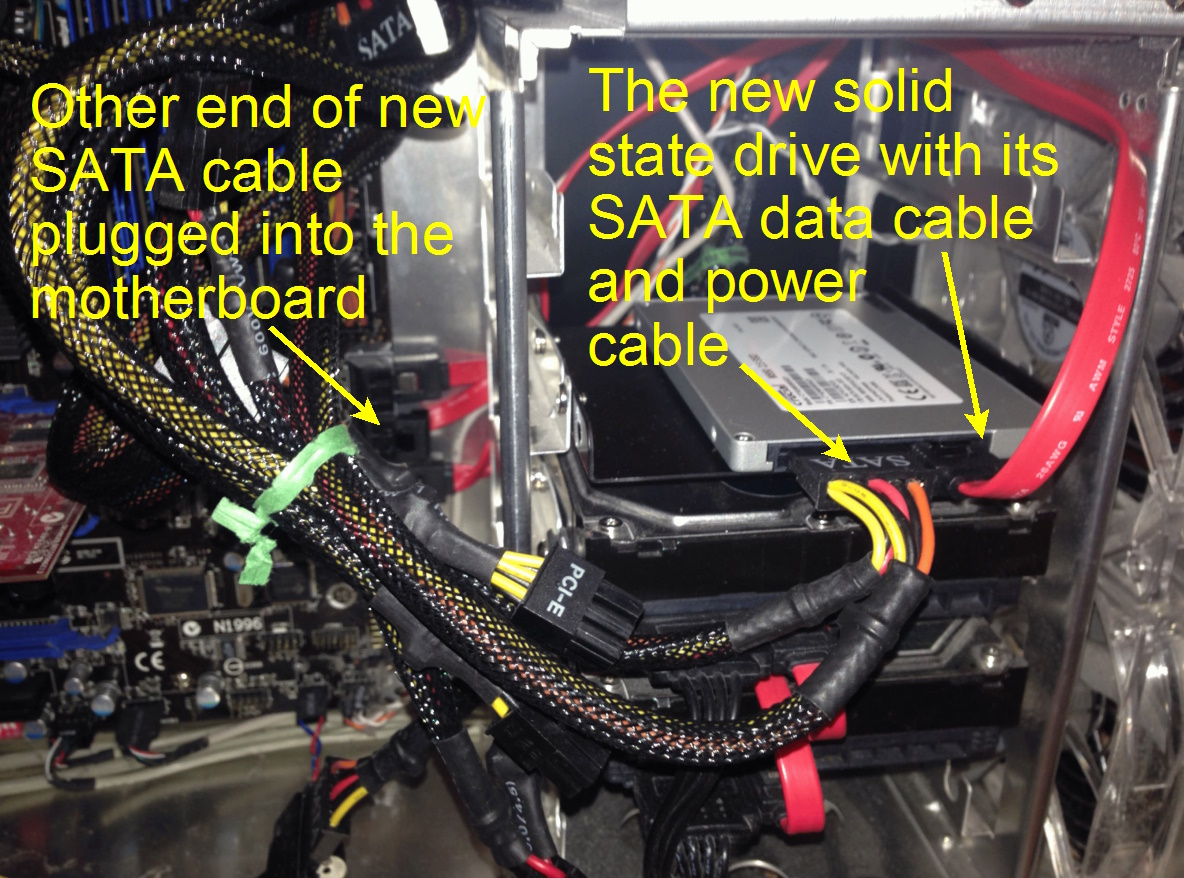
The new drive installed in my computer
Next I hooked one end of the keyed SATA cable which came with the installation kit to the new drive. The other end keyed into an empty port on the motherboard. I found an unused SATA power cord coming out of the power supply and hooked that in. With that, the hardware installation was complete. It was time to tackle the software side of things.
I needed to clone my boot hard disk to the new drive, tell the computer to start booting from the new drive instead of the old hard disk, and then tweak some Windows settings to help prolong the life of my solid state drive.
Cloning my disk
I closed up the computer and hooked everything back in. I flipped on the power and inserted into the optical drive the Acronis TrueImage HD disc from the installation kit. I was fast enough that the machine booted up in Acronis instead of Windows.
The Acronis software listed the new solid state drive and both of my hard disks. I instructed it to clone the boot hard disk C: over to the new solid state drive, which it had labelled as F:. It took 2.33 hours for the 772 GB of data on the hard disk to be copied over to the new solid state drive. I then exited Acronis and the machine rebooted.
Changing the boot settings in the BIOS
Pressing the DEL key repeatedly as it booted up interrupted the boot sequence to bring up the BIOS (Basic Input/Output System) menu where one sets boot options and the like. I changed the boot sequence to first try to boot from the CD/DVD drive, then each of the four USB flash drive slots on the front of the computer. This would allow me to easily bypass Windows if I needed to use a disaster recovery disk or a utility like Acronis. Next in the boot sequence came the new solid state drive, then the hard disk I had been booting Windows on, and finally the hard disk I was using for easy in-the-computer-case backups. (Yes, I also periodically make backups to a portable hard disk which I store off-site.) I saved the settings and exited the BIOS, and hoped that Windows would come up on the new drive.
It worked like a charm, with Windows 7 Home Premium booting up much faster than I’d ever seen before on my machine. I checked in Windows Explorer and verified that I had booted from the solid state drive; it was shown as drive C: while my backup hard disk was now drive E: and the hard disk I had been booting from previously was listed as drive F: (the optical drive is drive D:).
Making sure Windows 7 is being SSD-friendly
I’d noticed that Windows had installed some device drivers when it booted up, and one was for the new solid state drive. I hoped that meant Windows had been told to no longer try to defragment the boot drive and to use TRIM. Hard disks can be defragmented every so often to consolidate files spread out across the disk and speed up the disk’s performance; this was much more important in the old days than it is today with our enormous hard drives. But you should NOT defragment a solid state drive, since the resulting reads and writes simply waste rewrite cycles of the memory without improving performance to any meaningful degree. TRIM should also be enabled on a solid state drive; this changes how deleted files are handled to help preserve the usable life of the drive.
An article at Lifehacker helped me check that TRIM was enabled (it already was) and that defragmentation was disabled on the solid state drive. Older articles had urged disabling the SuperFetch service, relocating the Windows Page file to a hard disk, and the like. Other articles said those changes were not all that important, but I did them anyway, including implementing some more tips from ghacks.net.
The results
The new drive dramatically improved the boot process on my machine, which had become very slow and tedious with the hard disk maxing out as Microsoft Security Essentials and Dropbox and other services did their thing. Here’s a comparison:
| Boot item | Time after boot from hard disk (minutes:seconds) | Time after boot from solid state drive (minutes:seconds) |
|---|---|---|
| “Starting Windows” screen | 0:26 | 0:26 |
| Windows password prompt | 1:15 | 0:46 |
| Desktop background appears | 2:06 | 0:53 |
| Desktop icons first appear | 2:37 | 0:53 |
| Windows logon sound | 2:38 | 0:53 |
| Desktop icons fill back in | 4:20 | 1:02 |
| Networking icon shows ready (most start-up services running) | 6:40 | 1:08 |
| Dropbox shows ready | 16+ | 2:08 |
As you can see, it was taking forever for my machine to fully boot up – a major reason why I invested in the solid state drive. For years I’ve examined the disk activity via Windows Resource Monitor and seen how processes associated with Microsoft Security Essentials and Dropbox, and sometimes the disk indexing service and iTunes, were maxing out my hard disk’s throughput.
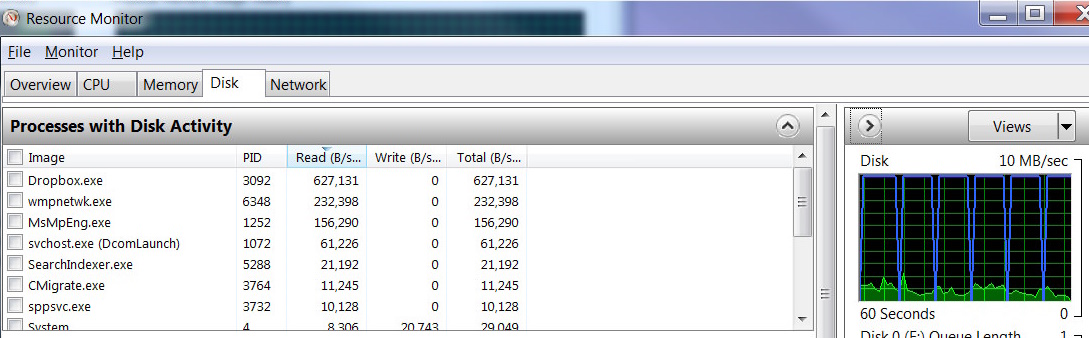
Dropbox and other services were hogging my hard disk after boot-ups
I had used various online tips over the years to tweak various services and settings, but they didn’t help much. Eventually things would settle down, but sometimes that would take 15 to 20 minutes, during which time my system was very sluggish. So I almost never rebooted my machine, and dreaded when a security update or the like would force me to reboot.
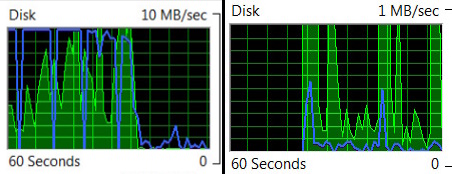
The left graph shows my hard disk finally settling down 19 minutes after booting; the right shows my solid state disk less than 3 minutes after booting.
The two graphs at right illustrate how much nicer things are with my solid state drive. On the left is a graph of hard disk use 19 minutes after a recent boot-up, when the hard disk finally settled down, transitioning back to more normal behavior after continually reading data as fast as it could. The right graph shows the solid state drive’s use less than 3 minutes after boot up; notice the change in the scale of the y-axis: the drive has already read all that was needed for the various services and is just doing minimal background tasks.
So thus far I’m extremely pleased with this upgrade. It will make booting and using my five-year-old machine much more enjoyable and hopefully allow me to stretch its useful life out for a few more years.
I have some nostalgia for that old tube television from my childhood; I remember the glow of the vacuum tubes, the comforting heat they generated, and the smell of hot dust as the television warmed up. But I will never be fond of my memories of the interminable boot times and sluggishness of my desktop computer before I installed the solid state drive. In this case, I’ve gone solid state and won’t look back.
UPDATE: One of my students this year told me that I needed a SATA III port to get the most of out of drive. My 2009 motherboard only has SATA II ports, which have less throughput. So eventually I might invest in a SATA III PCIe card. That would improve throughput even more, although still not reaching the level available on a motherboard-based SATA III port.