November 21, 2017

My previous post documented the new OLED television I purchased in October 2017 for $1,600. Since the television is actually one component of a basic home theater system, before completing that purchase I thought about what additional hardware upgrades might be needed. First I considered how to get content onto the set.
- Broadcast television: We don’t have cable TV, but our chimney-mounted antenna pulls in various HDTV broadcast stations from Tulsa. Of course these signals are only 1080p resolution at best, with no wider color gamut or high dynamic range.
- Television apps: The set comes with its own YouTube, Amazon, Netflix, Google Play Movies & TV, Hulu, Sling, and LG Channel Plus apps. We already have subscriptions to the first two services.
- Amazon streaming: The old TV required use of a 1st generation Amazon Fire TV stick and a Voice Remote, which we often used for renting or watching streaming movies via Amazon Prime. We could use it to access Amazon Music Unlimited, although we mostly employ Echo devices around Manor for the latter. The new set’s built-in Amazon video app, which I think will support UHD with HDR 10, rendered the old Fire TV stick superfluous and didn’t require that we invest in a new Fire TV with 4K Ultra HD.
- Apple streaming: We weren’t so lucky with the 4th generation Apple TV which Wendy and I use to share YouTube and website videos via Airplay to television, and on which we occasionally rent a movie from iTunes. It still worked fine, of course, but I spent $199 on a just-released Apple TV 4K with 64 GB of storage so that we can enjoy rented iTunes movies with Dolby Vision’s higher dynamic range and wider color gamut.
- Google streaming: I have 1st and 2nd generation Chromecasts, but wound up never using them even though I pay for Google Play Music. That subscription is just a cheap way to get the ad-free YouTube Red service. Since the television has its own Google Play Movies & TV app and YouTube app, I won’t bother with a new Chromecast Ultra, especially since I can use Amazon or Apple for streaming movies.
- Optical disc: When I sold off my collection of over 350 CDs back in 2010, I also sold off a few dozen DVDs. But I still have a collection of DVDs and Blu Ray discs, mostly music concerts and oddball television series one cannot reliably access via streaming services, along with favorite movies with added features like commentaries and documentaries not currently available via streaming services. So I considered purchasing a new UHD Blu-Ray player to replace my regular 2008 Sony BDP-S350 player, which cannot support higher dynamic range, wider color gamut, or 4K resolution. But the UHD Blu-Ray product category is immature and the disc options limited, so I’m waiting to see if anything comes along to make that upgrade worthwhile.
So I got off easy on input devices, only choosing to upgrade the Apple TV. The TV also had plenty of HDMI inputs and a great remote control, allowing me to make do with my 2003 Panasonic SA-HE100S audiovisual receiver. But, having upgraded the picture so greatly, I thought it was time to see what I could do to improve the sound without spending too much more.
The old receiver and surround sound speakers
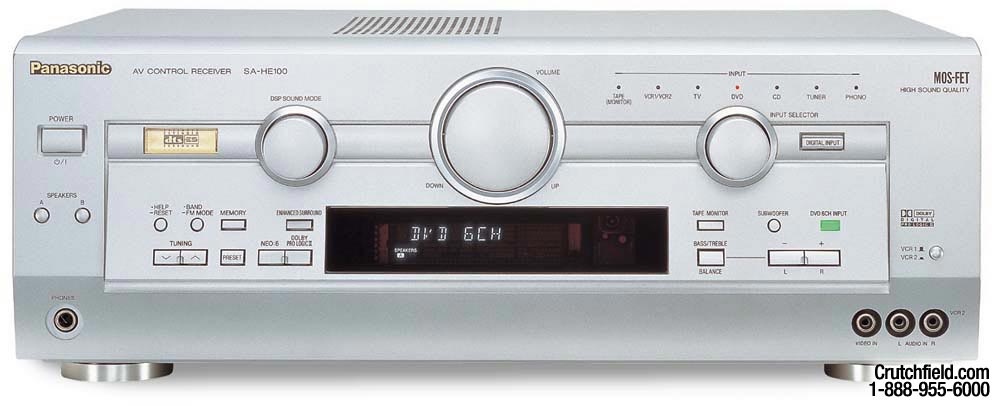
The old Panasonic receiver
Back in 2003 my Panasonic SA-HE100S receiver cost me $300. So it predated the HDMI standard now most commonly used in home theater systems, instead relying on optical audio and RCA stereo inputs and outputs. It was old enough to sport presets for things no longer part of most home theaters, such as a compact disc (CD) player and multiple videocassettee recorders (VCR). However, I still have an old VCR in my system, which I use on weekday mornings to play aerobic workout tapes I recorded in the mid 1990s.
Back in 2003 I hooked my then-new receiver up to a new $300 Onkyo SKS-HT500 home theater speaker system. The speakers are 5.1, meaning there are left, center, and right speakers along the monitor wall, left and right surround speakers, and a subwoofer that is so large it doubles as a lamp table. The surround speakers are not ideally placed; one sits several feet away on the mantle above your head when you watch a movie on the couch, and the other is on the floor right beside the other end of the couch.
I’m not interested in shifting them to unsightly locations that would provide better sound, and I simply don’t care about overhead sound from Dolby Atmos and similar systems. My old receiver had no automatic calibration to balance the surround speakers nor equalize them for optimum sound. So the few available speaker settings were just manually adjusted back in 2003 and never adjusted again, except for my occasionally tweaking the gain on the subwoofer.
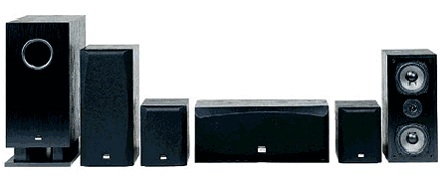
The Onkyo speaker system, unchanged from 2003
Making do for awhile
My old receiver actually still worked okay with the new television, despite its antiquated inputs and controls. I initially used the television as the HDMI hub and sent its output audio to the receiver via a digital optical cable.
I did notice that the playback sound for my Apple TV was not in sync with the picture. I had to modify the “AV Sync Adjustment” setting in the Sound menu of the television, by trial and error, to adjust the audio timing to restore synchronization.
However, I noticed that my old receiver was sometimes playing in stereo when I expected it to use its Dolby Pro Logic II or DTS-ES surround sound. And even after reprogramming, my Logitech Harmony 880 universal remote was having trouble getting the television and receiver to both sync up to the correct settings and inputs. Those issues and a passing comment from Wendy on how the receiver seemed dated were enough to prompt to go shopping for a new one.
The new receiver
Given that I wasn’t going to spend the money to replace my basic surround sound speakers, I saw no reason to break the bank on the new receiver. But I did want something that would be fairly easy to use, could serve as the HDMI hub for the Apple TV and Blu-Ray player, supposedly supported pass-through of high dynamic range and wider color gamuts, and could automatically calibrate my surround sound speakers.
After considering the various online reviews and recommendations from CNET and other trusted sites, I opted for a Sony STR-DN 1080 receiver, which cost me $598. I’m chagrined to note that Black Friday sales have currently brought it down to $400. Ouch!
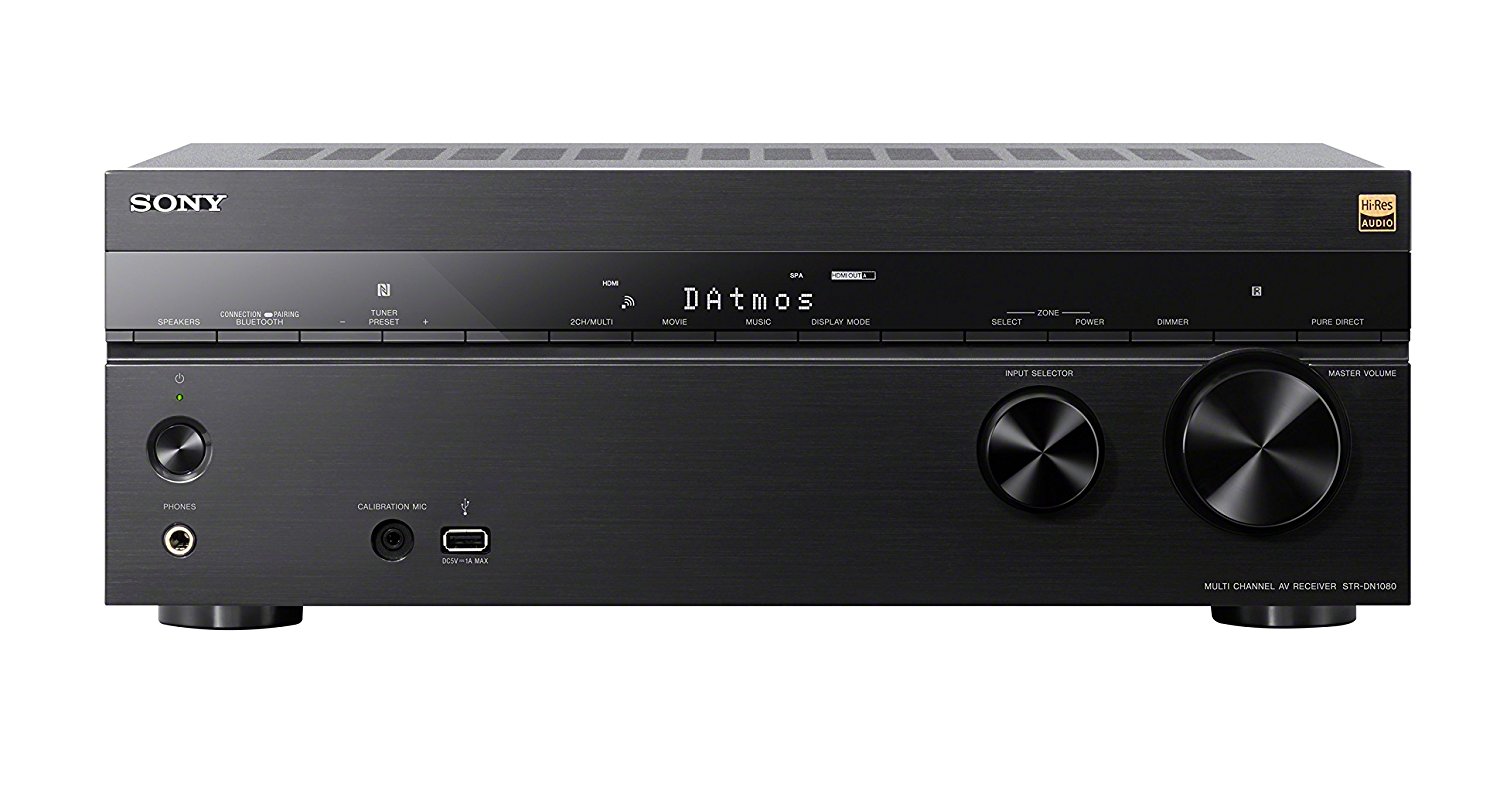
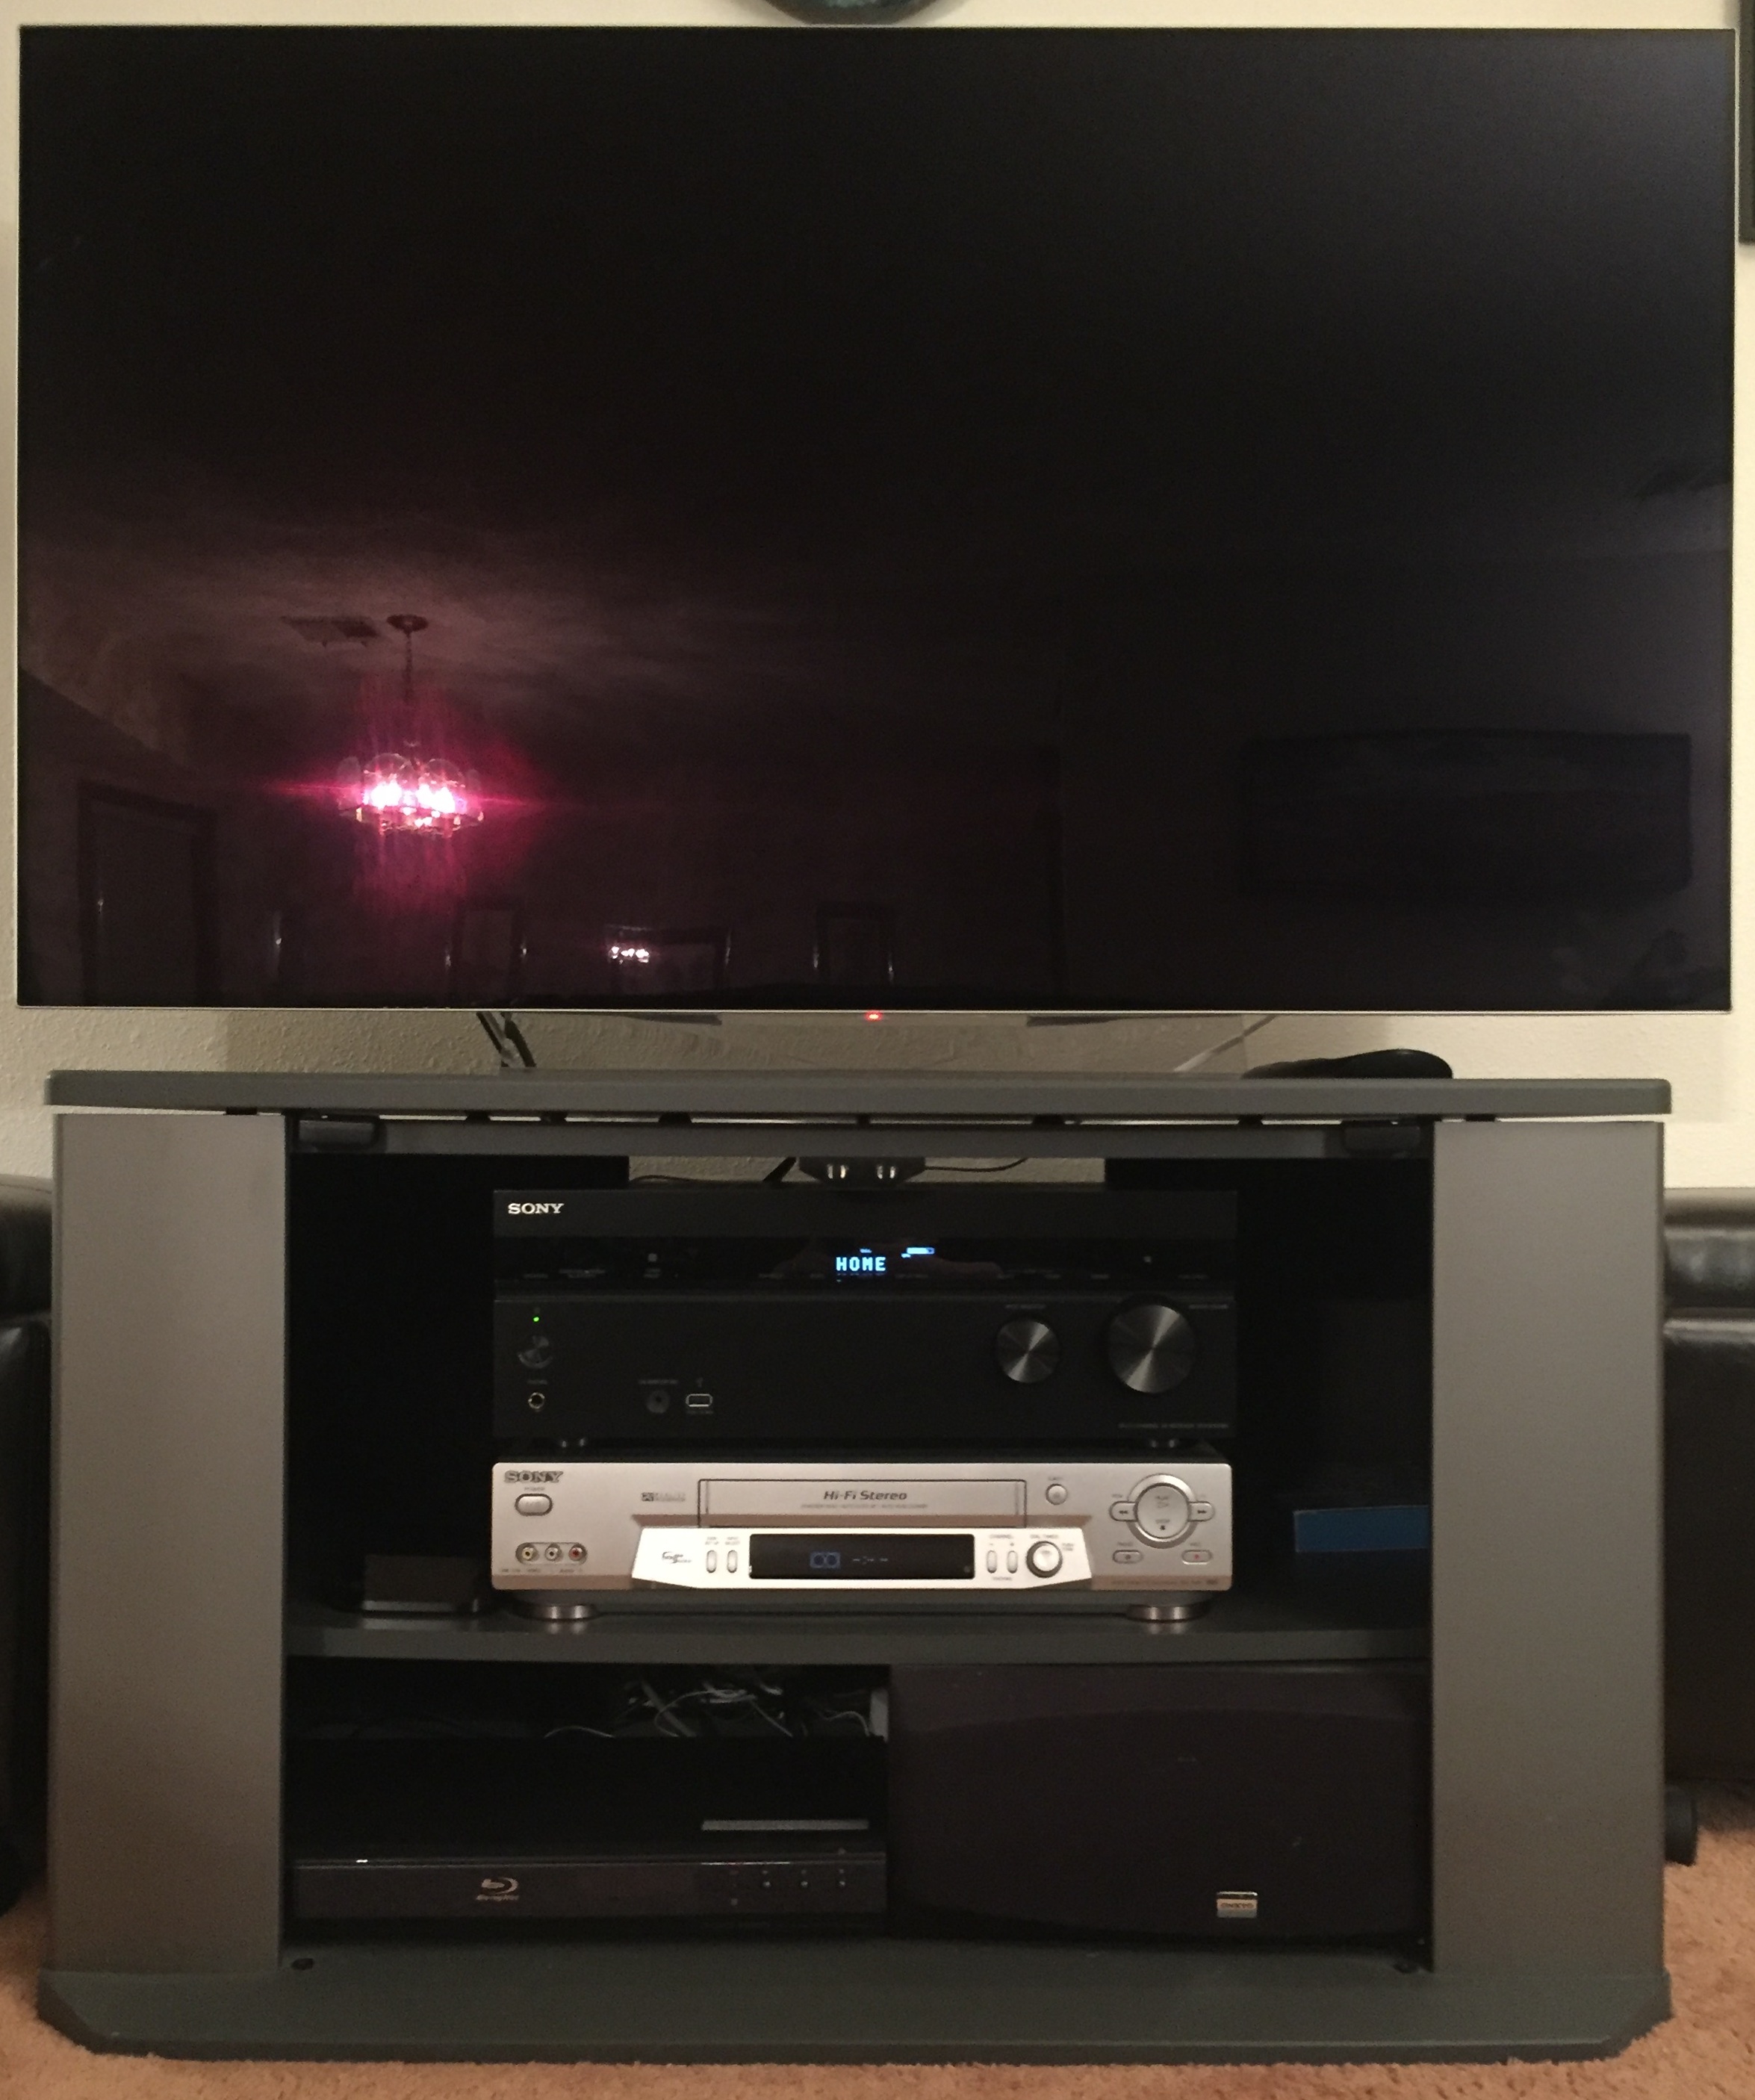
My new receiver is a Sony STR-DN1080
The new receiver sports a minimalist appearance, helping it fade away in the cabinet below the television. Unfortunately, the old silver Sony VCR in there still stands out.

A tangled mess
When the new receiver arrived, I pulled the television cabinet away from the wall, exposing my WiFi router, which was perched atop a tangle of wiring. I actually had fun untangling things and discovering that I was able to eliminate quite a few outmoded cables.
Cables for the long-missing TiVo were removed, and I replaced various older and longer HDMI cables with some short ones I bought which were definitely HDMI 2.0-compliant. Both the television and the receiver had one HDMI port with ARC, which standards for Audio Return Channel. This lets you connect the two with a single HDMI cable and pass sound either way, from the TV to the receiver or vice versa. More importantly, this port supports HDMI-CEC or Consumer Electronics Control, where one device can control the power, volume, and the like of the other.
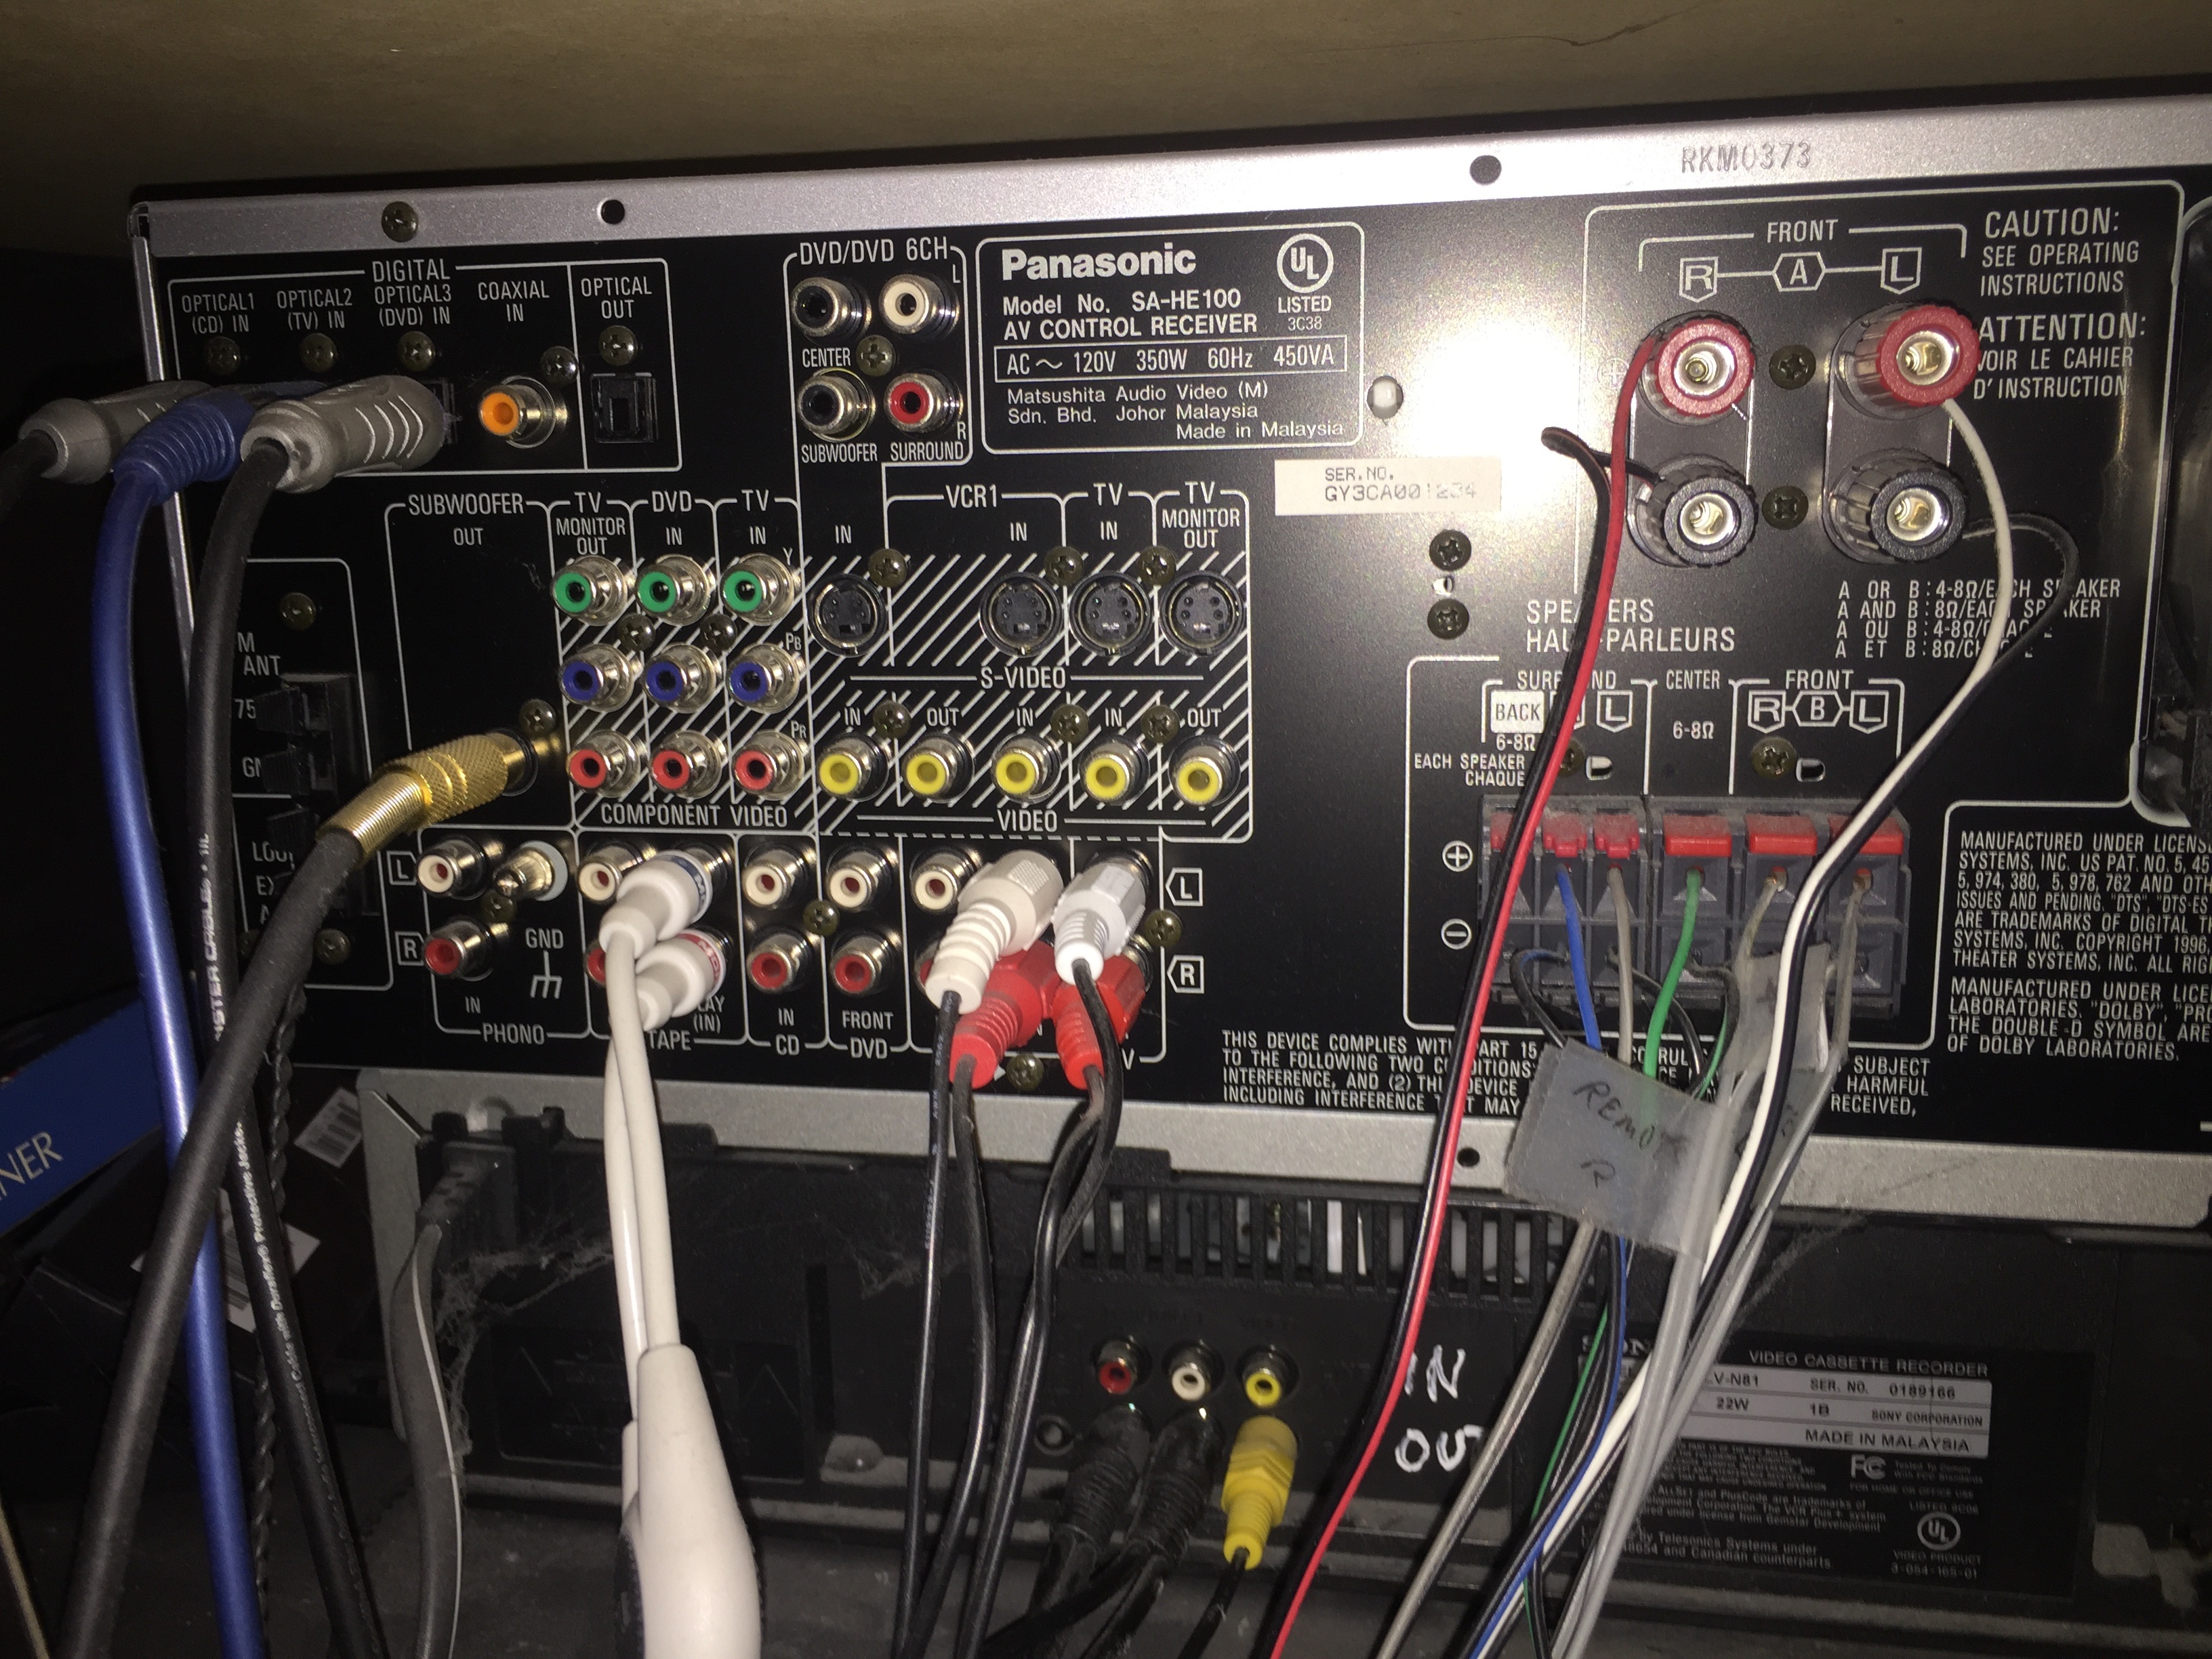
The wiring of the old receiver
Making our lives more interesting, each manufacturer has its own brand name for HDMI-CEC; LG calls it SimpLink. So I made sure I set the television to “Audio Out (Optical/HDMI ARC)” and navigated its settings menus to enable LG SimpLink. Then I made sure I enabled “HDMI Control” in the receiver. That let me retire all of the digital optical cables plugged into the old receiver.
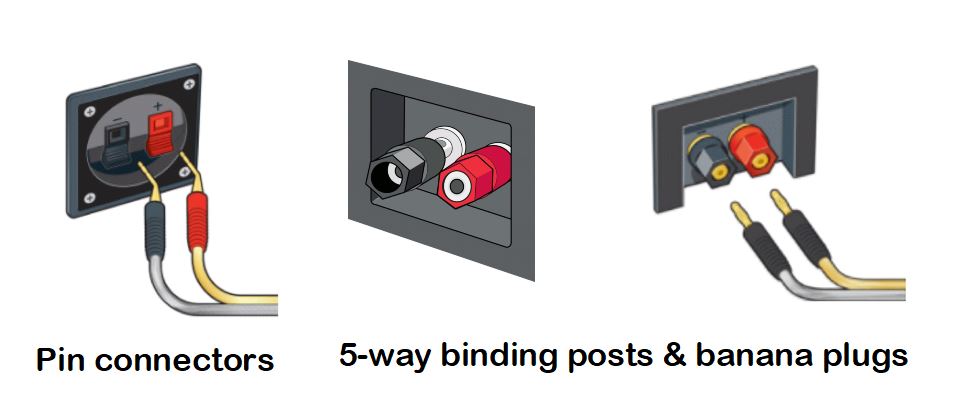
Pin connectors vs. binding posts
My old surround speakers terminated in stripped speaker wires hooked into pin connectors and some binding posts. I wish I could have instead just used banana plugs to connect the speakers, as that is so much easier and the new receiver had a full set of 5-way binding posts. But I wasn’t about to try and solder banana plugs onto the old wires. Instead I just suffered and painstakingly threaded 14 different wires into various posts, being careful to heed the old labels I had attached to each one 14 years ago to track the + and – terminals on each of the five surround speakers and the two remote speakers in the office. I needed the signals to go to the correct speakers and avoid phasing problems.
Subwoofers, for whatever reason, still use RCA-style connectors, so that was the one speaker that was easy to switch to the new receiver. If you are ever puzzled by the myriad connector types (there are over a dozen different ones on my two receivers), Crutchfield has a nice illustrated guide to them.
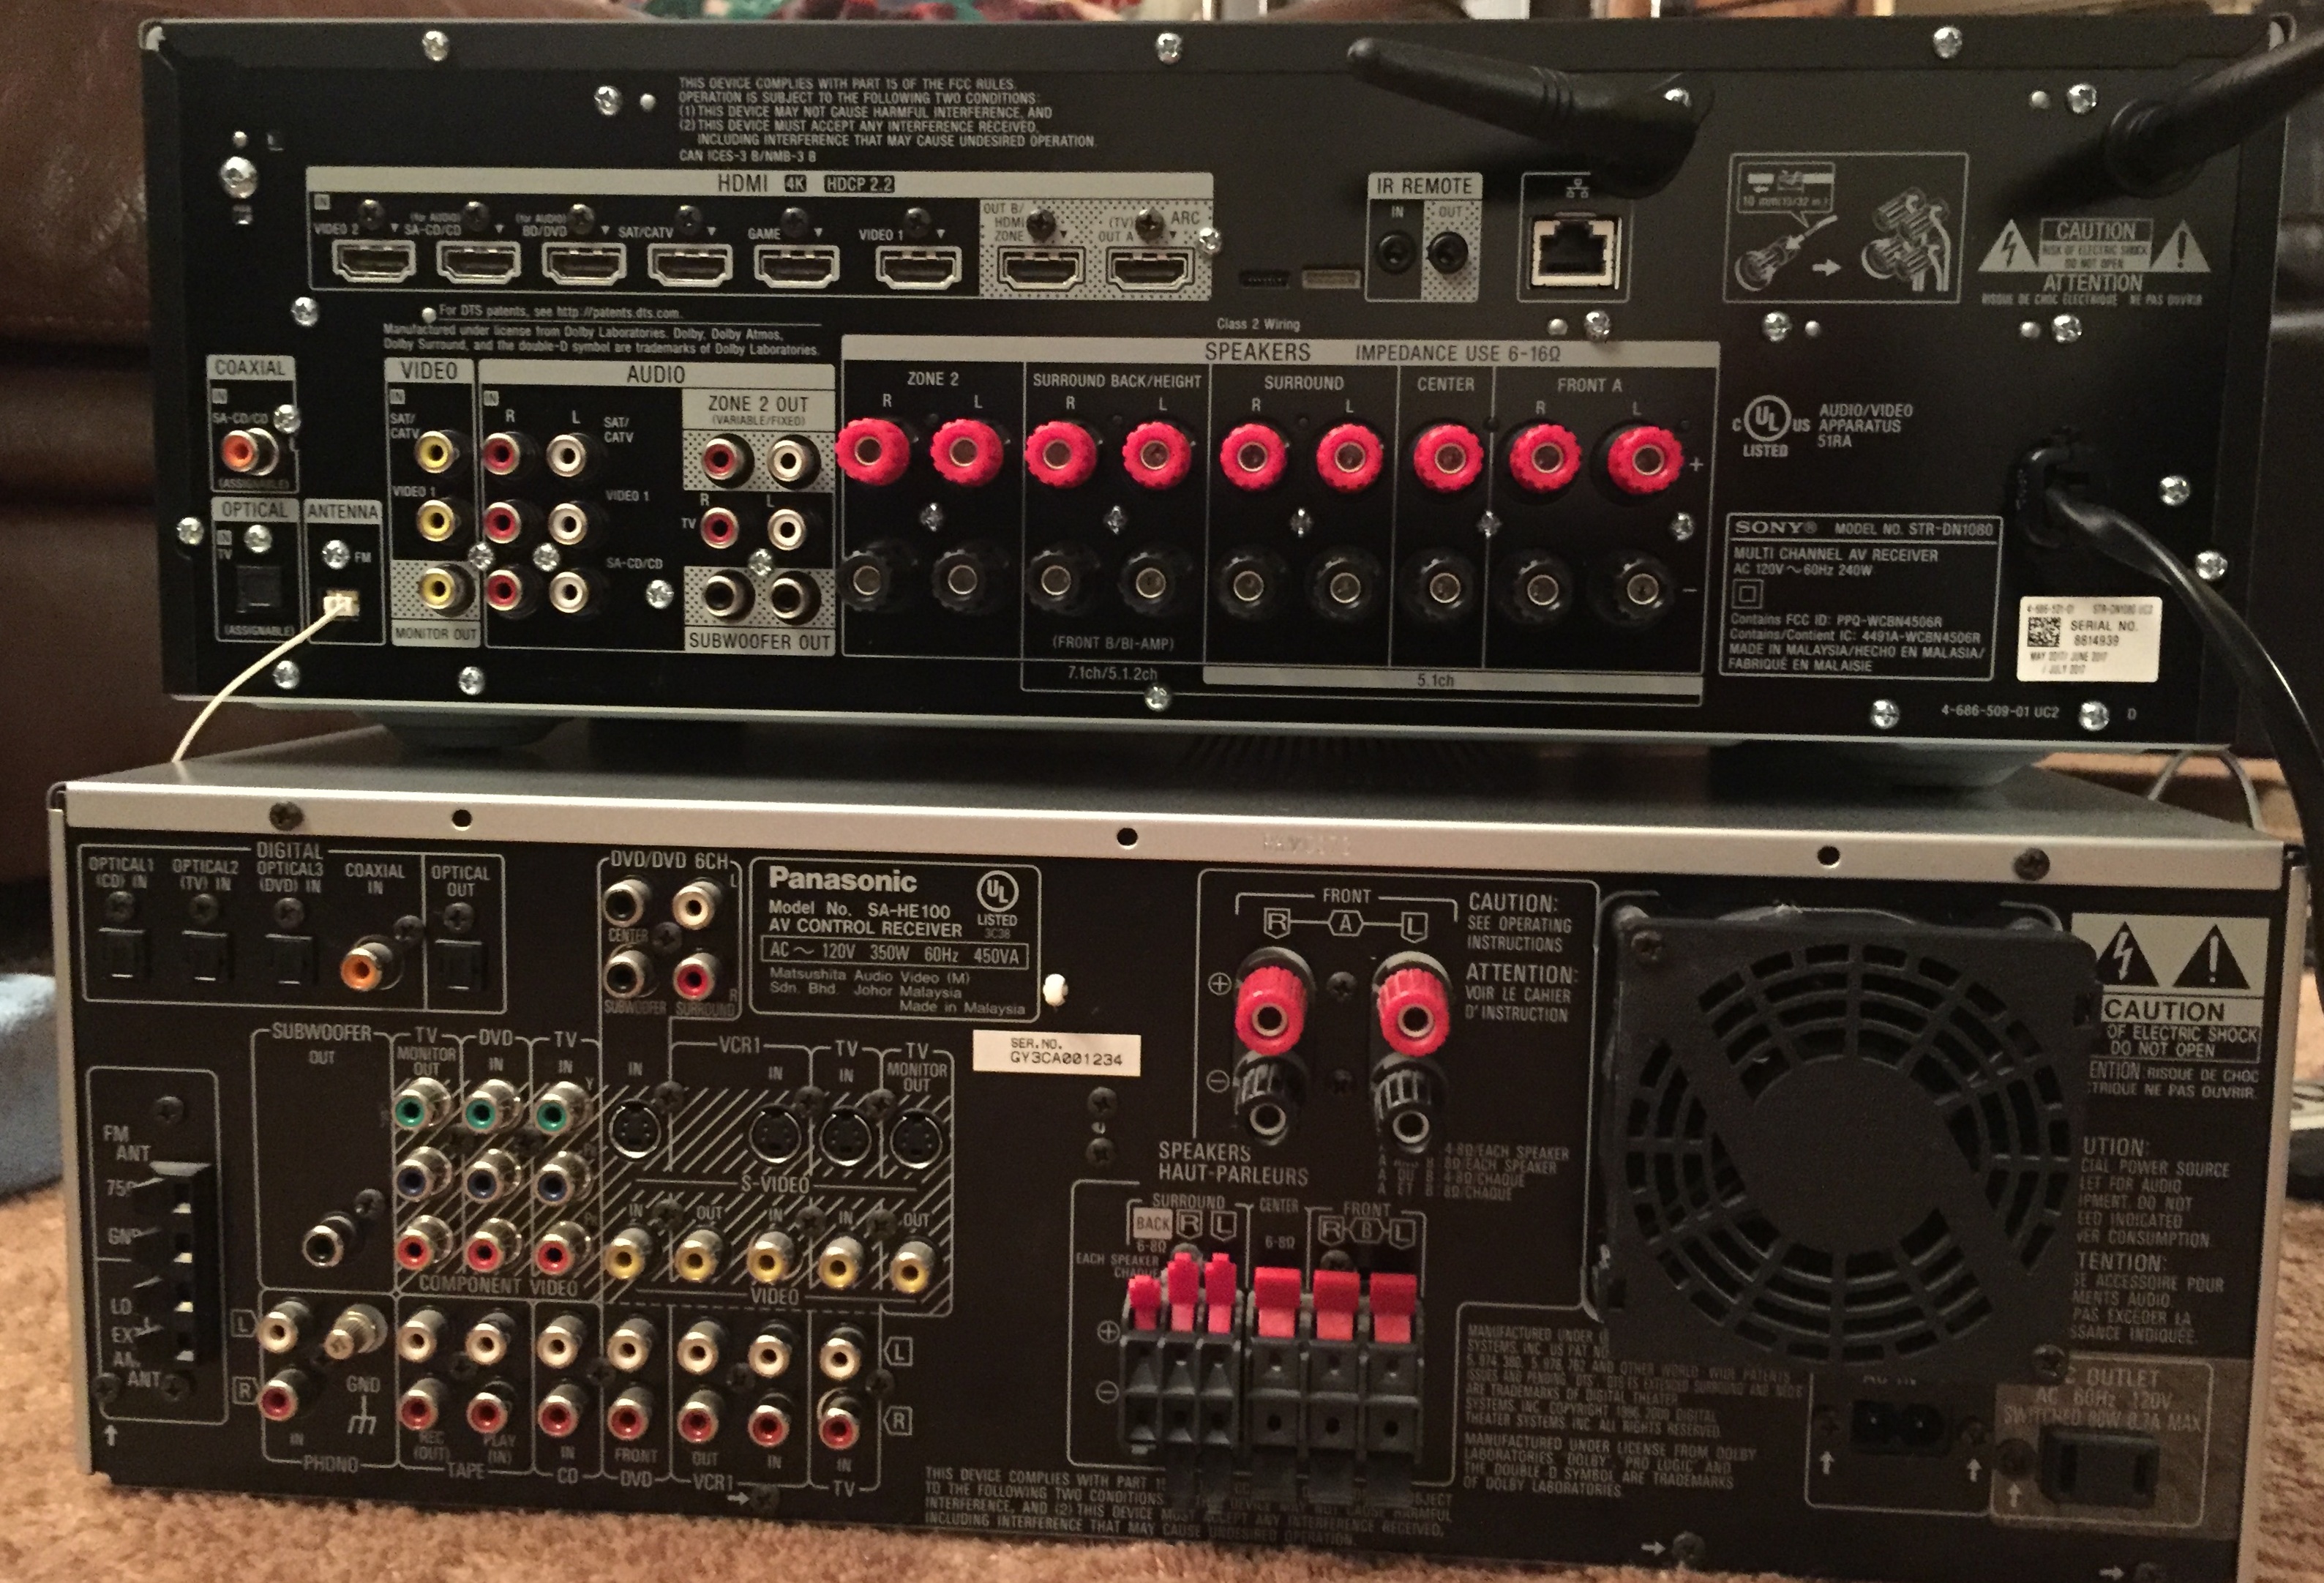
Comparing the connections on my new receiver (top) and the old one (bottom)
The new receiver supports up to seven speakers and two subwoofers in various configurations. I’m using a 5.1-2 setup of five surround speakers, a subwoofer, and two remote speakers. But I could give up on the remote speakers and reconfigure those channels for a) two upward-firing Dolby Atmos speakers which would bounce sound off the ceiling, b) two ceiling-mounted speakers, or c) back left and right surround speakers. However, I’m unlikely to ever upgrade the speaker system for any of those options or a second subwoofer.
I hooked in the radio antenna, but I did not bother to hook my old VCR in. There is a 75-ohm coaxial cable going from it to a switchbox that can connect it or the outdoor antenna to the television. I don’t listen to my old aerobics videotapes during my workouts, instead listening to podcasts on Bluetooth headphones connected to my iPad. But if I ever want to listen to a tape, the television can send the audio signal to the receiver for me through the HDMI-ARC cable. The Apple TV 4K and Blu Ray player hooked into the receiver with HDMI, leaving many HDMI ports free on both the receiver and the television for any future devices.
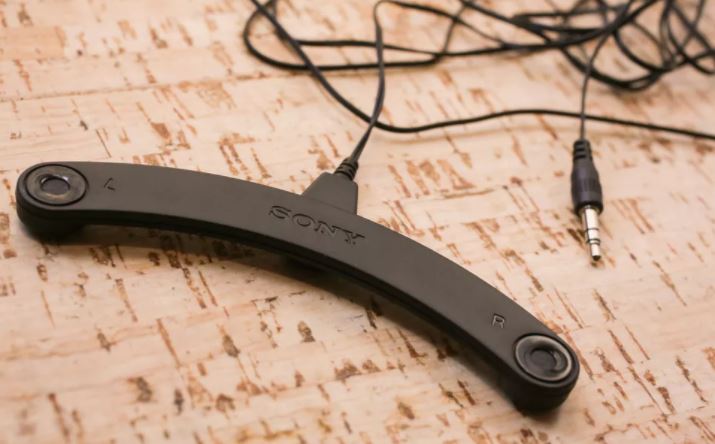
The little calibration microphone
I plugged in the little calibration microphone in the front of the receiver and held it where we sit to watch movies while the system ran a calibration. It didn’t take long, creating a variety of odd sounds to decide how to adjust each surround speaker and the subwoofer. Everything sounds fine to my ears, which are anything but golden.
I completed most of the setup on the receiver, confirming it could playback sound from the various devices and switch video as needed. Both it and the television can pair to Bluetooth headphones, so I can avoid annoying Wendy, whose hearing is far more sensitive than mine.
The receiver also has WiFi, so when either of us turns on AirPlay with our iPads or iPhones, the TV and receiver turn on and tune that in automatically, which seems a tad creepy but is convenient.
After installing the receiver, I did a firmware update that reportedly added Dolby Vision HDR passthrough, something my Apple TV 4K would require. I installed HDMI 2.0-compliant cables and ran the Dolby Vision HDR setup on the Apple TV 4K, but it failed. Tweaking settings on the receiver did not help. So I unhooked the Apple TV 4K from the receiver and plugged it directly into a spare HDMI port on the television. That got Dolby Vision to work. So the only device I’m currently feeding through the receiver to reach the television is the Blu-Ray player.
The bottom line
The new receiver under the new television and atop the old VCR
Everything now seems to be working fine. Upgrading the receiver was another expensive hassle, but now the speakers are supposedly calibrated, and the television and receiver work in perfect harmony in controlling each other.
Speaking of harmony, since 2007 I had used a Logitech Harmony 880 universal remote with my home theater. As various devices came and went, I was able to reprogram it with my old MacBook Air to operate almost everything with one remote, although I still had to use a Voice Remote for the old Amazon Fire TV stick. The new LG television solved that issue, and its Magic Remote is fun to use, but is unable to control the Apple TV 4K or the Blu Ray player, let alone the old Sony VCR. Long tweaking sessions could never get the old Harmony 880 remote to properly set up the inputs and muting on the newer devices for different sources.
So in my next post I’ll detail my experience in replacing the Harmony 880 with a new Harmony Companion universal remote.