For 28 years, I taught students about vectors as representations of physical quantities with magnitude and direction, and how adding, subtracting, and multiplying them differed from the “scalar” mathematics they were used to. We covered the vector cousins of common scalar quantities, such as displacement adding direction to distance, velocity adding direction to speed, and so forth.
Vectors are also used in computer graphics, with images created using a sequence of commands or mathematical statements that place lines and shapes in a two-dimensional or three-dimensional space. That contrasts with bitmapped or rasterized graphics of a grid of colored pixels. Photographs are represented with bitmaps, while scalable diagrams are best handled with vectors.
The most famous early use of vector graphics in popular culture was the original Asteroids arcade game released by Atari in 1979, made possible by directly manipulating the electron beam in a cathode ray tube to draw shapes. In a typical television, the beam instead would scan across and down the screen repeatedly in a set pattern to create a raster, rather than a vector, image.
Asteroids used vector graphics
In my previous post, I explored editing bitmapped photographs on my Mac, and I decided to wait and see if the default free Photos app will suffice. If not, I’m prepared to spend $70 on Adobe Photoshop Elements 2024. But what about vector graphics?
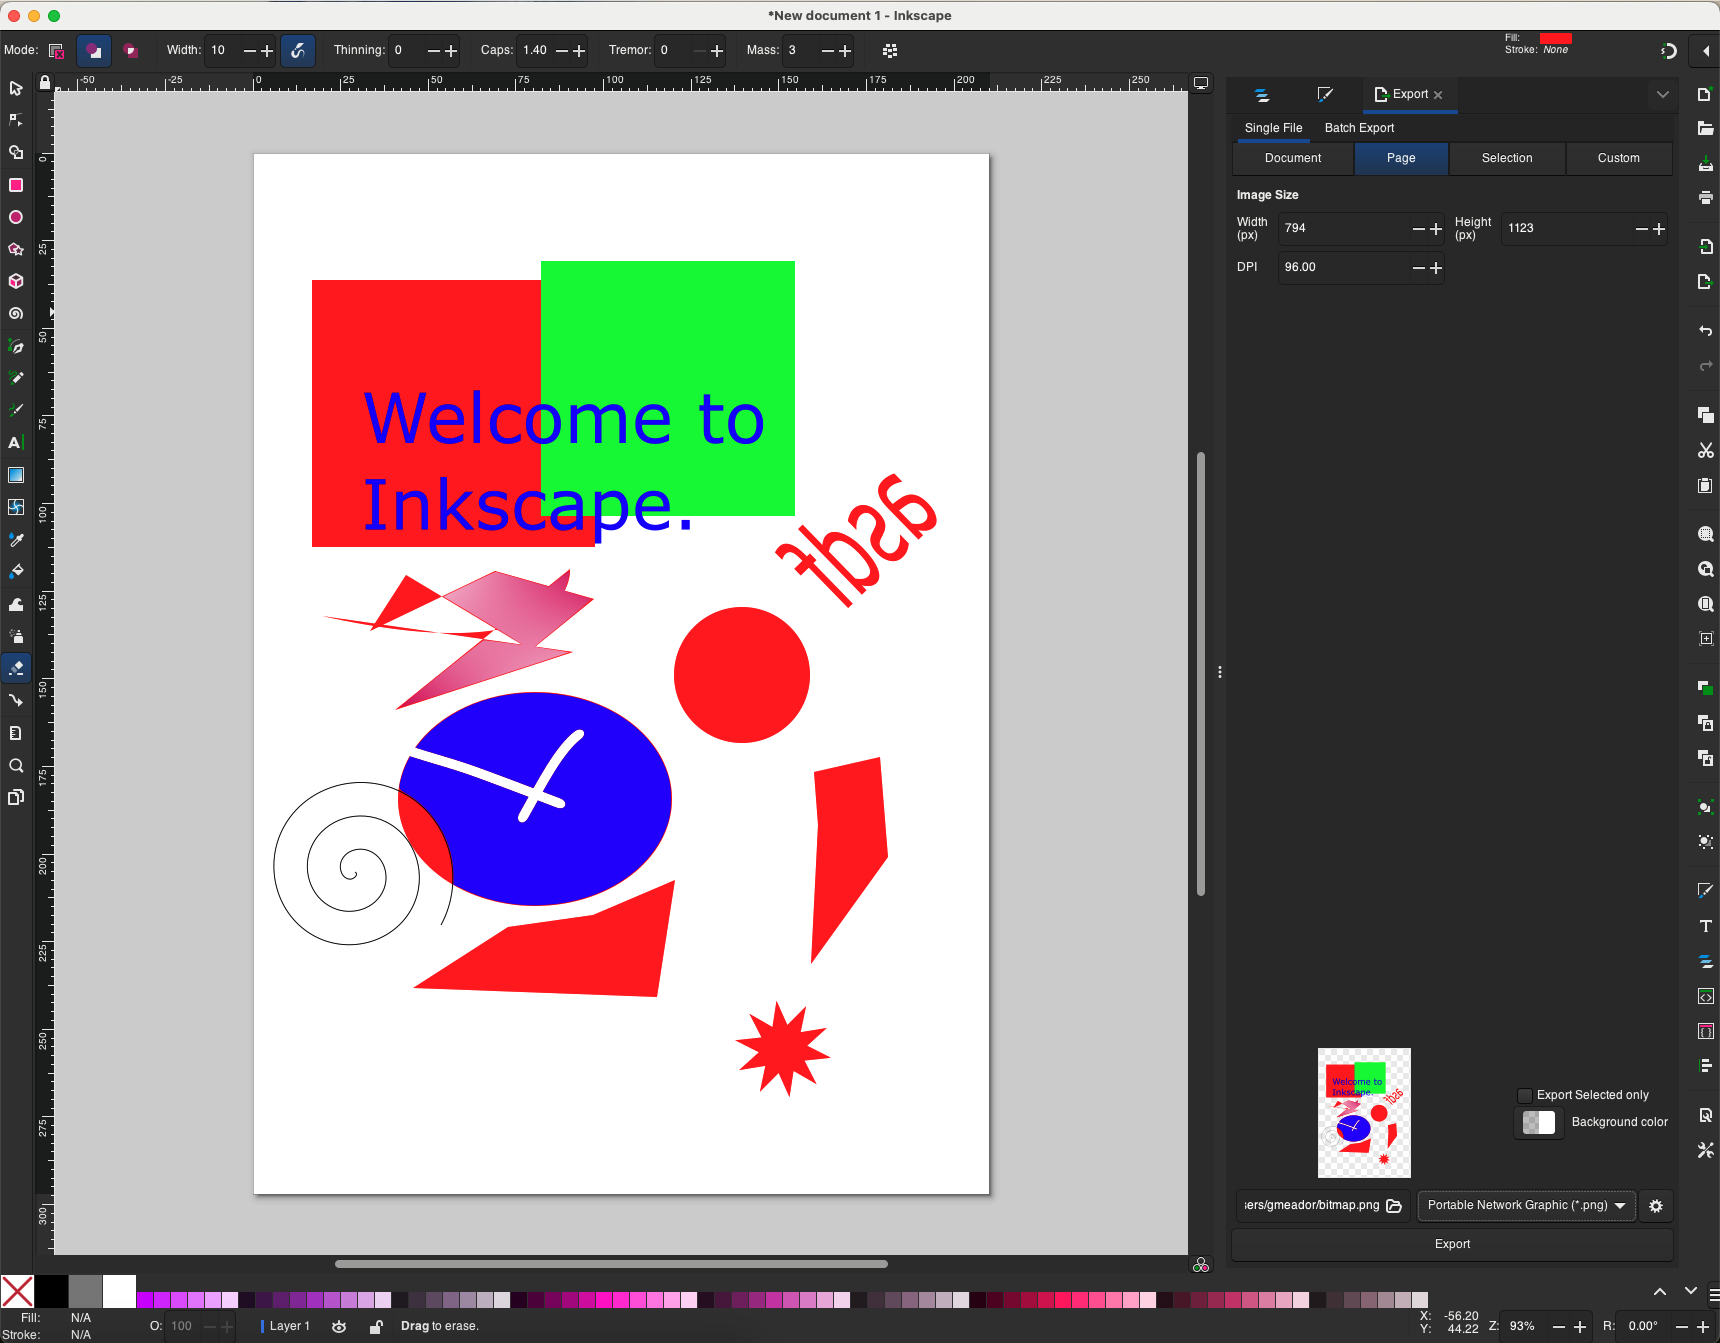
Thankfully, the free online Google Draw, which is part of Google Docs, has vector tools which are sufficient for most of my needs.
Should I want something more sophisticated, my go-to in Windows has long been Corel Presentations, which descended from 1990’s DrawPerfect. Professionals might use Adobe Illustrator, but that is too complex for my needs, and I have no interest in paying for a monthly or annual subscription for Adobe Creative Cloud after I retire.
Inkscape is a free open source vector editor that runs on Windows, Mac, and Linux. I was a bit skeptical of it, given that its free open source counterpart in advanced bitmap editing is Gimp, and I wasn’t impressed with Gimp’s interface.
Fidding around with Inkscape
I found Inkscape a mix of familiar and strange. I am used to right-clicking an object and selecting a menu option for a rotation, but in Inkscape you click an object once while in cursor mode to get resizing handles and again to get rotation and skew handles. Once you know the trick, it’s a fine approach.
I used Windows at home for almost 40 years, but I’m now switching to an Apple Mac Mini. An earlier post explains why. This post is about my search for how to touch up photos on the Mac.
I have about 130,000 digital photos thus far, and that will not only grow as I snap more of them, but also as I slowly digitize my parents’ photo albums and eventually some of my own analog prints. I like to share photos on Facebook and include some in my blog posts, and I’ve learned how to do some basic touch-ups.
Back in 2010 I attended a one-day digital photography workshop with Jerry Poppenhouse, who traveled the world doing photography for Phillips Petroleum for 27 years and then taught at OSU Okmulgee. In addition to giving us pointers on composition, he showed us novices how to use the burn and dodge brushes in bitmap editors along with adjusting highlights and shadows and the like.
My Windows ways
The three programs I used to edit graphics in Windows were quite venerable and the versions of them which I was using dated back six years or more.
For 20 years I have relied on the Thumbsplus Pro program for Windows to view, organize, and edit most of my graphics. It is easy to use for rotating, cropping, resizing, converting, and making basic adjustments to contrast, saturation, and gamma. It also has a few useful filters for sharpening and the like.
ThumbsPlus has been my go-to graphics viewer, organizer, and editor in Windows for over 20 years
But if I needed to burn or dodge a photo, adjust shadows or highlights or lights levels, or use a healing brush, those weren’t available in ThumbsPlus. I had tried Adobe Photoshop, but it was overwhelming for my basic needs, and its later conversion to monthly or annual subscriptions was a turnoff.
So back in 2009 I bought Adobe Photoshop Elements 8, then 10, and most recently Adobe Photoshop Elements 2018 (which was version 16). I used it mostly for adjusting highlights, shadows, and levels, correcting camera distortion, touch-ups with the healing brush, noise and dirt reduction, and the occasional burn or dodge.
I used Adobe Photoshop Elements 2018 for photo touchups beyond the abilities of Thumbsplus
When I wanted to do precise editing of bitmapped graphics or wanted to create vector graphics, I used Corel Presentations X7 software from 2014, which was the descendent of the 1990 MS-DOS application DrawPerfect by WordPerfect.
I used Corel Presentations X7 for fine-detail bitmap editing and for creating vector graphics
Bring out the Gimp
I looked for some recommendations online for powerful but inexpensive photo editing on a Mac. I knew Apple offered Aperture from 2005 to 2015, but the tight integration of Adobe Photoshop and Lightroom (Classic) prevailed. I don’t need the full-blown capabilities of Photoshop or Illustrator, and I have no interest in an Adobe subscription once I retire and no longer have access via a school account.
So I decided to first check out a free open-source graphics editor: Gimp. It has been available for many years and runs on Macs, Windows, and Linux. Its origins are given away by its full name: GNU Image Manipulation Program, named after the GNU version of Linux. (And GNU is itself a recursive acronym for GNU’s Not Unix. Soooo nerdy.)
Speaking of nerdy, take a look at the Gimp interface:
Gimp was a plethora of icons scattered across a dozen different areas on the screen
Oodles of tiny little icons, and a dozen different areas on the screen. That looks even worse than Adobe Photoshop:
Photoshop suffers from a similar outbreak of icons [image source]
Thankfully, you can hover over an icon or an area of the screen and get a brief explanation of what it is about. A bit of noodling around showed that Gimp was no wimp: it has many features this hobbyist associates with Adobe Photoshop, such as layers.
I had Gimp open in a window on the right half of the screen. After hovering over the different areas to see what they did, I thought, “Something is missing here.”
Being a four-decade Windows user, I had to remind myself to look at the top left of the screen, with the Gimp window selected, to see the application’s menu bar. There were the additional controls for…oh, good grief…if I click in my Chrome window to type this blog post, the Mac’s menu bar changes from Gimp to Chrome, so I can’t see the Gimp menu options to type them. In Windows, that wouldn’t be an issue, since its application menus are within each window. I guess I’ll just provide a screenshot of the Gimp menu bar:
Fonts
In messing with Gimp, I used the text tool and that provided my first glimpse into the default fonts of a Mac Mini…or perhaps just Gimp? The Google search engine’s Search Generative Experience, its experimental AI overview in search, stated that the Mac has separate folders for system fonts and for application fonts. In Windows, I just worked with one folder of fonts.
FYI, I only see the Search Generative Experience when I’m logged into a personal Google account at home. At work I use Google Workspace for Education, and Search Generative Experience is not enabled for it yet.
Many of the fonts were familiar, but many were not. I was surprised to see Arial in the list; I kind of expected that Helvetica imitator to be omitted. That prompted me to find out that I could use the Mac’s Font Book app to add fonts, and I diverted to find out my Mac had 470 fonts installed. Marcellus SC, which I picked out long ago for the school district logos, wasn’t included, so I added that. The Bruins logo also uses Blaze Italic, so I popped that in as well.
I’d rather draw than paint
The aftermath of my initial experiments with Gimp; it has many bitmap tools I’m used to, but its ability to draw basic shapes is gimpy
After playing around with a few tools in Gimp, I wondered how to draw simple shapes, since while I do some retouching of bitmapped images, I also often have cause to draw lines, circles, boxes, and the like. Gimp has ways to draw lines, rectangles, and circles, but they are somewhat counterintuitive kludges for a program that is clearly oriented towards bitmap editing.
I tried the healing brush in Gimp, and I wasn’t impressed. With some fine tuning, it could work for me, but I suspect it would exhaust my patience. So I gave up on Gimp, unwilling to navigate its interface on a regular basis for my relatively simple needs.
What to try next?
Those who live in mud houses…
I had already paid $80 back in 2017 for Adobe Photoshop Elements 2018. Could I use that license to get the Mac version for free?
I went to https://account.adobe.com/products and looked at my registered products. I once had a personal Creative Cloud subscription, but this was showing me standalones I purchased and registered over the years:
Acrobat 6 for Windows in 2005
Acrobat Professional 7 for Windows in 2005
Acrobat Professional 8 for Windows in 2008
Photoshop Elements 10 for multiple platforms in 2012
Dreamweaver 12 for Windows in 2012
Photoshop Elements 16 for Windows in 2017
Hmmm…no mention of my purchase of Photoshop Elements 8 back in 2009; I guess I never registered that purchase with Adobe. Anyway, I could download the Windows version of Photoshop Elements 16, but not the Mac version.
I’ve spent $1,463 on the Mac Mini since December 2020. To put a different lens on costs, since I made the decision to switch from my Windows desktop to the Mac Mini as my primary machine, I’ve spent $232 on these items: a new keyboard and wrist rest, an SD card dongle, a book, and an external SSD; a future blog post will be about the SSD. Was I willing to pay $70 for Adobe Photoshop Elements 2024 for the Mac? Sure, given how often I edit photos, but first I wanted to see if a free bundled tool might suffice.
By default by design
By default by design Time after time Maybe you’ve earned it Maybe you’ve spurned it But you’ve got it Yes, you’ve got it
-ABC, from Beauty Stab
I recalled that renaissance man and volunteer extraordinaire Michael Wray had sent me a tip that he organizes his photos with the Mac Photos app with different libraries for different events and clients. His focus was on the organization issue, but could the editing capabilities in Photos satisfy my hobbyist needs?
I’m familiar with the Photos app in iOS, having used its various functions for years, and while it can alter shadows and highlights and the like, it lacks a healing brush. To get that capability on iOS, I once used Adobe Photoshop Express, but I now use Snapseed.
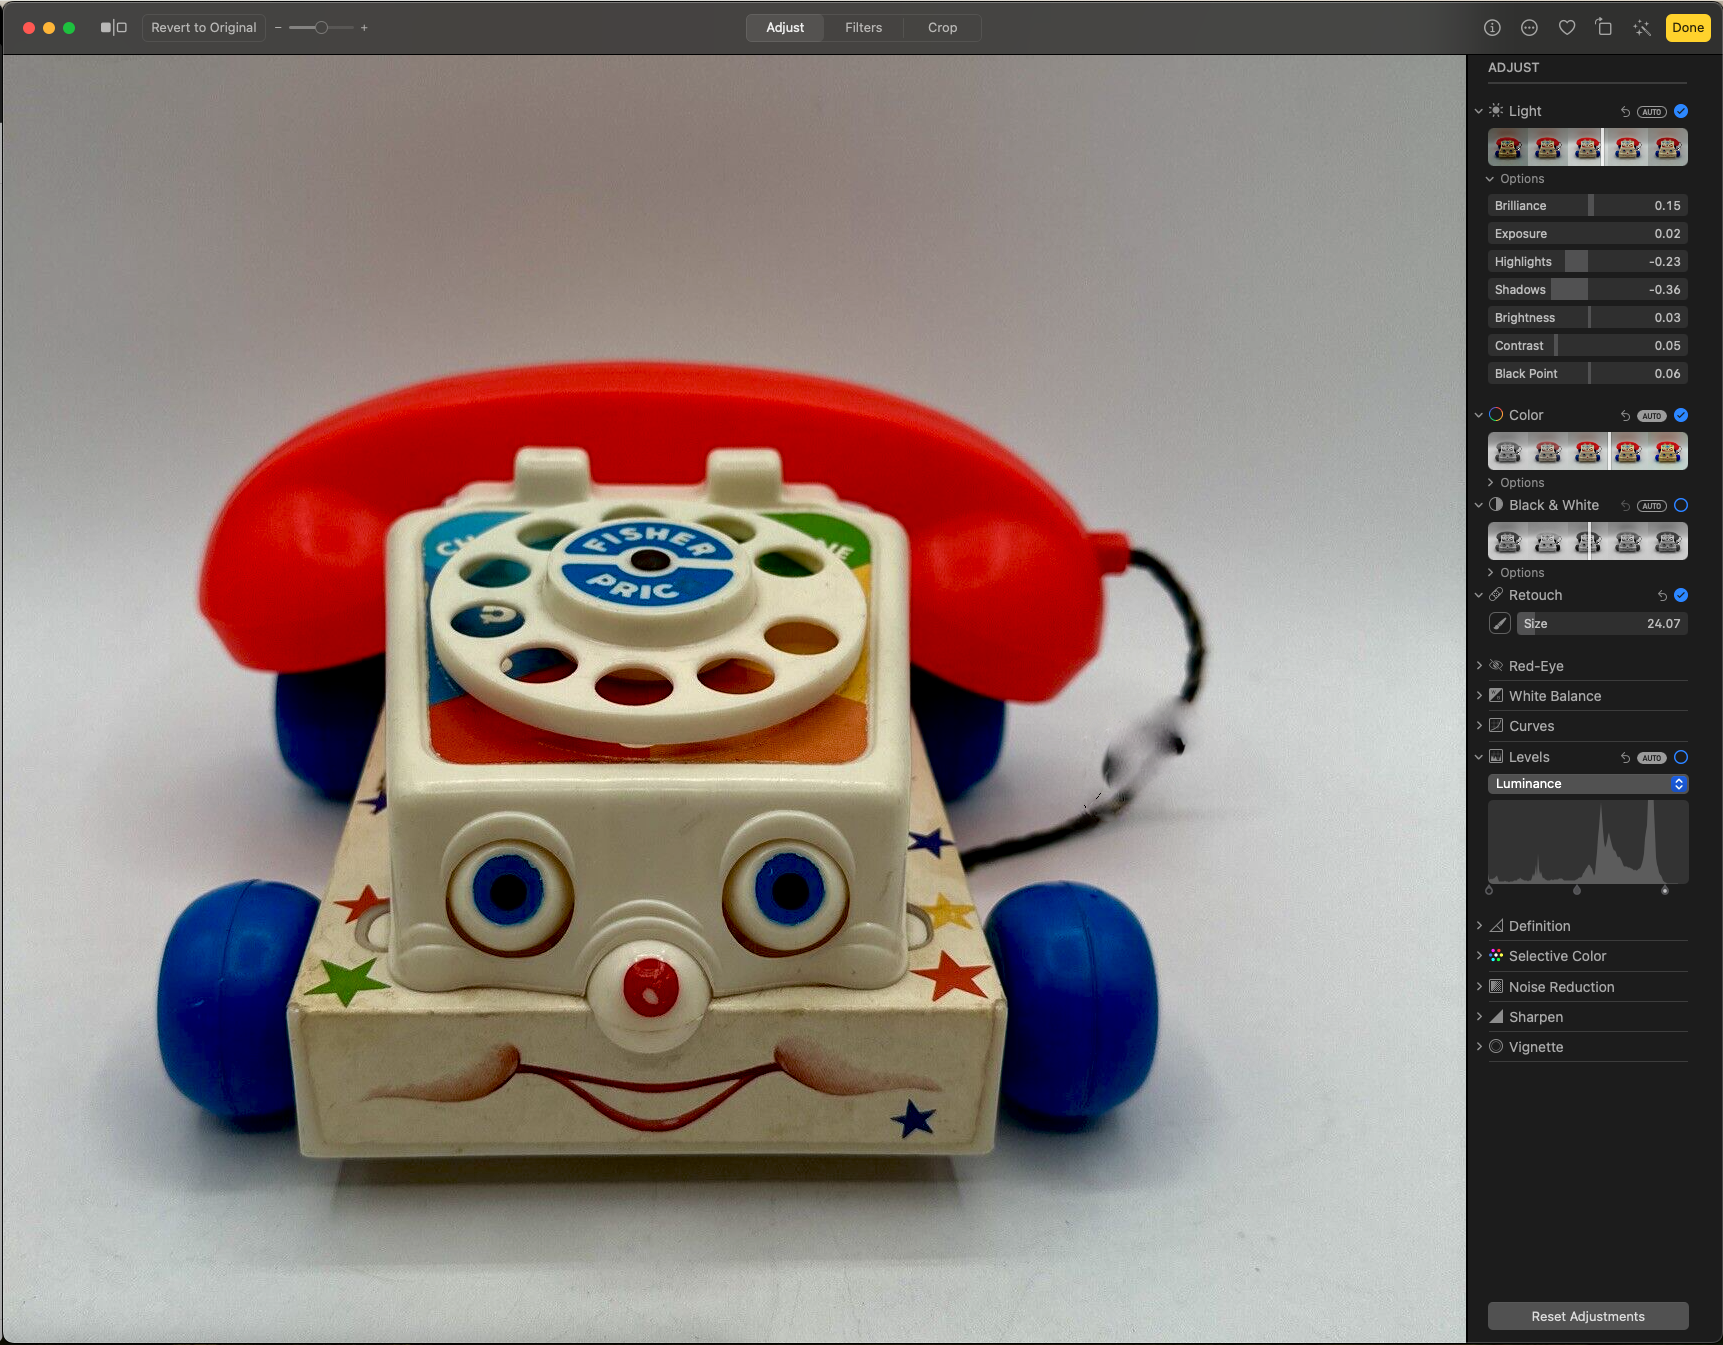
Puttering around with Retouch in the Photos app on the Mac; removing the E in Price worked fine, but taking a chunk out of the handset cord would require finer work than a few clicks of the Retouch brush
I also loaded a 1990s scan of a black-and-white film negative to see if the Retouch tool could deal with large specks and the like. Its handling of that was not awful, but it was noticeably inferior to the results I was used to getting in Adobe Photoshop Elements 16 for Windows.
I rechecked some online recommendations at Macworld and PCMag (I know, I know), and I decided to download the free trial version of Adobe Photoshop Elements 2024 for the Mac.
In my element
There was a warning that Adobe Photoshop Elements 2024 for the Mac only supported macOS 12 and 13, but the internet gave some indication it would work on Sonoma, which is version 14. I was a bit worried to see that there were known issues between Elements 2023 and Sonoma; I presume Elements sales for the Mac might be low enough that Adobe doesn’t put much programming resources into updates.
Elements 2024 on the Mac worked pretty much like Photoshop Elements 2018 on Windows after I switched the Mac version to dark mode; the default mode was too bright for my taste. I felt very comfortable in using it, and I appreciated the greater separation and clarity of its sidebar tools compared to the mess in Photoshop and Gimp.
I then edited the same images in Photos and Photoshop Elements 2024 side-by-side. I verified that Retouch in Photos was inferior to the Spot Healing Brush in Elements in retouching old negatives, and Retouch sometimes “hung” for awhile, leaving a dot on the screen where the brush had been applied. I’m guessing it might be using the cloud and experiencing server delays.
However, I didn’t see much difference between Retouch in Photos and the Healing Brush in Elements when editing the color photo of the Fisher Price Chatter Phone.
I’m holding off on purchasing Elements for now. My free trial lasts a month, and I’ve yet to work through my organizational scheme for photos on the Mac. Since it is likely that I’ll follow Mr. Wray’s lead and use Photos, I’d love to just use it for adjustments and avoid depending on Elements. But if Photos doesn’t meet my expectations, I can always plunk down $70 for Elements.
4/27/2024 UPDATE: When I tried to restart my Mac a few days later, it couldn’t restart, saying Adobe Photoshop Elements 2024 wouldn’t shut down. I tried various pointers on shutting down the program, but in the end I had to hold down the power button on the Mac for 10 seconds to restart. So Elements 2024 is no longer an option. I’ll either use the default Photos app or, in a pinch, I’ll Bring Out the Gimp!
Before I tackle organizing my photos, however, I think my next step will be to look at vector drawing tools on the Mac. That might be the topic for my next Mac post.
Three years ago, I spent $27 on a wireless iClever keyboard and mouse combination for my new Mac Mini M1. The mouse was great, and the keyboard was cute and lightweight with scissor keys. I didn’t do anything with the Mac for over three years, but now I’m working to make it my primary machine after relying on Windows computers for almost 40 years.
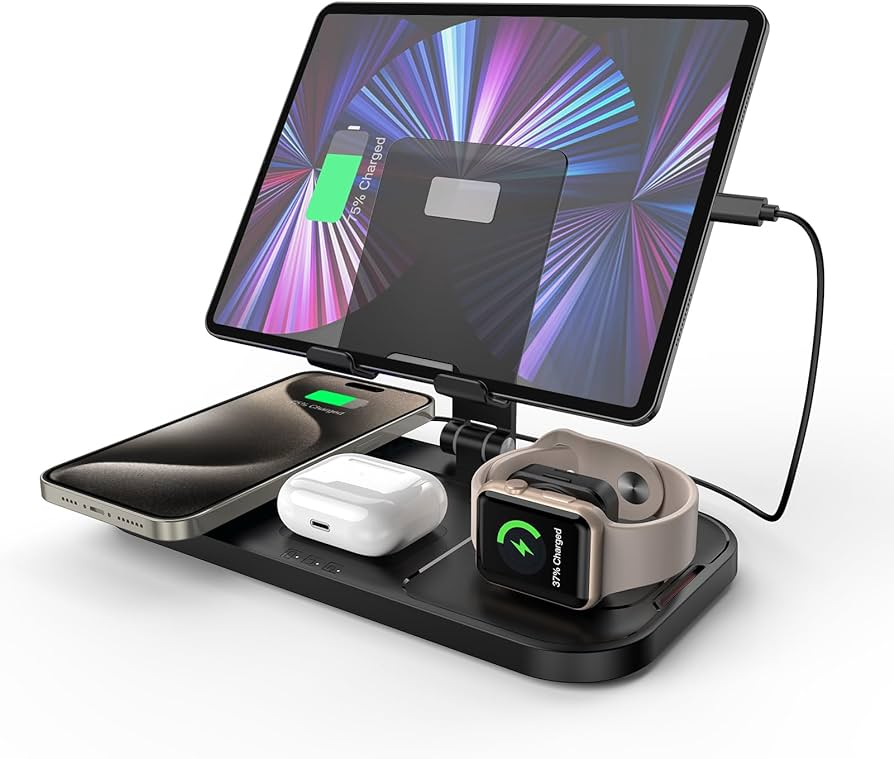
I have always been fine with wireless mice if they use a dry cell, since that can be quickly replaced and you’re back in business. A wireless keyboard that uses a dry cell would also be fine, but I’ve always been leery of wireless keyboards you have to plug in to recharge. I suffer from recharging fatigue:
Things I have to recharge multiple times per week
iPhone (daily)
iPad (daily)
Apple Watch (daily)
SHOKZ OpenRun bone conduction headphones (every few days)
Things I have to recharge on occasion
EGO batteries for the lawn mower (or string trimmer or chain saw)
That is more than enough for my taste. Another drawback to the iClever keyboard was that it tries to live in both the Mac and PC worlds, no doubt to boost sales. That means it has some key labels that don’t make sense on a Mac, and if you turn the thing off, you have to remember to hit fn+Q to put it back into Mac mode. I decided to try something different.
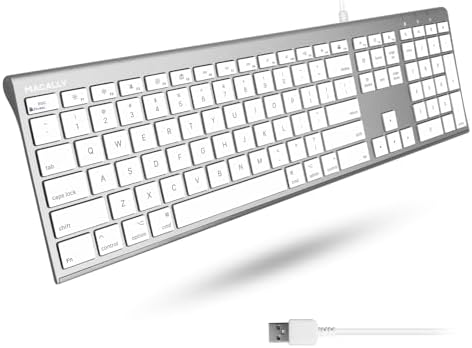
I first bought a $120 wireless Logitech keyboard. It was a nice typer, but I outlined my troubles with it in a previous post. I returned it, got a refund, and promptly ordered a Macally Ultra Slim USB ACEKEYA wired keyboard for $43. I received it today.
The Macally Ultra Slim USB ACEKEYA
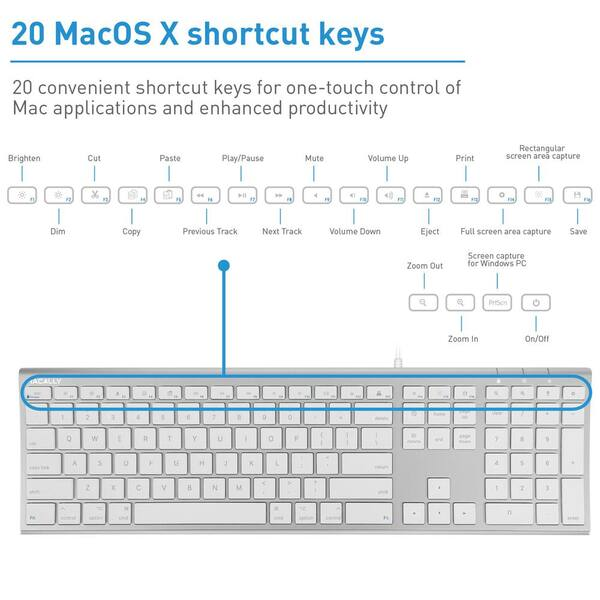
The new keyboard has the Mac key layout and 20 shortcut keys, all of the quiet scissor switch type. I’m fine with scissor switches or old-style mechanical keyboards, but Wendy’s hearing is far more acute than mine, so I figured the quieter scissor switch keys might be welcome.
One immediate concern with the new keyboard was getting it plugged in. My Mac Mini only has two USB-A ports to go with its two USB-C ports, and the USB-A ports were occupied by the mouse radio dongle and the multifunction printer/scanner. So I decided to replace the mouse dongle with a USB-A to USB-B cable leading to my monitor. That enabled two USB-A ports on the back of the monitor and two more on the side. I put the mouse dongle in one of the backside ports and plugged the keyboard in back there as well.
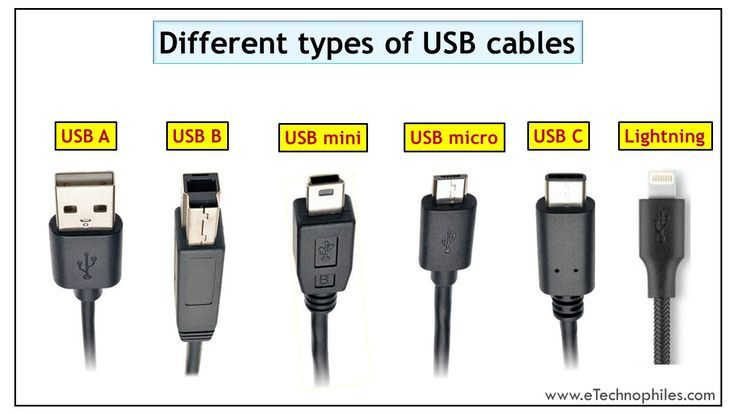
The ports were almost impossible to see, and since they were USB-A, I inevitably had the dongle and the keyboard cable facing the wrong way to be inserted. I eventually succeeded, although I muttered a few curses for the engineers of USB-A ports and cables. All of the modern serial cables shown above can only be plugged in one way, except for USB-C and Lightning.
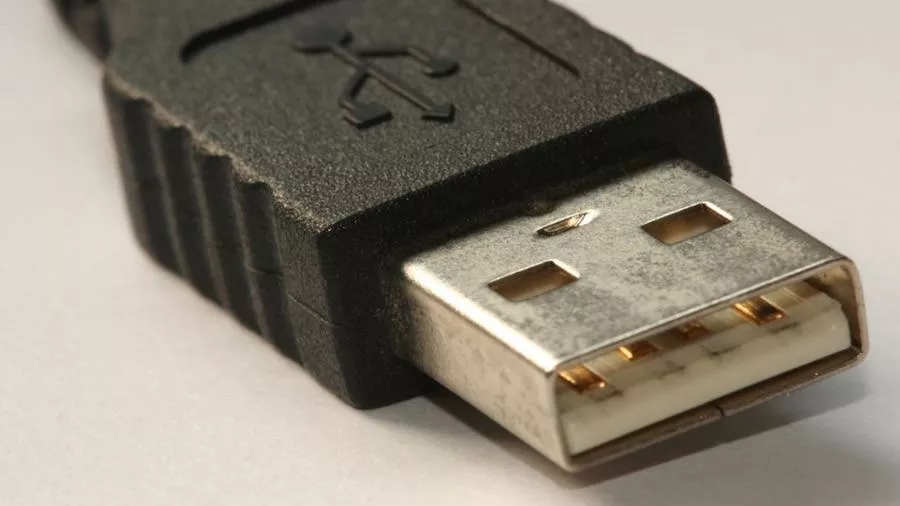
USB-A cable are supposed to be plugged in with the USB trident logo facing up
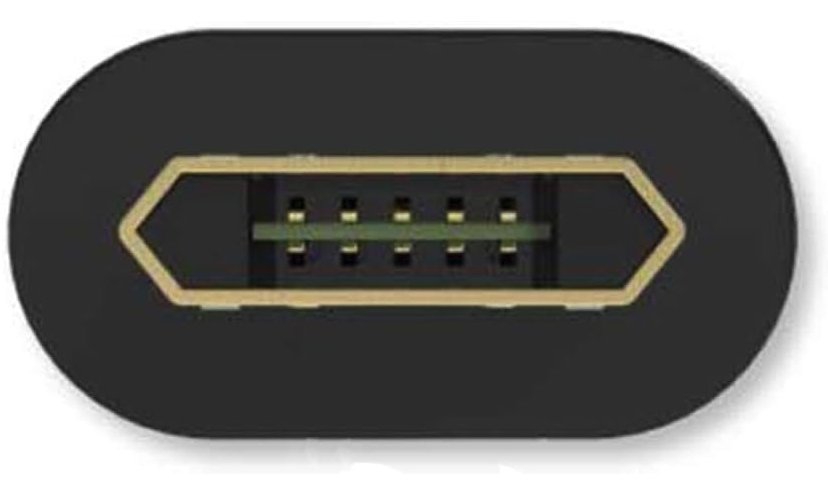
Purchasing a double-sided reversible Micro USB cable saved my sanity when plugging in my Kindle to recharge
I know that in general you can plug a cable in if the USB trident symbol is facing up, but in practice that often fails to help because ports are facing sideways or you can’t get a good view of them. Futzing with the Micro USB charging cable for my Kindle got so annoying that I purchased a cable with a double-sided reversible Micro USB end on it. That makes me smile every time I can insert it on the first try, which is always. Now if I could just change the charging LED. I am among the 5% of males with deuteranomaly, or green-weak, color vision. The Kindle’s LED is yellow when charging and green when fully charged, and I struggle to differentiate the hues it outputs.
One benefit from the recabling was that I have gained two available USB-A ports on the side of the monitor that should be able to handle 5 Gb/s data flows.
Can one be too slim?
If you’ve ever seen a typical supermodel, you know that one can be too slim. Once I could finally type on the new keyboard, I realized that Ultra Slim meant the front of the keyboard was so low to the desk that I couldn’t use even a thin wrist rest. With my wrists resting on the desk, the keyboard felt too low. So I went searching through our Drawers of Requirement (aka junk drawers) and found some adhesive foam strips I could affix to the underside to lift it up.
That helped, allowing me to use the thin wrist rest I had purchased separately for the somewhat svelte, but not slim or emaciated, Logitech keyboard I had returned. The typing action is comfortable and quiet, like the iClever keyboard, although I liked the steeper pitch of the iClever over the low angle of the Macally, so I added some more foam to the back side of the keyboard.
On my keyboard, the PrtScn key is actually a shortcut for Force Quit.
As for the shortcut keys, I don’t expect to use the Cut, Copy, or Paste keys since I’m used to CMD+X/C/V for those. I was hoping I might reprogram the function key shortcuts to do things like open the Calculator app, but the manual was silent on that.
I think this keyboard will be fine, so I’ll close by admitting that the title of this post is an intentional sly reference to the NeXT computer that Apple co-founder Steve Jobs developed after he was ousted from Apple by John Sculley in 1985. The joke is that Jobs had great taste in many things, but his mice were often terrible and I had no use for his minimalism on keyboards.
Steve Jurvetson has shared the story of how when Steve Jobs was in exile at NeXT, Jurvetson had Jobs over at his home to talk with a club of tech nerds. Jurvetson had already had Apple co-founder Steve Wozniak sign an Apple Extended Keyboard:
…I asked my childhood hero if he would sign my Macintosh keyboard.
He looked a little taken aback to see Woz’s signature already there, and then he exclaimed:
“This keyboard represents everything about Apple that I hate. It’s a battleship! Why does it have all these keys? Do you use this F1 key?”
No, I replied. And so, he pried it right off with his car keys. Same for F2 and down the line. He put the keys in his pocket, and then signed his name to the Apple Extended Keyboard that he despised. He then exclaimed, “I’m changing the world, one keyboard at a time.”
The poisoned relationship between Steve Wozniak and Steve Jobs led Wozniak to comment, “You may well have the only Apple device with both our signatures on it.”
That’s a great Steve Jobs story, among many, but I see that Jurvetson’s keyboard had all of its function keys in the picture. So did he scavenge them from another keyboard? Anyway, that keyboard was later auctioned for $74,535.
It looks like a decent keyboard. I would have paid $43 for it.
A primary reason I am comfortable shifting to a Mac at home after 40 years of using Windows is that so much of my computing is now done online. The primary exceptions are photo/graphics and video editing. Let’s take a look at how my use of productivity applications has evolved.
Word Processing
My first experiences with word processors were in the 1980s with Scripsit and Telewriter-64 on my primitive TRS-80 Color Computer. Later I used Digital Research GEM on the more advanced Tandy Model 2000, one of the very few personal computers that used the 80186 microprocessor.
The first professional word processor I used was a dedicated Wang terminal when I worked at the Oklahoma State Department of Tourism in the summer of 1985. It was next to a noisy 10-megabyte hard drive that was about the size of a washing machine.
The first professional word processor I used was a dedicated Wang unit
A year later, I started working for Scholars Programs at the University of Oklahoma, where I learned WordPerfect 4.2 for DOS on a personal computer, which was a relief to use compared to the venerable Wang. I had Multimate for my Tandy Model 2000 at home, which was reminiscent of the Wang in its features and interface. I also experimented with WordStar, Microsoft Write, and Lotus Symphony. But learning WordPerfect at work led me to get it for my Tandy 2000, and I would end up using WordPerfect continuously for about 30 years.
After coming to Bartlesville in 1989, I eventually had to learn Word to collaborate with some coworkers, but I never liked Microsoft’s word processor, preferring the tighter and far less confusing control that WordPerfect offered. It used embedded codes for functions that you could make visible for precise control, while Word, particularly in the old days, was far more opaque. But Word gradually overtook and then marginalized the superior product. Thus, back when I sold a physics curriculum, I made sure to include editable versions of the student handouts in the Word format along with their true master versions in WordPerfect. I steadily updated WordPerfect until version X7 in 2014, which was the 13th update of the software I used.
My career shifted in 2017 as I went into administration. I was recruited to lead the district’s technology and communications efforts, and a big focus was on deploying Chromebooks for students and teachers. So I made a point of using Google Docs, Sheets, and Slides instead of WordPerfect, Quattro Pro, or Presentations in the Corel WordPerfect Office suite or Word, Excel, and PowerPoint in the far more popular Microsoft Office suite.
For the past seven years, the only time I’ve used Microsoft Word instead of Google Docs has been when editing a document someone else created or for complex tasks like a mail merge, which is still beyond the capability of the free online version of Word and requires the desktop-based application. So while I have oodles of legacy documents in old formats, Google Docs is all I need at home for word processing. Since Apple Pages is free for Apple users, I could also play around with it, but for convenience I plan to just use Google Docs.
I no longer have much use for Desktop Publishing applications, but back in the day I used CorelDRAW, The Print Shop, and Microsoft Publisher. I also did a few small jobs with Adobe InDesign and QuarkXPress. The only desktop publishing service I’ve used recently was the online Canva, when I was testing it out to decide if we would set up Canva cloud licenses for the school district.
Spreadsheet
Lotus Symphony for the Tandy 2000 was NOT cheap!
My first spreadsheet was Lotus 1-2-3, which we used occasionally when I worked at the University of Oklahoma in the late 1980s. The “1-2-3” in the name referred to how Lotus was originally billed as an integrated product with spreadsheet, database, and graphing functions. I bought Lotus Symphony for my Tandy Model 2000 at home, which added a word processor and a communications program, but the spreadsheet was the main attraction. Symphony cost the equivalent of $2,000 in 2024 dollars…business software was expensive back then.
I gradually started using Microsoft Excel in the 1990s, and I gained the most experience with it once I started doing the numbers for the teachers’ bargaining team. When I became the Chief Negotiator for the team, I also served on the superintendent’s budget committee. I built complicated salary analyses, picking up a few Excel tips from the district’s directors of finance.
I also learned how to load the Analysis ToolPak in Excel to perform various statistical analyses so that I could show students how to test their science fair project data for statistical significance. I learned statistics beyond the basic concepts of mean, median, mode, and standard deviation in graduate school, where we did the various types of t-tests, Chi-Square, z-tests, ANOVA, and non parametric ones like the Mann-Whitney U Test and the Wilcoxon signed rank test.
Excel has a great add-in for statistical analysis
However, most of my spreadsheet work is now in Google Sheets. I used it extensively for tracking data and creating charts throughout the COVID pandemic in my role of chairing the school district’s Pandemic Response Committee. I seldom find I need Excel over Sheets, although since it is installed on my Windows systems at work and at home, spreadsheets automatically open in Excel, so when I use Sheets it is mostly files I created myself; I rely on dozens of them in my job.
Presentations
WordPerfect released the MS-DOS drawing program DrawPerfect in 1990. It became WordPerfect Presentations and added slide functionality. I used Presentations for some detailed graphics work from 1993 to 2020, but I never used its slides capabilities. Nowadays I do most such work in Google Draw. Although I use Adobe Illustrator for some graphics, such as district logos, I know very little of its functionality, and most of my graphics work is vector-based drawings, not bitmapped paint stuff.
A slide from one of the PowerPoints I created for my physics classes
For slides, I of course used Microsoft PowerPoint, although it could really frustrate me when it came to sound. PowerPoint was very bad about allowing one to incorporate a video or music, but then the sound not working when you exported a file to take it on the road. It was so bad that I sometimes would convert a presentation into a video file that I would manually pause to ensure the sound worked.
Since 2017, I have always used Google Slides instead of PowerPoint, although I have also created online interactive presentations with Prezi and Pear Deck.
Databases
dbase III
The first database I used was dBase III. I was working in Scholars Programs at OU where my boss had paid a student to write a scholarship database for them. That student had graduated, and I got the thankless job of trying to update its programming, having never seen a database before. Thankfully I knew a tiny bit about fields and records from learning the BASIC computer programming language at home and in high school.
We survived the experience, but I was glad when my boss got the funding to pay the university’s COBOL programmers to create a new database on the university mainframe. That was far more powerful, but my boss was angry about the revision costs. He would complain, “If I need to have just one @#$ing letter changed on a screen, I get a bill for hundreds of dollars!”
So when he needed a health fee waiver database which scholarship recipients could access, he paid me to write it in BASIC one summer. I subcontracted my friend Jeff Silver, who was doing database work for a living at company that made trucking logistics software, to help me with the roughest parts. The health fee waiver database was set up and running on a personal computer in the university library for a few years. It was cheaper to pay me to write a database from scratch and buy a computer and monitor to run it on than to pay to build the database on the university mainframe, and that was too long ago to simply have the database on the internet for students to access.
Almost a decade later, the Y2K crisis was in the news because lots of old software used two digits for the year, and the year 2000 meant old programs like that would malfunction. I remember thinking that my health fee waiver database was definitely not ready for the new century. Thankfully, it was of course long gone by then.
I generally found I could handle most of my data storage and manipulation needs using a spreadsheet, although in the 1990s when Bartlesville High School hosted a state Student Council convention, we had to track housing for hundreds of students across dozens of households across town. My former student council co-sponsor roped me into helping by creating a housing database. I either used FileMaker Pro or FoxPro for that, but I can’t readily recall using a desktop database application after that.
Nowadays at work I access multiple online databases on a regular basis, but I have no other need for them.
Getting the Picture
So you can see that I now do most of my work in the cloud. Hence I hope to avoid installing Microsoft Office on my Mac, and if all goes well I plan to not renew my $100 Microsoft 365 Family annual subscription at the end of June.
However, I have 340 GB of photographs on OneDrive, which is the online backup of over 130,000 of my photos that I also have on my Windows PC. There will be more on the photos situation in a coming post.
This is from day three of my switching from 40 years of using Windows at home to a Mac Mini. In my previous post, I shared my first day’s progress, in which I updated the Mac Mini’s macOS from Big Sur 11.2.2 to Sonoma 14.4.1. I then figured out the keyboard, learned how to snap windows to the sides of the screen, and discovered how to take screenshots.
Let the spending begin
Theoretically, switching to the Mac Mini would save me money by allowing me to avoid buying a new Windows 11 desktop computer once Windows 10 support ends in October 2025. I knew the reality was that I would be spending at least some money on hardware, software, and more to make the transition work for me.
The first spend was a mere $5 for theMagnet app, since the default way to snap windows was too cumbersome for my taste. Now I can just drag a window past the edge or a corner of the screen to snap it into half or one-quarter of the screen, etc.
The second spend was $11 for a dongle so I could read SD and microSD cards on my Mac, since despite my general reliance on my iPhone, I want the capability to directly load any photos onto my Mac that I take with my Canon EOS Rebel T6. I already had a few USB SD card reader dongles, but they were all USB-A. My Mac Mini has a couple of high-speed Thunderbolt 3/USB-C type 4 ports, and I wanted to be able to use those.
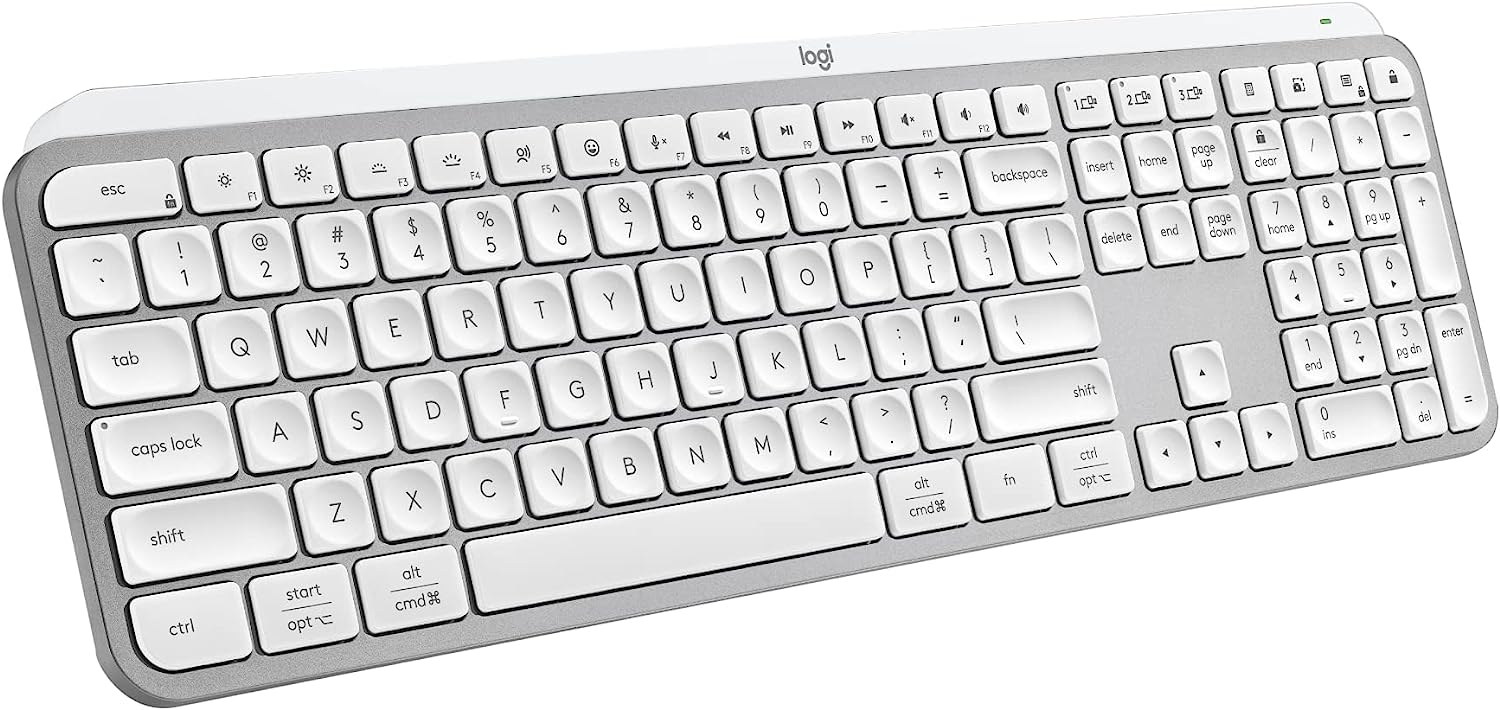
The third spend is the focus of this post: $120 for a Logitech MX Keys S keyboard. I bought an iClever IC-GK03 keyboard and mouse in 2021 for the Mac Mini, and that had only set me back $27. But I found that if I turned off the keyboard, I had to remember to hit fn+Q to put it back in Mac mode, and I didn’t like the half-size up and down arrow keys. I have also been annoyed at having shuffle between the wired keyboard on my Windows computer and the iClever one for the Mac on my cramped desktop.
I read several reviews, and settled on trying a fancy Logitech MX Keys S keyboard that I could connect to the Mac via Bluetooth and to my PC with a dongle.
A Grumpy Old Man and His Logitech MX Keys S Keyboard
Amazon could get me the dark version of the keyboard in a day, while the prettier graphite version would take a week. Impatience got the better of me, and I ordered the dark one.
It came today, and of course it didn’t come with a manual, because technology companies HATE their customers. There were just some cryptic and somewhat misleading illustrations inside the box lid. I knew I should charge the keyboard, but the cable that came with it was USB-C for the keyboard end and USB-A for the other.
Apple is notoriously skimpy with ports, and my Mac Mini only has two USB-A ports. One of mine has the dongle for the iClever mouse/keyboard and the other is connected to my Canon multifunction printer/scanner. That left two USB-C ports, or I could plug the SD card dongle in a USB-C port and try using the USB-A port on that dongle.
I don’t have a lot of USB-C cables, but I remembered that some months ago I bought a cable that was USB-C on both ends to try and be forward-thinking. I found it in a drawer and used it to charge the keyboard. I hoped that the keyboard might use that cable to identify the Mac Mini and configure itself, but it appears the USB-C port on the keyboard is only for charging. <sarcasm>Because who would ever want a wired keyboard?</sarcasm>
So I followed the graphics on the keyboard box to trigger Bluetooth pairing, accessed the Bluetooth controls for the Mac Mini via the Control Panel icon at the top right (which is also where you swipe down on an iPad to see its Control Panel), and I got the keyboard connected.
Since there was little guidance on using my new and rather expensive keyboard, I then downloaded the Logi+ Options software. That at least told me what level of charge the keyboard was at.
But when it came to figuring out how to adjust the backlighting on the keyboard, I found nothing on that in the box nor in the apparent options at the top right in the Logi+ Options software. There was a link about “Smart Actions” which is some kind of macro/scripting utility, but how could I figure out the keys on the new keyboard? Well, it turned out that Logitech was using what Vincent Flanders termed Mystery Meat Navigation.
The Logi+ Options software has Mystery Meat Navigation: you have to click on the image of the keyboard to get help with it
If I hovered my cursor over the keyboard image, it jumped up a bit, indicating that clicking it would do something, but even after you stumble across how that is a link, what that link does is still mystery meat.
Why in the world didn’t the programmers think to put a text link like Keyboard Tour in their crummy program? And don’t get me started on how Logitech couldn’t be bothered to put even the most basic manual in the box with a $120 keyboard. Clicking the image of the keyboard got me a menu that included explanations of the keys. I could use F3 and F4 to adjust the backlight. I did like how there were dedicated keys for the calculator app and a configurable screen capture key; maybe this keyboard would be okay.
I then plugged the dongle that came with the keyboard into my Windows PC and managed to configure the keyboard so that I could press one key to type on my Mac and another to type on the PC.
I should have bought this version with keys you can actually see without turning on the backlight
But it didn’t take long for me to figure out that I hated the backlighting on the keyboard. Turning it off was even worse, for then the symbols on the dark version I bought were far too hard to see.
I almost never return things, but I wasn’t at all happy with my $120 purchase. I decided to box it up and return it. The experience was crummy enough that I probably won’t buy the graphite version, either.
I may just use the refund on the returned Logitech keyboard to buy another dongle with USB-A and USB-C ports. I’m aware that the USB-C ports on the Mac Mini M1 are USB 4/Thunderbolt 3 ports that can reach 40 Gb/s, so I want to ensure that any dongle I plug into one of those includes high-speed ports. The two USB-A ports on my Mac Mini are limited to 5 Gb/s.
The Missing Manual
When I was a kid, I loved reading Owner’s Manuals like this one
The fourth spend was for a manual on macOS Sonoma. I did putz around and discover that if you make the Finder active, then press Help in the menu bar, you’ll get a Tips for your Mac link. But the fumbling to find that help just increased my desire for a manual.
When I was a kid, I always read the owner’s manuals to devices our family acquired, including our automobiles, our first color television, our campers, etc.
Radio Shack included great manuals with the TRS-80 Color Computers I used in junior high and high school
When I got my first computer back in 1982, the mostly well-written and extensive manuals Radio Shack included with its Color Computers got me off to a good start, and then I turned to dedicated periodicals for more insights.
I’m almost entirely self-taught on computers, and I like manuals. I’m known for the technology manuals I’ve produced for several of the services we use in the school district, as I’m often disappointed in what even major companies provide for end users. Manuals fell out of favor in technology, which migrated to online help systems. Sometimes those are A-OK, and of course you can Google something for quick and usually-correct guidance, but there are times I really want a manual. I’ve built up a mastery of Windows over the past 40 years, but I’m still a noob on the Mac, even though I did own a Macbook Air over a decade ago.
That dilemma is why the reporter and musician David Pogue wrote dozens of Missing Manual books, and I’ve always admired his work. When I purchased the Mac Mini in January 2021, I had purchased Pogue’s Mac Unlocked, but that book was written for a machine running macOS Big Sur 11, and Pogue has retired from writing computer books. I didn’t want to be confused by references to version 11 of macOS when I am using version 14.
Despite their titles, I’ve always found Wiley’s … for Dummies series of books, of which there are over 300 these days, to be well-written references; Pogue wrote about eight of them. So I plunked down $18 for the Kindle version of macOS Sonoma for Dummies by Guy Hart-Davis, who has written over 100 computing books…assuming that isn’t a pen name for a syndicate of ghostwriters.
So here’s how deep I am into the Mac Mini at this point:
Item
Date Ordered
Cost
Running Total
2024 Running Total
Mac Mini M1
12/12/2020
$1,156
$1,156
iClever keyboard & mouse
12/12/2020
$27
$1,183
Mac Unlocked book
1/13/2021
$25
$1,208
Magnet app
4/21/2024
$5
$1,213
$5
SD card dongle
4/21/2024
$11
$1,224
$16
Logitech keyboard
4/21/2024
$120
$1,344
$136
macOS Sonoma for Dummies book
4/22/2024
$18
$1,362
$154
Return Logitech keyboard
4/23/2024
-$120
$1,242
$34
The dates show how I bought the Mac Mini at the end of 2020 and started using it in early January 2021, but then stopped using it in February 2021 as the COVID pandemic was still too overwhelming. So in my mind, the final column is the most relevant in seeing how much I’m spending in lieu of simply buying a new Windows 11 desktop computer. We’ll see if that increases with another dongle soon!
In future Mac updates, I’ll get into software, interacting with other components of my Apple ecosystem, and anything of particular interest I learn from reading the Sonoma manual.